48
U S E R 1
H D 1 0 3 5 i _ R
H D 1 0 3 5 i _ Y
( U S E R 1 )
S O U R C E
S O U R C E
( S X G A 1 )
A U T O
N T S C ( 4 8 0 i )
S D T V ( 4 8 0 p )
H D T V ( 7 2 0 p )
H D T V ( 1 0 8 0 i )
P A L / S E C A M
P C - 9 8
V G A 1
V G A 3
M A C 1 3
V G A V E S A
S V G A 1
S V G A 2
M A C 1 6
X G A 1
X G A 2
M A C 1 9
M A C 2 1
S X G A 1
S X G A 2
S X G A 3
U S E R
S O U R C E
( S X G A 1 )
A U T O
N T S C ( 4 8 0 i )
S D T V ( 4 8 0 p )
H D T V ( 7 2 0 p )
H D T V ( 1 0 8 0 i )
P A L / S E C A M
P C - 9 8
V G A 1
V G A 3
M A C 1 3
V G A V E S A
S V G A 1
S V G A 2
M A C 1 6
X G A 1
X G A 2
M A C 1 9
M A C 2 1
S X G A 1
S X G A 2
S X G A 3
U S E R
OPERATE
VOL.
PAGE
BACK
PRESET
ZOOM
FOCUS
COMPUTER VIDEO
QUICK
ALIGN.
AV
MUTING
W
T
MENU/ENTER
MENU/ENTER
button
Cursor buttons
PAGE BACK button
Operating the Main Menu (Cont.)
Changing (Setting) the Source (Cont.)
5
Press the MENU/ENTER button to set
(fix) it.
■
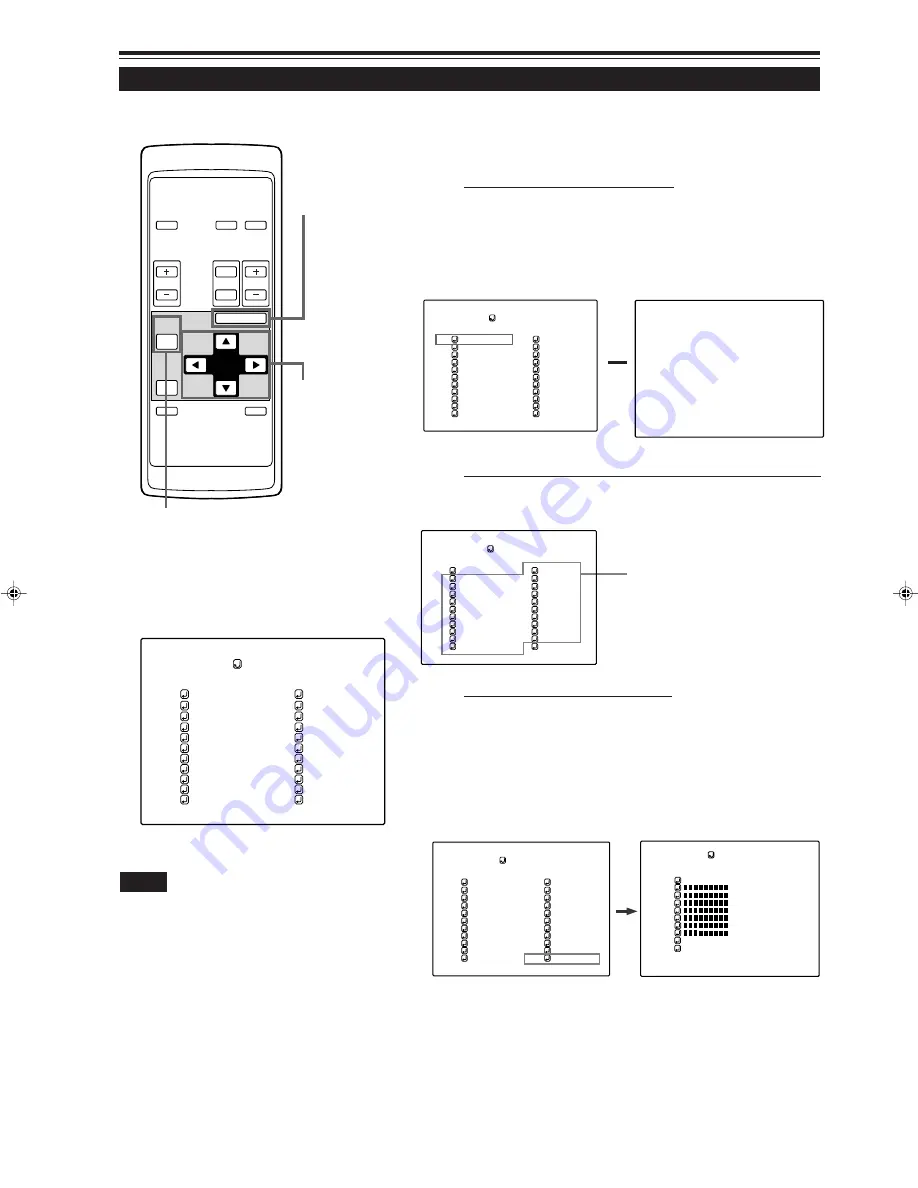
When AUTO is selected:
The main menu is automatically cleared, completing the
setting procedure, and the source display inputted appears.
• Both line display and source display appear on the screen
and disappear in five seconds. However, they do not appear
if the line display is set to OFF.
■
Remote control unit
■
Submenu item
Notes
• The selected item is shown in magenta color. Items shown
in gray color cannot be operated or set in the current mode.
• Items that can be set are different when video signals are
input and when computer signals are input.
• For dedicated source signals (corresponding frequency, etc.)
for computer signals, see page 19.
•
To finish the menu display, press PAGE BACK Button twice
(or three times).
■
When a dedicated source mode is selected :
The selected item is shown in ( ) below the displayed text
of “SOURCE” on the upper part of the screen.
▲
(SOURCE menu)
S O U R C E
( S X G A 1 )
A U T O
N T S C ( 4 8 0 i )
S D T V ( 4 8 0 p )
H D T V ( 7 2 0 p )
H D T V ( 1 0 8 0 i )
P A L / S E C A M
P C - 9 8
V G A 1
V G A 3
M A C 1 3
V G A V E S A
S V G A 1
S V G A 2
M A C 1 6
X G A 1
X G A 2
M A C 1 9
M A C 2 1
S X G A 1
S X G A 2
S X G A 3
U S E R
C H : 1
C O M P 2 S X G A 1
S O U R C E
( S X G A 1 )
A U T O
N T S C ( 4 8 0 i )
S D T V ( 4 8 0 p )
H D T V ( 7 2 0 p )
H D T V ( 1 0 8 0 i )
P A L / S E C A M
P C - 9 8
V G A 1
V G A 3
M A C 1 3
V G A V E S A
S V G A 1
S V G A 2
M A C 1 6
X G A 1
X G A 2
M A C 1 9
M A C 2 1
S X G A 1
S X G A 2
S X G A 3
U S E R
Source
■
When USER is selected :
The “USER SOURCE SETUP” menu is displayed.
• This menu is used when registering and using special video
signals that cannot be adjusted in “AUTO” mode or dedi-
cated source mode, using “USER SOURCE SETUP” (see
page 58).
• When the projector was shipped from the factory,
“HD 1035 i _ R” and “HD1035 i _ Y” were already registered.
1. Press the cursor buttons to select a setting.
2. Press the MENU/ENTER button to set.
•
When a user source is selected, the source setting of the
projector switches to a setting registered in the user source.
G20U p.35-59
99.12.17, 10:34 AM
48


