background image

47

REFERENCE

DVD Specifications

Laser system

Semiconductor laser, wavelength 650 nm

Frequency response

DVD (PCM 48 kHz): 8 Hz to 22 kHz, CD: 8 Hz to 20 kHz

Signal-to-noise ratio

More than 95dB 

Harmonic distortion

Less than 0.008%

Dynamic range

More than 90 dB

Inputs

VIDEO IN (AV1,2)

1.0 Vp-p 75 ohms, sync negative, RCA jack x 2

AUDIO IN (AV1,2)

- 6.0 dBm more than 47 kohms, RCA jack (L, R) x 2 

DV IN

4 pin (IEEE 1394 standard)

Outputs

VIDEO OUTPUT

1 Vp-p 75 

, sync negative, RCA jack x 1

S-VIDEO OUTPUT

(Y) 1.0 V (p-p), 75 

, negative sync, Mini DIN 4-pin x 1

(C) 0.286 V (p-p) 75 

COMPONENT OUTPUT

(Y) 1.0 V (p-p), 75 

, negative sync, RCA jack x 1

(P

B

)/(P

R

) 0.7 V (p-p), 75 

, RCA jack x 2

HDMI video/audio output

19 pin (HDMI standard, Type A)

Audio output (digital audio)

0.5 V (p-p), 75 

, RCA jack x 1

Audio output (optical audio)

Optical connector x 1

Audio output (analog audio)

1 kHz, -6 dBm, 600 

, RCA jack (L, R) x 2

Accessory: 

Video cable  . . . . . . . . . . . . . . . . . . . . . . . . . . . . .1

Audio cable (L, R)  . . . . . . . . . . . . . . . .1

Remote Control  . . . . . . . . . . . . . . . . . . . . . . . . . .1

Batteries  . . . . . . . . . . . . . . . . . . . . . . .2

Design and specifications are subject to change without notice.

Summary of Contents for DRMV80B - DVDr/ VCR Combo

Page 1: ...K DR MV80B DVD VIDEO RECORDER INSTRUCTIONS For Customer Use Enter below the Model No and Serial No which are located on the rear of cabinet Retain this information for future reference Model No Serial No LVT2013 001A J ...

Page 2: ...Laser System To ensure proper use of this product please read this owner s manual carefully and retain it for future refer ence Should the unit require maintenance contact an authorized service center Performing controls adjustments or carrying out pro cedures other than those specified herein may result in hazardous radiation exposure To prevent direct exposure to laser beam do not try to open th...

Page 3: ...owing measures Reorient or relocate the receiving antenna Increase the separation between the product and receiver Connect the product into an outlet on a circuit different from that to which the receiver is con nected Consult the dealer or an experienced radio TV technician for help CAUTION concerning the Power Cord Most appliances recommend they be placed upon a dedicated circuit That is a singl...

Page 4: ...ectrician for replacement of the obsolete outlet 10 Protect the power cord from being walked on or pinched particularly at plugs convenience recepta cles and the point where they exit from the apparatus 11 Only use attachments accessories specified by the manufacturer 12 Use only with the cart stand tripod bracket or table specified by the manufacturer or sold with the apparatus When a cart is use...

Page 5: ... 22 Special Playback Options 23 Playing a DivX Movie File 24 Playing an Audio CD or MP3 WMA files 25 Viewing a JPEG files 26 27 RECORDING About DVD recording 28 Notes for recording 28 Recording time and picture quality 28 Basic Recording One Touch Recording 29 Instant Timer Recording 29 Simultaneous Play and Record 29 Timer Link Recording External Timer Recording 30 Timer Recording 31 Timer Record...

Page 6: ...playback side of the disc Hold the disc by the edges so that fingerprints do not get on the surface Never stick paper or tape on the disc Storing Discs After playing store the disc in its case Do not expose the disc to direct sunlight or sources of heat and never leave it in a parked car exposed to direct sunlight Cleaning Discs Fingerprints and dust on the disc can cause poor pic ture quality and...

Page 7: ...M compatible players Recordings can be extensively edited Only DVD RAM standard Version 2 0 2 1 and 2 2 discs can be used in this unit You cannot use the cartridge type DVD RAM disc in this unit DVD RW DVD ReWritable These Discs can be recorded on repeatedly Recordings can be erased then you can record again on the same Disc Playable on DVD RW compatible players automatic finalization The edited c...

Page 8: ...ecorded in a compatible format there are cases in which it may not play because of the settings of the application software used to create the disc Check with the software publisher for more detailed information This recorder requires discs and recordings to meet certain technical standards in order to achieve optimal playback quality Pre recorded DVDs are automatically set to these standards Ther...

Page 9: ...M Copyright Recording equipment should be used only for lawful copying and you are advised to check carefully what is lawful copying in the area in which you are making a copy Copying of copyright material such as films or music is unlawful unless permitted by a legal exception or consented to by the rights owner This product incorporates copyright protection technology that is protected by method...

Page 10: ...order Lights when a disc is in the DVD deck The DVD deck is selected Lights when the Recorder is in playing mode or flashes when search mode The VCR deck is selected Indicates when the recorder is in timer recording or a timer recording is programmed This indicator will flash when the unit is set to standby mode for Timer Link recording A VHS tape is inserted in the VCR deck The Recorder is record...

Page 11: ...ts menu options ENTER Confirms menu selections DISPLAY Accesses On Screen Display Displays information of current status RETURN O Removes the menu d AUDIO Selects an audio language or an audio channel SUBTITLE Selects a subtitle language ZOOM Enlarges DVD video image CHAPTER Inserts a chapter marker when playing recording z REC Starts recording Press repeatedly to set the recording time REC MODE S...

Page 12: ...h no video tape inserted 2 Press the number key 1 for A 2 for B 3 for C or 4 for D while pressing ENTER down on the remote control 3 Press N on the unit for over 5 seconds while the unit is turned off The current code appears on the display window 4 Press STOP x on the remote control the current code on the display window changes to new code and blinks for approximately 10 seconds 5 The new code s...

Page 13: ...a high quality interface for digital audio and video e AC Power Cord Plug into the power source f COAXIAL DIGITAL AUDIO OUTPUT Connect to digital coaxial audio equipment g S VIDEO OUTPUT Connect to a S Video Input on TV h AUDIO OUTPUT Left Right Connect to a TV or other equipment with audio inputs i VIDEO AUDIO OUTPUT Left Right Connect to a TV with video and audio inputs a b c d e f g h i Rear Pa...

Page 14: ...s connection set the TV s source selector to VIDEO S Video connection Connect the S VIDEO OUTPUT jack on the Recorder to the S Video in jack on the TV using the optional S Video cable S Component Video connection If your television is a high definition or digital ready television you may take advantage of the Recorder s progressive scan output for the highest video resolu tion possible Connect the...

Page 15: ...cept About HDMI HDMI High Definition Multimedia Interface supports both video and audio on a single digital connection for use with DVD Players Set Top Boxes and other AV devices HDMI was developed to provide the technologies of HDCP High Definition Contents Protection HDCP is used to pro tect digital content transmitted and received HDMI has the capability to support standard enhanced or high def...

Page 16: ...t the digital output will be in DTS digital out when DTS audio stream is selected Notes If the audio format of the digital output does not match the capabilities of your receiver the receiver will produce a strong distorted sound or no sound at all Six Channel Digital Surround Sound via digital connec tion can only be obtained if your receiver is equipped with a Digital Multi channel decoder To se...

Page 17: ... acces sory component using the optional audio video cables Refer to page 29 for Basic Recording Connecting a Digital Camcorder Connecting a Digital Camcorder Use a DV cable not supplied to connect the DV in out jack of your DV Digital Camcorder to the front panel DV IN jack of this Recorder Notes This jack is for connection to DV equipment only It is not compatible with digital satellite tuners o...

Page 18: ...et in the setup menu see page 15 Using the Home Menu Using the Home Menu From the Home Menu screen you can access all the Media for playback and recording of the recorder 1 Press HOME and the Home menu appears 2 Use b B to select the desired main option 3 Use v V to select the desired Sub option then press ENTER to confirm your selection 4 To exit the HOME menu press HOME Setup Start Displays Setu...

Page 19: ...u appears 2 Select Setup Start and press ENTER 3 Use v V to select General option and press B Clock Set You can set the clock 1 Select the Clock Set option then B 2 Enter the necessary information for year date and time b B left right Moves the cursor to the previous or next column v V up down Changes the setting at the current cursor position 3 Press ENTER to confirm your setting TV Aspect 4 3 Le...

Page 20: ...OME and the Home menu appears 2 Select Setup Start and press ENTER 3 Use v V to select Audio option and press B Each DVD disc has a variety of audio output options Set the Recorder s Audio Output according to the type of audio system you use Dolby Digital DTS MPEG Bitstream Select Bitstream if you connect the DIGITAL AUDIO OUTPUT jack to an amplifier or other equipment with a Dolby Digital DTS or ...

Page 21: ...ital camcorders have two stereo tracks for audio One is recorded at the time of shoot ing the other is for overdubbing after shooting On the Audio 1 setting the sound that was recorded while shooting is used On the Audio 2 setting the overdubbed sound is used Auto Chapter During recording chapter markers are added auto matically at fixed intervals You can set this interval to 5 minutes or 10 minut...

Page 22: ...n The Disc label can be up to 32 characters long For discs formatted on a different Recorder you will see only a limited character set 1 Select the Disc Label option then press B Edit icon is highlighted 2 Press ENTER Keyboard menu appears To enter characters see page 38 Disc Protect Depending on the type of disc you are using Disc Protect allows you to preserve your recordings in a variety of way...

Page 23: ...R mode 2 Press DISPLAY once again to show various playback information The items displayed differ depending on the disc type or playing status 3 You can select an item by pressing v V and change or select the setting by pressing b B For details about each item see the pages in parentheses Title Current title number total number of titles page 21 22 Chapter Current chapter number total number of ch...

Page 24: ...oint If you press STOP x again or unload the disc x appears on the screen the unit will clear the stopped point 5 Press EJECT OPEN CLOSE Z to remove the disc Press EJECT OPEN CLOSE Z to close disc tray or press STANDBY ON 1 the disc tray closes automatically and unit turns off Note When do not use DVD please take out DISC Playback VCR Playback Options Buttons Operations EJECT Z Ejects the tape in ...

Page 25: ... To go directly to any chapter track during playback press DISPLAY twice and use v V to select the chapter or track for Video CD icon Input the chapter track number or use b B On a Video CD with PBC you must set PBC to OFF in the Setup menu to use this function See page 18 On an Audio CD to go directly to any track enter the track number using the numbered buttons 0 9 during playback ZOOM Enlarge ...

Page 26: ...ack playback the repeat playback cancels By pressing SKIP during Random playback the Recorder selects another title track and resumes Random playback AUDIO Press AUDIO then press b B repeatedly to hear a different audio language audio track or encoding method Note Some discs feature both Dolby Digital and DTS sound tracks There is no analog audio output when DTS is selected To listen to the DTS so...

Page 27: ... to recall or clear 3 Press ENTER and playback starts from the marked scene Or Press CLEAR and use b B to select OK then press ENTER to delete marked scene from the list 4 To remove the Marker Search menu press RETURN O Camera Angle If the disc contains scenes recorded at different camera angles you can change to a different camera angle during playback Press DISPLAY then select the Angle icon dur...

Page 28: ... Movie List menu options 1 Press v V to select a folder file on the Movie List menu then press ENTER Movie List menu options appear 2 Press v V b B to select an option and press ENTER Play Start playback the selected title Open Opens the folder and a list of files in the folder appears DivX file requirement Available resolution size 720x576 W x H pixel DivX file extensions avi divx Playable DivX s...

Page 29: ...lect between the Music List menu and Photo List menu by pressing TITLE repeatedly If you are in a file list and want to return to the Folder list use the v V to highlight and press ENTER to return to the previous menu screen Music List menu options 1 Press v V to select a track file or folder on the Music List menu then press ENTER 2 Use v V to select an option then press ENTER Play Start playback...

Page 30: ... list and want to return to the Folder list use the v V to highlight and press ENTER to return to the previous menu screen On CDs DVDs with mixed content Audio tracks MP3 WMA files or JPEG files you can select between the Music List menu and Photo List menu by pressing TITLE repeatedly Photo List menu options 1 Use v V b B to select a file then press ENTER The menu options appear 2 Use v V to sele...

Page 31: ...MARKER A check mark appears on the file Press MARKER again to cancel the marked file 2 Repeat step 1 to mark additional file Use the CLEAR button to select all files or cancel all marked files Photo file requirement File extensions jpg Photo size Resolution size 1280 x 720 W x H pixel Less than 4MB recommended CD R Format ISO 9660 and JOLIET DVD R RW Format ISO 9660 UDF Bridge format Maximum Files...

Page 32: ...ing if the reception is poor or the picture contains interference the recording times may be shorter If you record still pictures or audio only the recording time may be longer The displayed times for recording and time remaining may not always add up to exactly the length of the disc The recording time available may decrease if you heavily edit a disc If using a DVD RW disc make sure you change t...

Page 33: ...set the DVD recorder to 10min recording time or the VHS recorder to 30min recording time 4 Each subsequent press increases the recording time by 10 minutes DVD Each subsequent press increases the recording time by 10 minutes VCR Each subsequent press increases the recording time by 30 minutes maximum 540 minutes Please confirm the VHS tape has enough remaining time to be recorded before recording ...

Page 34: ...he power of the external device is off during external timer recording this unit will be stop the external timer recording and turns off the power automatically If the power of the external device is on again this unit will be start the external timer record ing again Press STOP x to stop recording intentionally while external timer recording is in progress The external timer record is available o...

Page 35: ...ng fin ishes to confirm the recorded program If two timer recordings are set to record sequentially one right after the other the later program may not be recorded You must press STOP x to stop the Timer Recording Checking Timer Recording Details Programming can be checked whenever the Recorder is turned on 1 Press HOME and the Home menu appears 2 Select TV Timer Record and press ENTER 3 Use v V t...

Page 36: ...DVD playback posi tion using PLAY REW FF PAUSE STEP etc The VCR deck will remain in Pause mode To resume Dubbing press the DUBBING button twice Dubbing from VCR to DVD Dubbing from VCR to DVD You can copy the contents of a VHS tape to a DVD using the DUBBING button This allows you to archive your old VHS tapes to DVD 1 Insert a blank DVD disc in the DVD deck and close the disc tray 2 Insert the VH...

Page 37: ...k is set up see page 17 Tips The source signal must be DVC SD format Some camcorders cannot be controlled using this recorder s remote If you connect a second recorder using a DV cable you cannot control the second DVD from this one You cannot control this unit remotely from a com ponent connected to the DV IN jack You cannot record date and time information from a DV cassette Disconnecting the DV...

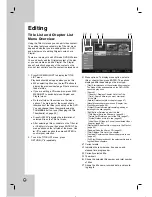
Page 38: ...tions on the left side of the menu Use v V to select a option then press ENTER to confirm your selection 2 To exit the TITLE LIST menu press RETURN O repeatedly 1 Menu options To display menu option select a title or chapter then press ENTER The options displayed differ depending on the disc type Play Start playback of the selected title or chapter The hidden titles and chapters on the DVD R RW ca...

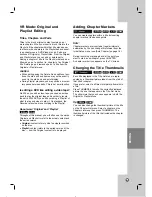
Page 39: ...l and Playlist Throughout this manual you will often see the words Original and Playlist to refer to the actual content and the edited version Original content refers to what s actually recorded on the disc Playlist content refers to the edited version of the disc how the Original content is to be played Adding Chapter Markers Adding Chapter Markers You can create chapters within a title by insert...

Page 40: ...aylist Add option then press B 3 Select New Playlist then press ENTER The new title appears in the updated Playlist All chapters of the title are added to the Playlist Adding Adding Additional T Additional Title itle Chapters to the Playlist Chapters to the Playlist You can add an Original title or chapter to add to a Playlist title even if it is already registered 1 Choose a title or chapter on t...

Page 41: ...e s name is changed to Deleted Title If more than two titles are repeatedly deleted the titles are combined into one When you are deleting a title or chapter only the last one on DVD R RW increases remaining recording time Deleting a Part Deleting a Part You can delete a part which you do not want in the title 1 Use b B v V to choose a title you want to delete on the Title List menu then press ENT...

Page 42: ...AR Deletes the character to the left of the cursor position 0 9 Enters the character corresponding to the selected column DISC MENU LIST DISPLAY Switches the keyboard type 4 Choose OK then press ENTER to fix the name and return to the previous menu screen 5 Press RETURN O repeatedly to exit the menu Notes Names can be up to 32 characters long For discs formatted on a different recorder you will se...

Page 43: ...the screen 2 Select Edit Hide option Example Title List DVD RW 3 Press ENTER to confirm The chapter s or title s thumbnail will dim Tip If you select a hidden chapter or title on the TITLE LIST or Chapter List menu you can show it by choosing Show option on the menu After doing that you are able to see the chapter or title Protect a T Protect a Title itle Use this function to protect against accid...

Page 44: ...seconds long Combining T Combining Two Chapters wo Chapters Into One Into One Use this function to combine two adjacent chapters into one 1 On the Chapter List menu select the second chapter of the two chapters you want to combine then press ENTER The menu options appears on the left side of the screen 2 Use v V to select Combine option The combine indicator appears between the two chapters you wa...

Page 45: ...nsert DVD R or DVD RW disc recorded already 2 On DVD mode press TITLE in Play mode or Stop mode Title List menu will appear as shown below 3 To play back a title select the title you want then press ENTER or PLAY N Tip You can remove the Title List menu by pressing STOP x Playing Playing Y Your Recordings on our Recordings on Other DVD Players Other DVD Players Finalizing a Disc Finalizing a Disc ...

Page 46: ... 7585 Laothian 7679 Latin 7665 Latvian Lettish 7686 Language Code Lingala 7678 Lithuanian 7684 Macedonian 7775 Malagasy 7771 Malay 7783 Malayalam 7776 Maltese 7784 Maori 7773 Marathi 7782 Moldavian 7779 Mongolian 7778 Nauru 7865 Nepali 7869 Norwegian 7879 Oriya 7982 Panjabi 8065 Pashto Pushto 8083 Persian 7065 Polish 8076 Portuguese 8084 Quechua 8185 Rhaeto Romance 8277 Rumanian 8279 Russian 8285 ...

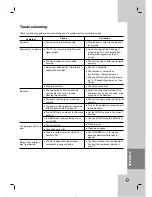
Page 47: ...rom the external component is copy protected Correction Plug the power cord into the wall out let securely Select the appropriate video input mode on the TV so the picture from the Recorder appears on the TV screen Connect the video cable into the jacks securely Check TV capability Check mode of connections eg S Video Components etc Check unit Resolution setting accord ing to TV capability and mod...

Page 48: ...er is off The recorder s source is incorrect Clock in record is not set to correct time Timer has been programmed incorrectly TIMER Record indicator light does not appear after programming timer Correction Insert a disc or tape Check that the disc or tape indicator in the display window is lit Insert a playable disc Check the disc type and Regional code Place the disc with the playback side down P...

Page 49: ...deo Out is not selected for viewing at the TV Correction Finalize the disc see page 18 No solution The other player must be RW compatible in order to play it No solution Use another disc You cannot record the source Use a VR mode formatted disc for copy once material No solution Make A V connections Stereo is avail able only via A V output from Recorder Select AUX or A V source as TV input Resetti...

Page 50: ...utes XP mode 2 hours SP mode 4 hours LP mode 6 hours EP mode VCR SP 2 hours T 120 SLP 6 hours T 120 8 hours T 160 Video recording format Sampling frequency 27MHz Compression format MPEG 2 VBR support Audio recording format Sampling frequency 48kHz Compression format Dolby Digital VCR Specifications Head system Four head helical scan azimuth system Timer 12 hour display type with AM PM Tape speed S...

Page 51: ...4 standard Outputs VIDEO OUTPUT 1 Vp p 75 Ω sync negative RCA jack x 1 S VIDEO OUTPUT Y 1 0 V p p 75 Ω negative sync Mini DIN 4 pin x 1 C 0 286 V p p 75 Ω COMPONENT OUTPUT Y 1 0 V p p 75 Ω negative sync RCA jack x 1 PB PR 0 7 V p p 75 Ω RCA jack x 2 HDMI video audio output 19 pin HDMI standard Type A Audio output digital audio 0 5 V p p 75 Ω RCA jack x 1 Audio output optical audio Optical connecto...

Page 52: ...reen 26 G General Settings 15 H Hide 34 39 Home Menu 14 I Initial Setup Wizard 14 Initialize 17 INPUT 7 INPUT 1 9 Instant Timer Recording 29 J JPEG 26 L Language Settings 16 Last Scene Memory 23 LP mode 17 28 46 M MLP mode 17 28 46 Move 34 39 MP3 25 MPEG 16 N Numerical buttons 7 O On Screen Display 19 OUTPUT 9 P PAUSE 6 7 21 PLAY 6 7 PLAY MODE 7 22 Playable Discs 3 Playback DVD 22 23 Audio CD or M...

Page 53: ...49 W WARRANTY ARRANTY Only in U S A Only in U S A ...

Page 54: ...0209SKMLGEEGL FOR SERVICING Only in U S A DR MV80B ...

Reviews: