background image

29

ENGLISH

SOUND ADJUSTMENTS

Adjusting the sound

You can adjust the sound characteristics to your
preference.

2

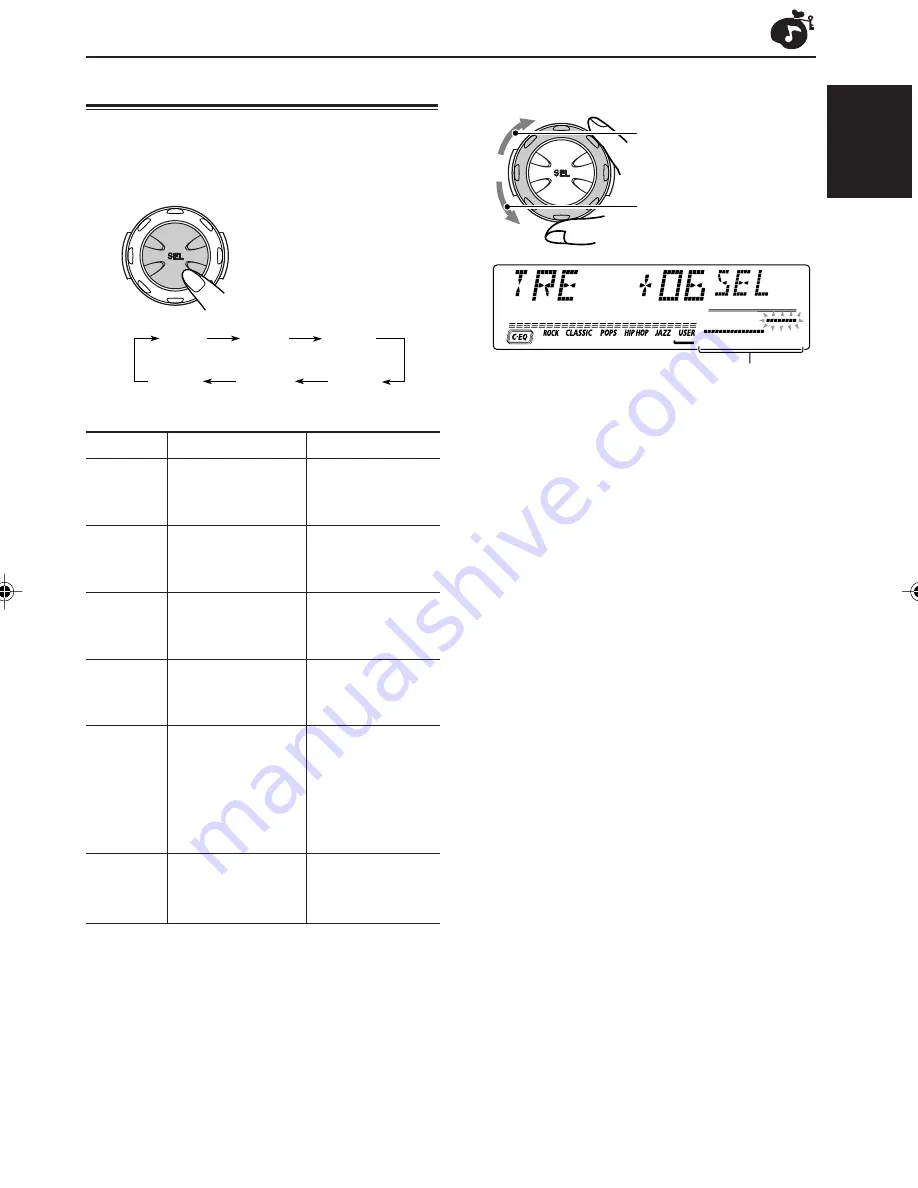
Adjust the level.

Note:

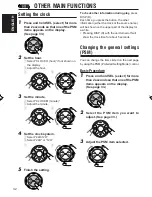
Normally, the control dial works as the volume
control. So you do not have to select “VOL” to adjust
the volume level.

1

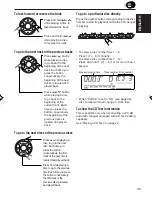
Select the item you want to adjust.

Each time you press the
button, the adjustable items
change as follows:

Indication

To do:

Range

BAS

Adjust the bass.

–06 (min.)
   |
+06 (max.)

TRE

Adjust the treble.

–06 (min.)
   |
+06 (max.)

FAD*

Adjust the front

R06 (Rear only)

and rear speaker

   |

balance.

F06 (Front only)

BAL

Adjust the left

L06 (Left only)

and right speaker

   |

balance.

R06 (Right only)

LOUD

Boost low and
high frequencies
to produce a
well-balanced
sound at low
volume level.

VOL

Adjust the volume. 00 (min.)

  |
50 (max.)

*

If you are using a two-speaker system, set the fader
level to “00.”

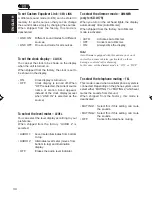
LOUD ON

   |

LOUD OFF

To increase the level.

To decrease the level.

Equalization pattern
changes as you adjust
the bass or treble.

VOL

(volume)

 LOUD

(loudness)

BAS

(bass)

TRE

(treble)

FAD

(fader)

BAL

(balance)

EN29-31KD-LH7R_LH5R[E]f.pm5

1/18/02, 3:20 PM

29

Summary of Contents for GET0075-001A

Page 1: ...UR CD CD RECEIVER 7 D SOUND VOL VOL SOURCE R F U D 5 D For installation and connections refer to the separate manual Für den Einbau und die Anschlüsse siehe das eigenständige Handbuch Pour l installation et les raccordements se référer au manuel séparé Bijzonderheden over de installatie en aansluiting van het apparaat vindt u in de desbetreffende handleiding KD LH5R KD LH7R ...

Page 2: ...witches to prevent radiation emission when unloading CDs It is dangerous to defeat the safety switches 5 CAUTION Use of controls adjustments or performance of procedures other than those specified herein may result in hazardous radiation exposure Bottom panel of the main unit How to reset your unit After detaching the control panel press the reset button on the panel holder using a ball point pen ...

Page 3: ...25 Locating a file or particular portion on an MP3 disc 26 Selecting MP3 playback modes 28 SOUND ADJUSTMENTS 29 Adjusting the sound 29 Selecting preset sound modes C EQ custom equalizer 30 Storing your own sound adjustments 31 OTHER MAIN FUNCTIONS 32 Setting the clock 32 Changing the general settings PSM 32 Assigning names to the sources only for KD LH7R 36 Detaching the control panel 37 CD CHANGE...

Page 4: ...s SSM buttons when pressed together with DISP D display button e FM AM DAB button r CD CD CH button t EQ equalizer button y MO monaural button u RPT repeat button i RND random button o Number buttons Remote sensor Display window a DISC indicator s TRACK indicator d MP3 indicators only for KD LH7R DIRECTORY FILE f Main display g Source clock display h Tuner reception indicators MO monaural ST stere...

Page 5: ...ive off heat crack or start a fire Do not poke the battery with tweezers or similar tools Doing this may cause the battery to give off heat crack or start a fire back side This section is only for KD LH7R KD LH5R can also be remotely controlled with an optionally purchased remote controller We recommend that you use remote controller RM RK50 with your unit Before using the remote controller Aim th...

Page 6: ...tening to the DAB tuner if pressed briefly Searches ensembles while listening to the DAB tuner if pressed for more than 1 second Fast forwards or reverses the track file if pressed and held while listening to a disc Skips to the beginning of the next track file or goes back to the beginning of the current or previous tracks files if pressed briefly while listening to a disc Remote controller SOUND...

Page 7: ... level will drop in a moment To resume the previous volume level press the button briefly again If you turn the control dial you can also restore the sound To turn off the power Press for more than one second SEE YOU appears then the unit turns off If you turn off the power while listening to a disc CD play will start from where playback has been stopped previously next time you turn on the power ...

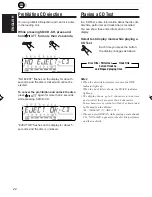
Page 8: ...ote This receiver has three FM bands FM1 FM2 FM3 You can use any one of them to listen to an FM broadcast FM 1 FM 2 FM 3 F1 F2 F3 AM 2 Start searching a station When a station is received searching stops To stop searching before a station is received press the same button you have pressed for searching Press to search stations of higher frequencies Press 4 to search stations of lower frequencies S...

Page 9: ...ency keeps changing in 50 kHz intervals for FM and 9 kHz intervals for AM MW LW until you release the button When an FM stereo broadcast is hard to receive 1 Press MODE M to enter the functions mode while listening to an FM stereo broadcast MODE appears on the upper part of the display and the number buttons work as different function buttons 2 Press MO monaural while MODE is still on the display ...

Page 10: ... number you have selected FM1 FM2 or FM3 These stations are preset in the number buttons No 1 lowest frequency to No 6 highest frequency When automatic preset is over the station stored in number button 1 will be automatically tuned in SSM appears then disappears when automatic preset is over Manual preset You can preset up to 6 stations in each band FM1 FM2 FM3 and AM manually Ex Storing an FM st...

Page 11: ... F1 F2 F3 AM 3 Press and hold the number button in this example 1 for more than 2 seconds 4 Repeat the above procedure to store other stations into other preset numbers Notes A previously preset station is erased when a new station is stored in the same preset number Preset stations are erased when the power supply to the memory circuit is interrupted for example during battery replacement If this...

Page 12: ... make Network Tracking Reception work correctly PI Programme Identification and AF Alternative Frequency Without receiving these data correctly from the RDS station you are listening to Network Tracking Reception will not operate RDS OPERATIONS To use Network Tracking Reception You can select the different modes of network tracking reception to continue listening to the same programme in its fines...

Page 13: ...ce is FM the TP indicator either lights up or flashes If the TP indicator lights up TA Standby Reception is activated If a station starts broadcasting a traffic announcement TRAFFIC appears on the display and this unit automatically tunes in to the station The volume changes to the preset TA volume level see page 17 and the traffic announcement can be heard If the TP indicator flashes TA Standby R...

Page 14: ...Finish the setting 7 When the current source is FM the PTY indicator either lights up or flashes If the PTY indicator lights up PTY Standby Reception is activated If a station starts broadcasting the selected PTY programme this unit automatically tunes in to the station If the PTY indicator flashes PTY Standby Reception is not yet activated since the station being received does not provide the sig...

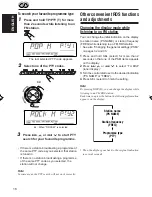
Page 15: ...favourite programme types 1 Press and hold TP PTY T for more than 2 seconds while listening to an FM station 2 Select one of the twenty nine PTY codes See page 18 Selected code name appears on the display 3 Press and hold the number button for more than 2 seconds to store the PTY code selected into the preset number you want MEMO and the selected code name will flash alternately Then only the sele...

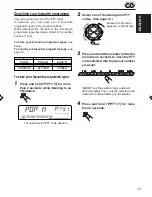
Page 16: ...he display while listening to an FM RDS station Each time you press the button the following information appears on the display Then the display goes back to the original indication in several seconds To search your favourite programme type 1 Press and hold TP PTY T for more than 2 seconds while listening to an FM station 2 Select one of the PTY codes Ex When ROCK M is selected The last selected P...

Page 17: ...c programme is received the volume level automatically changes to the preset level See also Changing the general settings PSM on pages 32 and 33 1 Press and hold SEL select for more than 2 seconds so that one of the PSM items appears on the display 2 Press or 4 to select TA VOL 3 Turn the control dial to set to the desired volume You can set it from VOL 00 to VOL 50 4 Press SEL select to finish th...

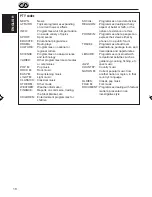
Page 18: ...ommerce trading the Stock Market etc CHILDREN Entertainment programmes for children SOCIAL Programmes on social activities RELIGION Programmes dealing with any aspect of belief or faith or the nature of existence or ethics PHONE IN Programmes where people can express their views either by phone or in a public forum TRAVEL Programmes about travel destinations package tours and travel ideas and oppo...

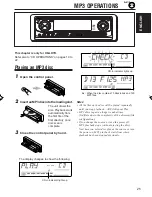
Page 19: ...isc is already in the loading slot selecting CD as the source starts CD play When a disc is inserted upside down the disc automatically ejects if the control panel is open If the control panel is closed PLEASE and EJECT appear alternately If you change the source CD play also stops without ejecting the disc Next time you select CD as the source CD play starts from where playback has been stopped p...

Page 20: ...e next track Each time you press the button consecutively the beginning of the next tracks is located and played back Press 4 briefly while playing a disc to go back to the beginning of the current track Each time you press the button consecutively the beginning of the previous tracks is located and played back To go to a particular track directly Press the number button corresponding to the track...

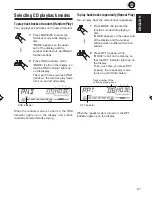
Page 21: ...dicator lights up on the display Selecting CD playback modes To play back tracks at random Random Play You can play back all tracks on the disc at random 1 Press MODE M to enter the functions mode while playing a disc MODE appears on the upper part of the display and the number buttons work as different function buttons 2 Press RND random while MODE is still on the display so that the RND indicato...

Page 22: ...title performer and track title is recorded You can show these disc information on the display Select text display mode while playing a CD Text Each time you press the button the display changes as follows Notes When the disc title performer is shown the DISC indicator lights up When the track title is shown the TRACK indicator lights up The display shows up to 8 characters at one time and scrolls...

Page 23: ... format with a data compression ratio of 1 10 128 Kbps That means by using MP3 format one CD R or CD RW can contain 10 times as much data volume as a regular CD can This player is not compatible with the data encoded with Layer 1 and 2 formats Bit rate is the average number of bits that one second of audio data will consume The unit used is Kbps 1000 bits second To get a better audio quality choos...

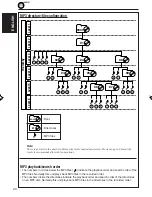
Page 24: ...elow the MP3 files indicate the playback order and search order of the MP3 files Normally this unit plays back MP3 files in the recorded order The numbers inside the directories indicate the playback order and search order of the directories on an MP3 disc Normally this unit plays back MP3 files in the directories in the recorded order Note There is no limit to the number of hierarchy levels neste...

Page 25: ...hts up The display changes to show the following Ex When the disc contains 13 directories and 125 MP3 files CD in indicator lights up Notes All the files on the disc will be played repeatedly until you stop playback All File Repeat Play MP3 discs require a longer readout time It differs due to the complexity of the directory file configuration If you change the source or turn the power off MP3 pla...

Page 26: ...e file name Note The display shows up to 8 characters at one time and scrolls if there are more than 8 characters See also To select the scroll mode SCROLL on page 35 To stop play and eject the disc Press 0 Playback stops the control panel moves down and the disc automatically ejects from the loading slot Note During this operation you can only hear intermittent sounds The elapsed playing time als...

Page 27: ...12 Press and hold 1 7 6 12 for more than 1 second Notes If MP3 flashes on the display after you have selected a directory it means that the directory does not contain any MP3 files You cannot directly select a directory with a number greater than 12 To select a particular file in a directory press or 4 after selecting the directory To skip to the next directory Press 5 up briefly while playing an ...

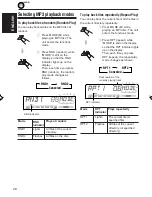
Page 28: ...ss RPT repeat the repeat play mode changes as follows RPT Indicator Mode RPT indicator Track number of the currently playing track Selecting MP3 playback modes To play back files at random Random Play You can play back all files on the MP3 disc at random 1 Press MODE M while playing an MP3 disc The unit enters the functions mode 2 Press RND random while MODE is still on the display so that the RND...

Page 29: ... the bass 06 min 06 max TRE Adjust the treble 06 min 06 max FAD Adjust the front R06 Rear only and rear speaker balance F06 Front only BAL Adjust the left L06 Left only and right speaker balance R06 Right only LOUD Boost low and high frequencies to produce a well balanced sound at low volume level VOL Adjust the volume 00 min 50 max If you are using a two speaker system set the fader level to 00 L...

Page 30: ...ect ROCK JAZZ POPS USER ROCK CLASSIC HIP HOP Note You can adjust each sound mode to your preference and store it in memory If you want to adjust and store your original sound mode see Storing your own sound adjustments on page 31 To store a sound mode separately for each playback source C EQ Link You can select a sound mode and store it in memory It will be recalled every time you select the same ...

Page 31: ...ress MODE M MODE appears on the upper part of the display and the number buttons work as different function buttons 2 Press EQ equalizer while MODE still on the display The last selected sound mode is recalled and applied to the current source Ex If you have selected ROCK previously Sound mode indicator flashes 3 Select the sound mode you want to adjust 4 Select the item you want to adjust See pag...

Page 32: ... during play press DISP D Each time you press the button the other information either the clock or the source name will be shown on the upper part of the display for a while Pressing DISP D with the unit turned off will show the clock time for about 5 seconds 2 1 2 1 2 1 Changing the general settings PSM You can change the items listed on the next page by using the PSM Preferred Setting Mode contr...

Page 33: ...ON 35 TAG OFF TAG ON DAB VOL 12 to DAB VOL 12 DAB VOL 00 45 CLOCK H Hour adjustment CLOCK M Minute adjustment CEQ LINK Custom equalizer link 24H 12H 24 12 hour time display AUTO ADJ Automatic clock setting CLOCK Clock display TU DISP Tuner display AF REG Alternate frequency Regionalization reception PTY STBY PTY standby TA VOL Traffic announcement volume P SEARCH Programme search DAB AF Alternate ...

Page 34: ...UDIO 2 is selected AUDIO 1 Level meter illuminates from bottom to top AUDIO 2 Alternates level meter moves from bottom to top and illumination display OFF Erases the audio level indicator To select the dimmer mode DIMMER only for KD LH7R When you turn on the car head lights the display automatically dims Auto Dimmer When shipped from the factory Auto Dimmer mode is activated AUTO Activates Auto Di...

Page 35: ...l component to use When shipped from the factory CD changer is selected as the external component LINE IN To use the external component other than CD changer CHANGER To use the CD changer Note For connecting the Line Input Adaptor KS U57 and the external component refer to the Installation Connection Manual separate volume To turn the tag display on or off TAG DISP only for KD LH7R An MP3 file can...

Page 36: ...sed while showing ID3 tags of the MP3 disc Some characters or symbols will not be shown and be blanked on the display Ex ABCå d ABCA D A B C D E F G H I J K L M N O P Q R S T U V W X Y Z space 0 1 2 3 4 5 6 7 8 9 Assigning names to the sources This section is only for KD LH7R You can assign names to discs both in this unit and in the CD changer After assigning a name it will appear on the display ...

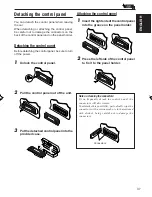
Page 37: ...nectors with a cotton swab or cloth moistened with alcohol being careful not to damage the connectors 5 Detaching the control panel You can detach the control panel when leaving the car When detaching or attaching the control panel be careful not to damage the connectors on the back of the control panel and on the panel holder Detaching the control panel Before detaching the control panel be sure ...

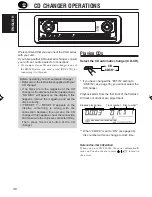
Page 38: ...nd set the discs correctly If RESET 1 RESET 8 appears on the display something is wrong with the connection between this unit and the CD changer If this happens check the connection and make sure the cords are connected firmly Then press the reset button of the CD changer When CLOCK is set to ON see page 34 disc number will soon change to clock time Note on One Touch Operation When you press CD CD...

Page 39: ...t forward the track Press and hold 4 while playing a disc to reverse the track Press briefly while playing a disc to go ahead to the beginning of the next track Each time you press the button consecutively the beginning of the next tracks is located and played back Disc number Track number Elapsed playing time Press 4 briefly while playing a disc to go back to the beginning of the current track Ea...

Page 40: ...tedly RPT Indicator RND indicator lights up RPT indicator lights up Track number of the currently playing track Ex When you select RPT1 Selecting CD playback modes To play back tracks at random Random Play 1 Press MODE M to enter the functions mode while playing a disc MODE appears on the upper part of the display and the number buttons work as different function buttons 2 Press RND random while M...

Page 41: ...owing procedure select the external input correctly See To select the external component to use EXT IN on page 35 1 Select the external component LINE IN If LINE IN does not appear on the display see page 35 and select the external input LINE IN Displayed only when one of the following sources is selected FM AM and CD 2 Turn on the connected component and start playing the source 3 Adjust the volu...

Page 42: ... form one ensemble With the DAB tuner connected with this unit you can enjoy these DAB services DAB TUNER OPERATIONS Tuning in to an ensemble and one of the services A typical ensemble has 6 or more programmes services broadcast at the same time After tuning in to an ensemble you can select a service you want to listen to Before you start Press DAB FM AM briefly if CD CD changer or external compon...

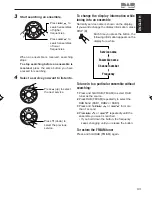
Page 43: ... 4 for more than 1 second 4 Press or 4 repeatedly until the ensemble you want is reached If you hold down the button the frequency keeps changing until you release the button To restore the FM AM tuner Press and hold DAB FM AM again 3 Start searching an ensemble When an ensemble is received searching stops To stop searching before an ensemble is received press the same button you have pressed for ...

Page 44: ... services into other preset numbers Notes A previously preset DAB service is erased when a new DAB service is stored in the same preset number Preset DAB services are erased when the power supply to the memory circuit is interrupted for example during battery replacement If this occurs preset the DAB services again Selected band preset number and MEMO memory appear alternately for a while DAB 1 DA...

Page 45: ...d mode AF ON Traces the program among DAB services and FM RDS stations Alternative Reception The AF indicator lights up on the display see page 12 AF OFF Deactivates Alternative Reception Note When Alternative Reception for DAB services is activated Network Tracking Reception for RDS stations see page 12 is also activated automatically On the other hand Network Tracking Reception cannot be deactiv...

Page 46: ...d Connections are incorrect The volume level is set to the minimum level Connections are incorrect Disc is inserted upside down CD R CD RW is not finalized No disc in the loading slot Disc is inserted incorrectly Disc is locked The built in microcomputer may function incorrectly due to noise etc Signals are too weak The antenna is not connected firmly Symptoms Sound is sometimes interrupted Sound ...

Page 47: ...ars on the display Disc cannot be played back Files skip or 00 00 appears and playback stops Noise is generated A longer readout time is required CHECK keeps flashing on the display Files cannot be played back as you have intended them to play Elapsed playing time is not correct MP3 flashes on the display NO FILES appears on the display for a while then PLEASE and EJECT appear alternately Correct ...

Page 48: ...t becomes very humid inside the car Should this occur the unit may malfunction In this case eject the disc and leave the unit turned on for a few hours until the moisture evaporates When playing a CD R or CD RW You can play back your original CD Rs or CD RWs recorded in audio CD format or in MP3 format only for KD LH7R However they may not be played back depending on their characteristics or recor...

Page 49: ... 75 Ω 50 dB Quieting Sensitivity 16 3 dBf 1 8 µV 75 Ω Alternate Channel Selectivity 400 kHz 65 dB Frequency Response 40 Hz to 15 000 Hz Stereo Separation 30 dB Capture Ratio 1 5 dB AM Tuner Sensitivity 20 µV Selectivity 35 dB CD PLAYER SECTION Type Compact disc player Signal Detection System Non contact optical pickup semiconductor laser Number of channels 2 channels stereo Frequency Response 5 Hz...

Page 50: ...b Bitte setzen Sie Ihr Gerät zurück Siehe Seite Zurücksetzen des Geräts Vous avez des PROBLÈMES de fonctionnement Réinitialisez votre appareil Référez vous à la page intitulée Comment réinitialiser votre appareil Hebt u PROBLEMEN met de bediening Stel het apparaat terug Zie de pagina met de paragraaf Het apparaat terugstellen VICTOR COMPANY OF JAPAN LIMITED ...

Page 51: ...is Sicherstellen daß die Griffe für künftigen Gebrauch nach dem Einbau des Geräts aufbewahrt werden 4 Die Halterung im Armaturenbrett einbauen Nach dem korrekten Einbau der Halterung im Armaturenbrett die entsprechenden Riegel umknicken um die Halterung an ihrem Platz zu sichern siehe Abbildung 5 Die Befestigungsschraube an der Rückseite des Gerätekörpers befestigen und das Ende der Schraube mit e...

Page 52: ...icus laten doen Opmerking Dit apparaat mag worden gebruikt bij elektrische systemen die werken op 12 V gelijkstroom met negatieve aarding Als uw auto niet is uitgerust met een dergelijk systeem is een spanningsomzetter vereist Dit instrument kan worden aangeschaft bij JVC car audio dealers Vervang de zekering door een exemplaar met het aangegeven vermogen Als de zekering vaak doorslaat moet u uw J...

Page 53: ...fen FalscheAnschlüssekönnenernsthafte Schäden am Gerät hervorrufen Die Leiter des Stromkabels und die Leiter des Anschlusses im Fahrzeug können sich farblich unterscheiden 1 Die farbigen Leitungen des Spannunsgversorgungskabels an der Autobatterie den Lautsprechern und dem Motorantenne sofern vorhanden in folgender Reihenfolge anschließen 1 Schwarz Erdung 2 Gelb an Autobatterie konstant 12 V 3 Rot...

Page 54: ... Het is mogelijk een JVC CD wisselaar en of JVC DAB tuner Digital Audio Broadcasting aan te sluiten Zie de instructies van deze apparaten voor meer informatie over het tot stand brengen van deze aansluiting CD changer and DAB tuner CD Wechsler und DAB Tuner Changeur CD et tuner DAB CD wisselaar en DAB tuner Connecting cord supplied with your DAB tuner Verbindungskabel das zum Lieferumfang des DAB ...

Reviews: