background image

37

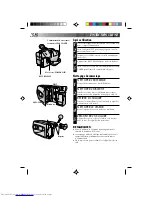
Indicateur de doublage audio

Viseur

Microphone

PLAY

REW

PAUSE

A. DUB

PLAY

REW

A. DUB

RM-V700U
(en option)

RM-V705U (fournie avec
le GR-AX710 seulement)

OU

Doublage audio

Vous pouvez enregistrer une nouvelle piste son sur une
bande préenregistrée (audio normal uniquement)
** Effectuer les étapes 12 et 3 de la procédure

d’insertion vidéo (

Z

P. 36) avant de continuer.

TROUVER LE POINT D’ENTREE DE

MONTAGE

1

Appuyer sur REW pour aller un peu avant le début
de la séquence que vous voulez remplacer, appuyer
sur PLAY pour visionner la bande enregistrée, et
appuyer sur PAUSE exactement au point où le
doublage audio doit commencer.

PASSER EN MODE D’ATTENTE DE

DOUBLAGE AUDIO

2

Tout en maintenant pressée A. DUB, appuyer sur
PAUSE.

LANCER LE DOUBLAGE AUDIO

3

Appuyer sur PLAY. Lorsque le compteur passe par
“0:00:00”, le doublage audio s’arrête
automatiquement et le camescope passe en mode
de lecture.

REMARQUES:

Le doublage audio peut ne pas fonctionner
correctement si une partie vierge existe sur la bande
enregistrée.

Si le microphone du camescope est trop près du
téléviseur, ou si le volume du téléviseur est trop fort,
des sifflements ou des hurlements peuvent se produire.

Summary of Contents for GR-AX510

Page 1: ...X710 GR AX650 GR AX510 YU30052 525 Compact VHS INSTRUCTIONS MANUEL D INSTRUCTIONS COMPACT VHS CAMCORDER CAMESCOPE COMPACT VHS The camcorder illustrations appearing in these instructions are of the GR AX710 ...

Page 2: ... your area for recycling options or proper disposal Dear Customer Thank you for purchasing the JVC Compact VHS camcorder Before use please read the safety information and precautions contained in the following pages to ensure safe use of your new camcorder Using This Instruction Manual All major sections and subsections are listed in the Table Of Contents Z pg 7 Notes appear after most subsections...

Page 3: ...onal safety In order not to defeat the built in safeguards observe the following basic rules for its installation use and servicing ATTENTION Follow and obey all warnings and instructions marked on your product and its operating instructions For your safety please read all the safety and operating instructions before you operate this product and keep this manual for future reference INSTALLATION 1...

Page 4: ...ng amplifiers that produce heat SERVICING 1 Servicing If your product is not operating correctly or exhibits a marked change in performance and you are unable to restore normal operation by following the detailed procedure in its operating instructions do not attempt to service it yourself as opening or removing covers may expose you to dangerous voltage or other hazards Refer all servicing to qua...

Page 5: ... P 30 n Or simply play back the tape on a VHS VCR using the Cassette Adapter VHS Playpak Z P 28 SHOOTING 1 Slide the LENS COVER open close knob to open the lens cover 2 Set the power switch to CAMERA The power indicator will light and an image will appear in the viewfinder 3 Press the Recording Start Stop button Recording starts To stop recording temporarily momentarily press the Recording Start S...

Page 6: ... Shutter n 15 sec Self Timer Intelligent Function Control Z P 18 25 SEL F1 F2 Variable Speed Hyper Zoom Z P 15 Random Assemble Editing Z P 32 35 PROVIDED ACCESSORIES Lithium Battery Shoulder Strap Cassettes marked can be used with this camcorder T W T W T W T W Zoom in Zoom out 8 8 2 2 5 5 4 4 1 1 6 6 3 3 7 7 Integrated Auto Light GR AX710 GR AX650 only Z P 18 Battery Pack BN V11U Cassette Adapter...

Page 7: ...3 RECORDING 14 Basic Recording 14 Basic Features 15 Advanced Features 16 PLAYBACK 28 Using The Cassette Adapter 28 Basic Connections 29 Basic Playback 30 Features 31 EDITING 32 Tape Dubbing 32 Random Assemble Editing R A Edit 32 Insert Editing 36 Audio Dubbing 37 USER MAINTENANCE 38 TROUBLESHOOTING 39 INDEX 40 Controls 40 Connectors 40 Indicators 40 Other Parts 40 Viewfinder 41 Terms 42 CAUTIONS 4...

Page 8: ...s 30 min BN V22U approx 2 hrs 10 min approx 7 hrs BN V25U approx 2 hrs 40 min approx 10 hrs REFRESH indicator REFRESH switch CHG charge indicator To AC outlet Marks END indicator Hook on Push in BATT RELEASE POWER indicator USING THE BATTERY PACK ATTACH BATTERY PACK 1 Hook its top end to the camcorder and push the battery pack in until it locks in place DETACH BATTERY PACK 2 Slide BATT RELEASE and...

Page 9: ...harging To avoid interference with reception do not use the AC Power Adapter Charger near a radio Make sure you unplug the DC cord before charging or discharging the battery pack A blinking CHG indicator means that the battery pack has become hot Wait until it cools down to continue The CHG indicator may not light properly with a brand new battery pack or with one that s been stored for an extende...

Page 10: ...s up insert the supplied lithium battery and push it in CLOSE COVER 5 Close the compartment cover until it clicks in place NOTE See SAFETY PRECAUTIONS Z pg 2 for information on safe handling of lithium batteries Date Time Settings SELECT MODE 1 Set the power switch to CAMERA SET DATE TIME 2 Press SET and the month blinks Press or to set the month Repeat to set day year hour and minute START CLOCK ...

Page 11: ...xtended Play is more economical recording at 1 3 the speed of SP Loading Unloading A Cassette OPEN CASSETTE HOLDER 1 Slide EJECT until holder opens Do not use force to open INSERT REMOVE CASSETTE 2 Make sure label is facing outward CLOSE CASSETTE HOLDER 3 Press PUSH and make sure the holder is closed and locked NOTES A cassette holder can t be opened unless a power supply is attached Make sure tha...

Page 12: ...ion at left thread the strap through the top of the eyelet 1 then fold it back and thread it through the keeper 2 and then through the buckle 3 Repeat the procedure to attach the other end of the strap to the other eyelet making sure the strap isn t twisted ADJUST LENGTH 2 Adjust as shown in the illustration at left 1 then slide both keepers snug against the eyelets to prevent slipping 2 Tripod Mo...

Page 13: ...e Search Z pg 30 A DUB button Audio dubbing Z pg 37 Remote Control Unit provided with GR AX710 only The Full Function Remote Control Unit can operate this camcorder from a distance as well as the basic operations PLAY STOP PAUSE FF and REW of your VCR This remote control unit makes additional recording functions possible Before use refer to the instruction booklet PULL OUT BATTERY HOLDER 1 Pull ou...

Page 14: ...nder STOP RECORDING 4 Press the Recording Start Stop button again The camcorder re enters the Record Standby mode NOTES A cassette holder can t be opened unless a power supply is attached There may be a delay after you slide EJECT until the holder opens Do not use force The tape s remaining time is displayed in the viewfinder as shown TAPE END appears when the tape reaches its end and the power go...

Page 15: ...To re record certain segments OPERATION 1 Make sure camcorder is in Record Standby mode 2 Press either RETAKE button to reach start point for new recording 3 Press Recording Start Stop to start recording NOTE Noise may appear during Retake This is normal FEATURE Index Code Marking PURPOSE To give you automatic access to any selected point on a recording Auto Marking and Manual Marking are availabl...

Page 16: ...MBOL Auto Mode Lock Locks camcorder in Full Auto mode preventing accidental misoperation button pressing during shooting CINEMA FADER FOCUS EXPOSURE DISPLAY TITLES and MWB Manual White Balance controls are disabled in this mode Auto Mode Release Re enables controls that were disabled by Auto Mode Lock Electronic Fog Filter Makes picture look misty white as when external fog filter is attached to l...

Page 17: ...bjects with different color temperatures ADJUST FOCUS 1 Point the camcorder at a white flat object such as a sheet of white paper and adjust focus manually Z pg 21 ADJUST WHITE BALANCE 2 Press MWB until MWB appears then press and hold MWB for more than 3 seconds MWB blinks in the viewfinder during adjustment then stops blinking but stays lit when adjustment is complete NOTES To switch to automatic...

Page 18: ...he camcorder s power on It is recommended to set the white balance to indoor mode Z pg 17 when you use the video light When not using the video light turn it off to save battery power NOTES n Even if the battery indicator does not blink in the viewfinder if the battery pack s charge is low the camcorder may turn off automatically when you turn on the video light or when you start recording with th...

Page 19: ...g and activate fade in OR END RECORDING Press Recording Start Stop to end recording and engage fade out NOTES Pressing and holding the Recording Start Stop button allows you to record a black blank screen The screen becomes slightly reddish when the Fader is used with Sepia Z pg 16 With the Electronic fog filter mode Z pg 16 engaged the image fades in out to a white screen Cinema This feature allo...

Page 20: ...amcorder Engage the focus lock function to lock your subject in before recording When you want your subject to be focused and to appear in a corner of the screen First center on the subject and focus using auto focus mode Then engage the focus lock function and move the camcorder until the subject is where you want it SELECT MODE 1 Press Function SEL until FOCUS appears to the right of F1 LOCK FOC...

Page 21: ...indication is replaced by the focus lock indication and the adjusted focus is locked in RELEASE MANUAL FOCUS MODE 4 Press F1 The Manual Focus mode is immediately released and the focus lock indication disappears NOTES Be sure to focus the lens in the maximum telephoto position when you use the Manual Focus mode If you focus in on a certain subject in the wide angle position sharply focused images ...

Page 22: ...down F2 slide the power zoom switch to T The Exposure indicator bar appears in the viewfinder OR DARKEN IMAGE While holding down F2 slide the power zoom switch to W The Exposure indicator bar appears in the viewfinder When you want to return to the factory setting RESTORE INITIAL SETTING 3 Press F2 The standard setting is immediately restored and the Exposure indicator bar disappears F1 button F2 ...

Page 23: ... the month day and year for about 5 seconds after recording is initiated in the following situations After changing the date After loading a cassette After Auto Date Record mode is selected by pressing F2 In this mode the month day and year are replaced after 5 seconds with AUTO DATE NOTES Setting PROGRAM AE to LOCK always engages this mode and disables all other modes In the Auto Date Record mode...

Page 24: ... viewfinder ACCESS CHARACTER MODE SCREEN 3 Press SET A character grid appears in the view finder ENTER DESIRED CHARACTERS 4 Press or to move the cursor on the character grid to the desired character then press SET to enter The selected characters appears at the bottom of the screen When you re done press SET as many times as necessary to exit the screen The title you made appears at the bottom of ...

Page 25: ...ONGRATULATIONS SELECT MODE 1 Press Function SEL until TITLE appears to the right of F1 SELECT PRESET TITLE 2 Engage the Record Standby mode then press F1 to cycle through the preset titles until the desired title is displayed NOTES To delete the Instant Title during recording press F1 To recall a title engage the Record Standby mode and then press F1 to select the desired title To display a title ...

Page 26: ... each time INT TIME is pressed 15S 15 seconds 30S 30 seconds 1MIN 1 minute and 5MIN 5 minutes Pressing again releases the Self timer START DELAYED RECORDING 3 Press Recording Start Stop The tally lamp begins blinking and the blinking speed increases about 5 seconds before recording starts When recording begins the lamp stops blinking but stays lit RELEASE SELF TIMER MODE 4 To release when the tall...

Page 27: ...t cannot be performed during Animation shooting Time Lapse You can record sequentially at preset time spans Leaving the camcorder aimed at a specific subject you can record subtle changes over an extended period of time NOTE You need the RM V705U or RM V700U remote control unit to perform the following procedure ENGAGE RECORD STANDBY MODE 1 Make sure the lens cover is open then set the power switc...

Page 28: ...ment door PLAY BACK ON CONNECTED VCR 3 Load the cassette adapter into the VCR and play the tape back as you would any other REMOVE CASSETTE FROM ADAPTER 4 Slide the latch and the compartment door opens automatically Then insert your finger in the hole on the underside of the adapter as shown in the illustration at left push up and remove the cassette NOTES During tape loading and unloading do not ...

Page 29: ...o cables between the AUDIO and VIDEO connectors on the camcorder and those on the TV SELECT MODE 2 Set the TV to its VIDEO or AV mode as specified in its instructions Connection To A TV With NO A V Input Connectors Playback ONLY NOTE Use the optional RF V5U RF unit Refer to the RF V5U instruction manual for connection procedure NOTES It is recommended to use the AC Power Adapter Charger as the pow...

Page 30: ...d SELECT MODE 2 Set the power switch to PLAY The Power On indicator lights PLAYBACK 3 Press PLAY PAUSE The playback picture appears in the viewfinder and the connected TV STOP PLAYBACK 4 Press STOP Rewind or Fast forward the tape Press REW to rewind or FF to fast forward the tape during Stop mode NOTE The camcorder shuts off automatically after about 5 minutes in STOP mode To turn on again set the...

Page 31: ... 1 Press FF during playback Speed is 3 times normal in SP and 7 times normal in EP mode Reverse Search 1 Press REW during playback Speed is as noted above NOTE Noise bars appear and pictures may become monochrome in Shuttle Search This is normal FEATURE Counter Memory Function PURPOSE To make it easier to locate a specific tape segment OPERATION 1 Press COUNTER R M and hold for more than 2 seconds...

Page 32: ...ES When using a Remote PAUSE terminal pressing EDIT on the camcorder in step 5 automatically engages the VCR s Record mode When using a Remote PAUSE terminal you can access a function called Master Edit Control System Before beginning reset the camcorder s counter to 0 00 00 at an edit out point When the tape reaches this point remember there s a small margin of error during editing the camcorder ...

Page 33: ...he remote for the desired function The functions the remote can control are PLAY STOP PAUSE FF REW and VCR REC STBY you don t need to press VCR CTL for this one You re now ready to try Random Assemble Editing IMPORTANT Although the MBR is compatible with JVC VCRs and those of many other makers it may not work with yours or may offer limited functions NOTES If the VCR s power doesn t come on in ste...

Page 34: ... as 8 MAKE CORRECTIONS 5 Press CANCEL during steps 2 and 3 to erase the most recently registered point NOTES The RM V700 can be used to operate other camcorder functions as well Point the RM V700U at the camcorder s remote sensor and press any of the following buttons function appears in parentheses ON OFF camcorder R A EDIT IN OUT camcorder IN OUT CANCEL camcorder CANCEL There must be at least on...

Page 35: ...been copied the camcorder and VCR enter the still or pause mode Press STOP on both units NOTES If you performed step 1C on page 33 keep the remote control pointed at the VCR during editing The on screen display only appears while the camcorder searches for each scene To dub a copy of the camcorder s source tape perform R A EDIT by specifying only one in point and no out point The contents of the t...

Page 36: ...Insert mode is engaged and the scene the camcorder is aimed at appears on the screen BEGIN INSERT EDITING 6 Press Recording Start Stop When the counter reaches 0 00 00 editing stops automatically and the camcorder enters the playback mode NOTES Insert Editing may not work correctly if a blank segment exists in the recorded tape or if the recording speed was changed The tape may stop slightly befor...

Page 37: ... AUDIO DUB STANDBY MODE 2 Press and hold A DUB and press PAUSE BEGIN AUDIO DUBBING 3 Press PLAY When the counter reaches 0 00 00 Audio Dubbing stops automatically and the camcorder enters the playback mode NOTES Audio Dubbing may not work correctly if the tape contains blank segments or if the recording speed was changed during the original recording If the camcorder s mike is too close to the TV ...

Page 38: ...oth CLEAN LENS 2 Blow it with a blower brush then wipe gently with lens cleaning paper REMOVE EYEPIECE 3 Turn the eyepiece counterclockwise and pull it out CLEAN VIEWFINDER 4 Remove dust using a blower brush RE ATTACH EYEPIECE 5 Align the marks re attach the eyepiece and turn it clockwise NOTES Avoid using strong cleaning agents such as benzine or alcohol Cleaning should be done only after the bat...

Page 39: ...cement This is normal The tape stops during fast forward or rewind Rewinding or fast forwarding cannot be performed The Counter Memory Function has been activated Z pg 31 The tape is already fully wound on one reel or the other TAPE TRANSPORT OTHER The tape won t eject Some functions are not available Vertical white lines appear when shooting a very bright object Bright crystal shaped spots appear...

Page 40: ...KE F Button Z pg 15 R A EDIT CANCEL Button Z pg 34 STOP Button Z pg 30 PLAY PAUSE Button Z pg 30 q POWER Switch Z pg 10 w Recording Start Stop Button Z pg 12 e LIGHT ON AUTO OFF select switch GR AX710 AX650 only Z pg 18 Connectors r REMOTE Jack For connection of the RM V20U wired remote control unit optional t Shoulder Strap Eyelets Z pg 12 y EDIT Jack Z pg 32 u VIDEO Out Jack Z pg 29 i RF DC OUT ...

Page 41: ... Z pg 16 Displayed at 2 for approx 3 seconds when the PROGRAM AE select dial is switched from one position to another Then only the indicator remains at 1 3 Focus Indicator Z pg 20 4 White Balance Mode Indicator Z pg 17 5 Zoom Level Indicator Z pg 15 Exposure Indicator Bar Z pg 22 6 Battery Pack Remaining Power Indicator Changes as follows according to the battery pack s remaining power level When...

Page 42: ...pg 15 Insert Cassette pg 11 Insert Editing pg 36 Instant Titles pg 25 Intelligent Function Control pg 18 25 M Manual Focus pg 21 Master Edit Control pg 32 MBR code Setting pg 33 N ND Effect Mode pg 16 O On Screen Display pg 23 P Playback pg 30 Program AE with Special Effects pg 16 Provided Accessories pg 6 Q Quick Review pg 15 R Random Assemble Editing pg 32 35 Recording Advanced Features pg 16 27...

Page 43: ... on room temperature of 20 C The lower the temperature the longer recharging takes CAUTIONS DANGER Video Light The video light becomes extremely hot Do not touch it either while in operation or soon after turning it off otherwise serious injury may result Do not place the camcorder into the carrying case immediately after using the video light since it remains extremely hot When operating keep a d...

Page 44: ... shock or vibration near a television set near appliances generating strong magnetic or electric fields speakers broadcasting antennas etc in places subject to extremely high over 40 C or 104 F or extremely low under 0 C or 32 F temperatures CAUTIONS cont 3 DO NOT leave the unit in places of over 50 C 122 F in places where humidity is extremely low below 35 or extremely high above 80 in direct sun...

Page 45: ... Vp p 75 ohms unbalanced via VIDEO out connector AUDIO Output 8 dBs 1 k ohm via AUDIO out connector AC POWER ADAPTER BATTERY CHARGER AA V11U Power requirement U S A and Canada AC 120 V 60 HZ Other countries AC 110 V to 240 V 50 60 Hz Power consumption 23 W Output Charge DC 8 5 V 1 3 A VTR DC 6 3 V 1 8 A Charging system Constant current peak detection timer controlled Dimensions 150 W x 42 H x 68 D...

Page 46: ...applique à l AA V11U POUR ÉVITER LES CHOCS ÉLECTRIQUES INTRODUIRE LA LAME LA PLUS LARGE DE LA FICHE DANS LA BORNE CORRESPONDANTE DE LA PRISE ET POUSSER JUSQU AU FOND ATTENTION RISQUE D ELECTROCUTION NE PAS OUVRIR ATTENTION POUR EVITER TOUT RISQUE D ELECTROCUTION ATTENTION NE PAS OUVRIR LE BOITIER AUCUNE PIECE INTERIEURE N EST A REGLER PAR L UTILISATEUR SE REFERER A UN AGENT QUALIFIE EN CAS DE PROB...

Page 47: ...s règles de base suivantes pour son installation utilisation et entretien ATTENTION Suivre et respecter tous les avertissements et instructions marqués sur votre produit et dans son mode d emploi Pour votre sécurité lire avant son utilisation toutes les consignes de sécurité et le mode d emploi et conserver cette brochure et le mode d emploi avec votre produit pour une référence ultérieure INSTALL...

Page 48: ...reils de chauffage et d autres produits comprenant les amplificateurs qui produisent de la chaleur DEPANNAGE 1 Dépannage Si votre produit ne fonctionne pas correctement ou montre un net changement dans ses performances et que vous ne pouvez pas revenir à un fonctionnement normal en suivant la procédure détaillée du mode d emploi n essayez pas de réparer par vous mêmes ouvrir ou démonter les capots...

Page 49: ... l écran du viseur Pour terminer la lecture appuyer sur la touche STOP Pour plus de détails Z P 30 n Ou simplement lire la bande sur un magnétoscope VHS en utilisant l adaptateur de cassette VHS Playpak Z P 28 ENREGISTREMENT 1 Faire coulisser le bouton d ouverture fermeture LENS COVER pour ouvrir le bouchon d objectif 2 Placer l interrupteur d alimentation sur CAMERA L indicateur d alimentation s ...

Page 50: ...000 s n Retardateur 15 s Commande de fonction intelligente Z P 18 à 25 SEL F1 F2 Hyper Zoom à vitesse variable Z P 15 Montage par mémorisation de séquences Z P 32 à 35 ACCESSOIRES FOURNIS Pile au lithium Bandoulière Les cassettes portant la marque peuvent être utilisées avec ce camescope T W T W T W T W Zoom avant Zoom arrière 8 8 2 2 5 5 4 4 1 1 6 6 3 3 7 7 Torche automatique intégrée GR AX710 GR...

Page 51: ...EMENT 14 Enregistrement de base 14 Fonctions de base 15 Fonctions avancées 16 LECTURE 28 Utilisation de l adaptateur de cassette 28 Raccordements de base 29 Lecture de base 30 Fonctions 31 MONTAGE 32 Copie de bande 32 Montage par mémorisation de séquences 32 Montage par insertion 36 Doublage audio 37 ENTRETIEN CLIENT 38 EN CAS DE DIFFICULTE 39 INDEX 40 Commandes 40 Connecteurs 40 Indicateurs 40 Au...

Page 52: ...sser la batterie dans le sens de la flèche jusqu à ce qu elle s enclenche en place L indicateur de recharge s allume RETIRER LA BATTERIE 3 Lorsque la recharge est terminée l indicateur END s allume Coulisser la batterie dans le sens opposé à la flèche UTILISATION DE LA BATTERIE MONTER LA BATTERIE 1 Crocher son extrémité supérieure au camescope et pousser sur la batterie jusqu à ce qu elle s enclen...

Page 53: ...adaptateur secteur chargeur de batterie près d une radio S assurer de débrancher le cordon CC avant de recharger ou décharger la batterie Un indicateur CHG clignotant signifie que la batterie est devenue chaude Attendre qu elle refroidisse pour continuer L indicateur CHG peut ne pas s allumer correctement avec une batterie toute neuve ou avec une batterie qui a été entreposée pendant longtemps Dan...

Page 54: ...que entre la pile et le compartiment A pour la faire sortir INTRODUIRE LA PILE 4 En s assurant que le côté plus est en haut introduire la pile au lithium fournie et la pousser à l intérieur FERMER LE COUVERCLE 5 Fermer le couvercle du compartiment jusqu à son verrouillage REMARQUE Voir PRECAUTIONS DE SECURITE Z P 2 pour des informations sur une manipulation sans danger des piles au lithium Réglage...

Page 55: ...3 de la vitesse SP Mise en place et retrait d une cassette OUVRIR LE PORTE CASSETTE 1 Faire coulisser EJECT jusqu à ce que le porte cassette s ouvre Ne pas forcer pour ouvrir INTRODUIRE RETIRER LA CASSETTE 2 S assurer que son étiquette est tournée vers l extérieur REFERMER LE PORTE CASSETTE 3 Appuyer sur PUSH et s assurer que le porte cassette est fermé et verrouillé REMARQUES Le porte cassette ne...

Page 56: ...ANDOULIERE 1 En suivant l illustration sur la gauche passer la courroie par le haut de l oeillet 1 puis la replier et la passer par le passant 2 puis par la boucle 3 Refaire la même chose pour attacher l autre extrémité de la courroie à l autre oeillet en s assurant que la courroie n est pas entortillée AJUSTER LA LONGUEUR 2 Ajuster comme montrer dans l illustration sur la gauche 1 puis faire coul...

Page 57: ...la fenêtre de réception du rayon infrarouge est directement exposée à la lumière du soleil ou à des éclairages puissants Fenêtre de réception du rayon infrarouge Portée de la télécommande Touches Fonctions Avec l interrupteur d alimentation du Avec l interrupteur d alimentation du camescope placé sur CAMERA camescope placé sur PLAY 1 Fenêtre de transmission Transmet le signal du rayon du rayon inf...

Page 58: ...trement est en cours et REC apparaît dans le viseur ARRÊTER L ENREGISTREMENT 4 Appuyer à nouveau sur cette touche Le camescope repasse en mode d attente d enregistrement REMARQUES Le porte cassette ne peut être ouvert que si le camescope est alimenté Le porte cassette s ouvre quelques secondes seulement après l action sur le commutateur EJECT Ne pas forcer pour ouvrir le porte cassette La durée de...

Page 59: ... ré enregistrer certaines séquences Opération 1 S assurer que le camescope est dans le mode d attente d enregistrement 2 Appuyer sur une touche RETAKE pour atteindre le point de départ pour un nouvel enregistrement 3 Appuyer sur marche arrêt d enregistrement pour lancer l enregistrement Remarque Une distortion peut se produire quand la lecture commence en mode de Retouche C est normal Caractéristi...

Page 60: ...SE M Mode automatique libre FG FOG FG Mode Voile ND ND EFFECT ND Effet neutre SEPIA Sepia TWILIGHT Ambiance réelle A LOCK AUTO LOCK Mode verrouillage automatique SYMBOLE SUR LA VISEUR MODE MOLETTE Sports Une grande vitesse d obturation permet de prendre clairement une action rapide Obturateur à grande vitesse 1 2000s Prend des actions plus rapides que ce que fait le mode Sports Retardateur 15 s Vo...

Page 61: ...a plusieurs sujets avec des températures de couleur différentes AJUSTER LA MISE AU POINT 1 Pointer le camescope sur un objet uniforme et blanc comme par exemple une feuille de papier blanche et régler manuellement la mise au point Z P 21 AJUSTER LA BALANCE DES BLANCS 2 Appuyer sur MWB jusqu à l apparition de MWB puis maintenir pendant plus de 3 secondes MWB clignote dans le viseur pendant le régla...

Page 62: ... la balance des blancs sur le mode intérieur Z P 17 quand vous utilisez la torche vidéo Si la torche n est pas utilisée l éteindre pour économiser l énergie de la batterie REMARQUES n Même si l indication de batterie ne clignote pas dans le viseur si la batterie est presque déchargée l alimentation du camescope peut être coupée automatiquement lorsque vous allumez la torche vidéo ou quand vous com...

Page 63: ...he arrêt d enregistrement pour commencer l enregistrement et activer le fondu OU ARRETER L ENREGISTREMENT Appuyer sur marche arrêt d enregistrement pour arrêter l enregistrement et engager le fondu à la fermeture REMARQUES Maintenir pressée la touche de marche arrêt d enregistrement vous permet d enregistrer un écran vierge noir L écran devient légèrement rougeâtre quand le fondu est utilisé avec ...

Page 64: ...server votre sujet au point avant l enregistrement Si vous voulez que votre sujet principal apparaisse dans le coin de l écran D abord vous devez le centrer et faire la mise au point en utilisant la mise au point automatique puis engager la fonction de mémorisation de mise au point et déplacer le camescope pour recadrer le sujet comme vous le voulez SELECTIONNER LE MODE 1 Appuyer sur SEL jusqu à c...

Page 65: ... le commutateur de zoom électrique L indication de mise au point est remplacée par l indication de mémorisation de mise au point et la mise au point réglée est mémorisée RELACHER LE MODE DE MISE AU POINT MANUELLE 4 Appuyer sur F1 Le mode de mise au point manuelle est immédiatement relâché et l indication de mémorisation de mise au point disparaît REMARQUE Bien faire la mise au point en position té...

Page 66: ...ONNER LE MODE 1 Appuyer sur SEL jusqu à ce que EXP apparaisse à la droite de F2 RENDRE L IMAGE PLUS LUMINEUSE 2 Tout en maintenant F2 pressée faire coulisser le commutateur de zoom électrique sur T La barre d indication d exposition apparaît dans le viseur OU RENDRE L IMAGE PLUS SOMBRE Tout en maintenant F2 pressée faire coulisser le commutateur de zoom électrique sur W La barre d indication d exp...

Page 67: ... sur les modes comme montré dans l illustration sur la gauche REMARQUES L affichage sélectionné peut être enregistré Si vous ne voulez pas enregistrer l affichage sélectionner le mode sans date avant la prise de vues Si vous voulez annuler l affichage pendant la prise de vues appuyer sur F2 Si vous voulez rappeler un affichage annulé passer en mode d attente d enregistrement puis sélectionner le m...

Page 68: ...paraisse dans le viseur ACCEDER A L ECRAN DE MODE CARACTERE 3 Appuyer sur SET Une grille de caractères apparaît dans le viseur ENTRER LES CARACTERES DESIRES 4 Appuyer sur ou pour déplacer le curseur sur la grille de caractères jusqu au caractère désiré puis appuyer sur SET pour le faire entrer Les caractères sélectionnés apparaissent dans le bas de l écran Lorsque vous avez fini appuyer sur SET le...

Page 69: ...NS SELECTIONNER LE MODE 1 Appuyer sur SEL jusqu à ce que TITLE apparaisse à la droite de F1 SELECTIONNER LE TITRE PREREGLE 2 Passer en mode d attente d enregistrement puis appuyer sur F1 pour boucler sur les titres préréglés jusqu à l affichage du titre désiré REMARQUES Pour annuler le titre immédiat pendant l enregistrement appuyer sur F1 Pour rappeler un titre passer en mode d attente d enregist...

Page 70: ...5 secondes 30S 30 secondes 1MIN 1 minute et 5MIN 5 minutes Une pression supplémentaire relâche le retardateur LANCER L ENREGISTREMENT RETARDE 3 Appuyer sur marche arrêt d enregistrement La lampe de signalisation commence à clignoter et la vitesse du clignotement augmente environ 5 secondes avant que l enregistrement commence Lorsque l enregistrement commence la lampe s arrête de clignoter mais res...

Page 71: ...être effectué pendant la prise de vues en animation programmée Pour de meilleurs résultats s assurer que le camescope est bien fixé pendant la prise de vues Si pendant les étapes 3 et 4 la molette PROGRAM AE est réglée sur le mode retardateur le mode retardateur 15S est engagé Animation Donnez à des scènes ou des objets immobiles une illusion de mouvement Cette fonction vous permet de filmer une s...

Page 72: ... ouvrir la porte du compartiment de l adaptateur puis introduire la cassette et refermer la porte du compartiment LIRE SUR UN MAGNETOSCOPE 3 Charger l adaptateur de cassette dans le magnétoscope et lire la bande comme vous faites avec une autre bande RETIRER LA CASSETTE DE L ADAPTATEUR 4 Coulisser le verrou et la porte du compartiment s ouvre automatiquement Puis introduire le doigt dans le trou s...

Page 73: ...opie et lecture REMARQUE Utiliser les câbles audio et vidéo en option RACCORDER LE CAMESCOPE A UN MAGNETOSCOPE 1 Comme montré dans l illustration sur la gauche brancher les câbles audio et vidéo en option entre les connecteurs AUDIO et VIDEO sur le camescope et ceux sur le magnétoscope FOURNIR L ALIMENTATION 2 Mettre le camescope le magnétoscope et le téléviseur sous tension SELECTIONNER LE MODE 3...

Page 74: ...l interrupteur d alimentation sur PLAY L indicateur d alimentation s allume LECTURE 3 Appuyer sur PLAY PAUSE L image de lecture apparaît sur l écran du viseur et du téléviseur connecté TERMINER LA LECTURE 4 Appuyer sur STOP Rebobinage ou avance rapide de la bande En mode d arrêt appuyer sur REW pour le rebobinage ou sur FF pour l avance rapide REMARQUE L alimentation du camescope est coupée automa...

Page 75: ...ormal Caractéristique Recherche accélérée Objectif Offrir une recherche à grande vitesse dans un sens ou l autre Opération Recherche dans le sens avant 1 Appuyer sur FF pendant la lecture La vitesse est à 3 fois la vitesse normale en SP et à 7 fois la vitesse normale en mode EP Recherche dans le sens inverse 1 Appuyer sur REW pendant la lecture La vitesse est comme indiquée ci dessus Remarque Des ...

Page 76: ...magnétoscope en mode de pause d enregistrement et appuyer sur PAUSE sur le camescope MONTER D AUTRES SEQUENCES 7 Reprendre les étapes 4 à 6 pour continuer le montage puis arrêter le magnétoscope et le camescope quand c est fini REMARQUES En utilisant une borne de télécommande PAUSE appuyer sur EDIT sur le camescope dans l étape 5 lance automatiquement le mode d enregistrement du magnétoscope En ut...

Page 77: ...ec votre magnétoscope ou offrir des fonctions limitées REMARQUES Si l alimentation du magnétoscope n est pas mise dans l étape 1 essayer un autre code du tableau Certains modèles de magnétoscope ne se mettent pas en marche automatiquement Dans ce cas mettre en marche l alimentation manuellement et essayer l étape 2 Si la RM V700U ne peut pas commander le magnétoscope utiliser les commandes sur le ...

Page 78: ...FF pour trouver la fin de la séquence que vous voulez puis appuyer sur IN OUT pour l enregistrer La valeur du compteur apparaît sous OUT sur l affichage La durée totale des séquences enregistrées est affichée en bas de l écran ENREGISTRER DES SEQUENCES SUPPLEMENTAIRES 4 Reprendre les étapes 2 et 3 pour chaque séquence supplémentaire jusqu à 8 FAIRE DES CORRECTIONS 5 Appuyer sur CANCEL pendant les ...

Page 79: ...e toutes les séquences sélectionnées ont été copiées le camescope et le magnétoscope passent en mode d arrêt d image ou de pause Appuyer sur STOP sur les deux appareils REMARQUES Si vous effectuez l étape 1C de la page 33 maintenir la télécommande pointée vers le magnétoscope pendant le montage L affichage sur écran apparaît seulement pendant que le camescope cherche la séquence suivante Pour fair...

Page 80: ...visionner la bande enregistrée et appuyer sur PAUSE exactement au point où la nouvelle séquence doit commencer PASSER EN MODE D INSERTION 5 Tout en maintenant pressée INSERT appuyer sur PAUSE Le mode d insertion est engagé et la scène visée par le camescope apparaît sur l écran LANCER L INSERTION VIDEO 6 Appuyer sur marche arrêt d enregistrement Lorsque le compteur passe par 0 00 00 l insertion s ...

Page 81: ... remplacer appuyer sur PLAY pour visionner la bande enregistrée et appuyer sur PAUSE exactement au point où le doublage audio doit commencer PASSER EN MODE D ATTENTE DE DOUBLAGE AUDIO 2 Tout en maintenant pressée A DUB appuyer sur PAUSE LANCER LE DOUBLAGE AUDIO 3 Appuyer sur PLAY Lorsque le compteur passe par 0 00 00 le doublage audio s arrête automatiquement et le camescope passe en mode de lectu...

Page 82: ... NETTOYER L EXTERIEUR 1 Essuyer doucement avec un chiffon doux NETTOYER L OBJECTIF 2 Souffler avec une brosse soufflante puis essuyer gentiment avec du papier de nettoyage d objectif RETIRER L OCULAIRE 3 Tourner l oculaire dans le sens inverse des aiguilles d une montre et le retirer NETTOYER LE VISEUR 4 Retirer la poussière avec une brosse soufflante REMONTER L OCULAIRE 5 Aligner les repères refi...

Page 83: ...n remplacement des têtes C est normal DEFILEMENT DE LA BANDE La bande s arrête en avance rapide ou en rembobinage L avance rapide ou le rembobinage ne peut pas être effectué La fonction mémoire de compteur a été activée Z P 31 La bande est déjà complètement enroulée sur une bobine ou sur l autre AUTRE La cassette ne peut pas être éjectée Certaines fonctions ne sont pas disponibles Des lignes verti...

Page 84: ...TAKE R Z p 15 Touche d avance rapide FF Z p 30 Touche de retouche RETAKE F Z p 15 Touche R A EDIT CANCEL Z p 34 Touche d arrêt STOP Z p 30 Touche de lecture pause PLAY PAUSE Z p 30 q Interrupteur indicateur d alimentation POWER Z p 10 w Touche de marche arrêt d enregistrement Z p 12 e Sélecteur de fonctionnement de la torche LIGHT ON AUTO OFF GR AX710 AX650 seulement Z p 18 Connecteurs r Prise de ...

Page 85: ...itres immédiats Z p 25 q Date Heure Caractères Z p 23 w Durée du retardateur et de l animation Z p 26 Indications dans le viseur 1 2 Indicateur PROGRAM AE Z p 16 Affiché en 2 pendant 3 secondes environ quand la molette de sélection PROGRAM AE est commutée d une position à l autre Puis seul l indicateur reste en 1 3 Mise au point Z p 20 4 Indicateur de balance des blancs Z p 17 5 Indicateur de Zoom...

Page 86: ...ette p 11 L Lecture p 30 M Marquage de code d indexation p 15 Mémoire de compteur p 31 Mémorisation de la mise au point p 20 Mise au point automatique p 20 Mise au point manuelle p 21 Mode automatique libre p 16 Mode cinémascope p 19 Mode d ambiance réelle p 16 Mode d effet neutre p 16 Mode obturateur à grande vitesse p 16 Mode sepia p 16 Mode sports p 16 Mode verrouillage automatique p 16 Mode vo...

Page 87: ...Le fonctionnement 0 C à 40 C Le stockage 10 C à 30 C REMARQUES La durée de charge est basée sur une température ambiante de 20 C Plus la température est basse plus longue est la durée de recharge PRECAUTIONS A OBSERVER ATTENTION DANGER Torche vidéo La torche vidéo et l ampoule deviennent très chaudes Pendant l utilisation et immédiatement après avoir éteint ne pas les toucher sinon de sérieuses br...

Page 88: ... cuisson dans des endroits soumis à des chocs ou vibrations excessifs près d un téléviseur près d appareils générant des champs magnétiques ou électriques puissants haut parleurs antennes de diffusion etc dans des endroits soumis à des températures très élevées plus de 40 C ou très basses inférieures à 0 C PRECAUTIONS A OBSERVER suite 3 NE PAS laisser l appareil dans des endroits à plus de 50 C da...

Page 89: ...ms asymétrique via le connecteur de sortie VIDEO AUDIO Sortie 8 dBs 1 kohm via le connecteur de sortie AUDIO ADAPTATEUR SECTEUR CHARGEUR DE BATTERIE AA V11EG Alimentation Etats Unis et Canada CA 120V 60 Hz Autres pays CA 110 240 V 50 60 Hz Consommation 23 watts Sortie CHARGE CC 8 5 V 1 3 A camescope CC 6 3 V 1 8 A Système de charge Courant constant détection de crête contrôlé par minuterie Dimensi...

Page 90: ...MEMO ...

Page 91: ...MEMO ...

Page 92: ...GR AX710 AX650 AX510 COPYRIGHT 1995 VICTOR COMPANY OF JAPAN LTD U C Printed in Japan 0196MKV UN VP VICTOR COMPANY OF JAPAN LIMITED ...

Reviews: