Digital Video Cassette Technology
54
4.
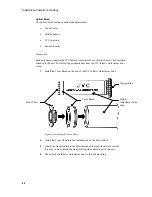
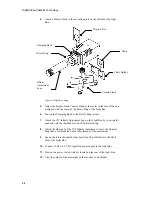
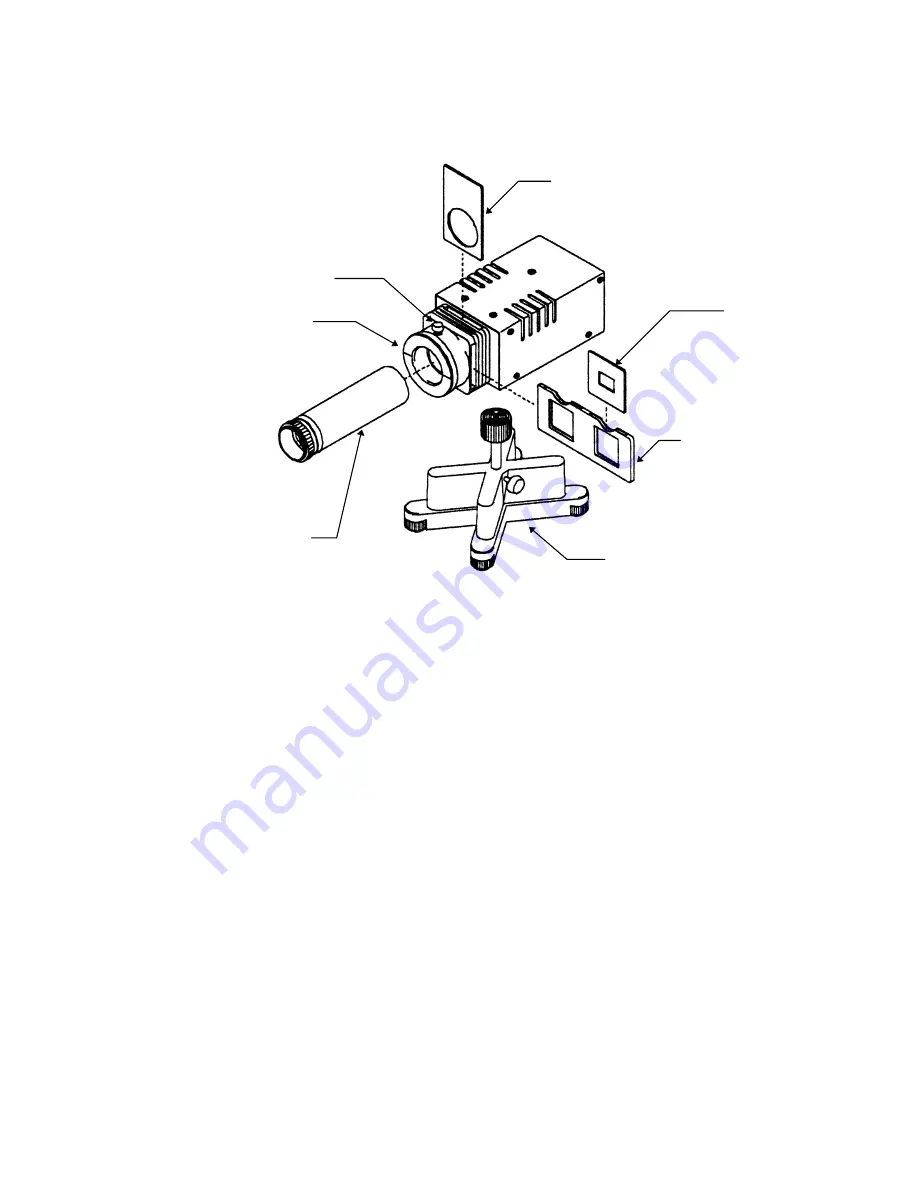
Attach a Camera Stand to the mounting plate on the bottom of the Light
Box.
Figure 91 Light Box Setup
5.
Adjust the height of each Camera Stand so the center of the lens of the unit
is aligned with the center of the Rotary Ring of the Light Box.
6.
Loosen the Clamping Knob so the Rotary Ring is loose.
7.
Attach the JVC Infinity Adjustment Lens to the Light Box by screwing the
open end onto the threaded section of the Rotary Ring.
8.
Attach the other end of the JVC Infinity Adjustment Lens to the Adapter
Ring that is still mounted on the filter threads of the camera lens.
9.
Load a chart into the chart holder. Insert the Chart Holder into the Chart
Slot of the Light Box.
10.
Connect a 12.0
±
0.2 VDC regulated power supply to the Light Box.
11.
Turn on the power switch which is located on the rear of the Light Box.
12.
View the output of the camcorder on the monitor or viewfinder.
Slip-in Filter
Chart
Clamping Knob
Rotary Ring
Infinity
Adjustment
Lens
Camera Stand
Chart Holder


