background image

13

DANGER

• The video light can become

extremely hot.
Do not touch it either while in
operation or soon after turning it
off, otherwise serious injury may result.

• Do not place the camcorder into the carrying case

immediately after using the video light, since it
remains extremely hot for some time.

• When operating, keep a distance of about 30 cm

between the video light and people or objects.

• Do not use near flammable or explosive materi-

als.

• It is recommended that you consult your nearest

JVC dealer for replacing the video light.

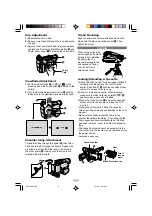
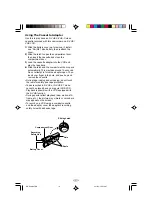
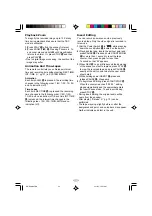
OFF (no indication)

AUTO (         )

ON (      )

Video Light

To brighten the scene when natural lighting is too
dim.
Pressing LIGHT 

#

 changes the Video Light mode

sequentially as shown below.

OFF : Turns off the light.
AUTO: Automatically turns on the light when the

camcorder senses insufficient lighting on
the subject.

ON

: Always keeps the light on as long as the

camcorder is turned on.

• It is recommended to set M.W.B. (

 pg. 19) to

 in CAMERA MENU when you use the video

light.

• Even if the battery indicator (

) does not blink

if the battery pack’s charge is low, the camcorder
may turn off automatically when you turn on the
video light, or when you start recording with the
video light turned on.

• When the Video Light mode is set to “AUTO”:

• Depending on the lighting conditions, the video

light may keep turning on and off. Press LIGHT

#

 repeatedly until “ON” or “OFF” is selected as

required.

• While the “Sports” or “High Speed Shutter” mode

is engaged, the light is likely to stay on. While
the “Twilight” mode is engaged, the light will not
activate. (

 pg. 24, “Programme AE with

Special Effects”)

Zooming

To produce the zoom in/out effect. Digital circuitry
extends the maximum magnification offered by
optical zoom. This system is called Digital Zoom.
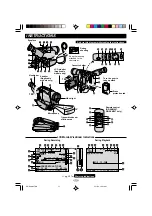
• Slide the Power Zoom Lever 

3

 towards “T” to

zoom in, or “W” to zoom out.

• The further you slide the Power Zoom Lever 

3

,

the quicker the zoom action.

• Focusing may become unstable during Zooming.

In this case, set the zoom while in Record–
Standby, lock the focus by using the manual focus
(


pg. 12,


“Auto/Manual Focus”), then zoom in

or out in Record mode.

• The zoom level indicator 

8

-

 moves during

zoom. Once the zoom level indiator 

8

-

reaches the top, all magnification from that point
is through digital processing.

• When using Digital Zoom, the quality of image

may suffer. To deactivate Digital Zoom, set
“D.ZOOM” (

 pg. 20) to “OFF” in SYSTEM

MENU.

• Digital zoom cannot be used when the “VIDEO

ECHO” mode (

 pg. 24, “Digital Effects”) is

activated.

Quick Review

To check the end of the last recording.
1) Make sure the camcorder is in the Record–

Standby mode.

2) Press 

2


e

 and release quickly.

Tape is rewound for approx. 1 second and
played back automatically, then pauses in
Record–Standby mode for the next shot.

• Distortion may occur at the start of playback. This

is normal.

Retake

To re-record certain segments.
1) Make sure the camcorder is in the Record–

Standby mode.

2) Press and hold either RETAKE 

*

 or 

e

 to reach

the start point for new recording. Pressing 

3

*

 forwards the tape and pressing 

2


e

reverses it.

3) Press the Recording Start/Stop Button 

0

 to

start recording.

• Noise bars appear and pictures may become

monochrome or darken during Retake. This is
normal.

GR-SXM967-EN

3/11/03, 10:33 AM

13

Summary of Contents for GR-SX897

Page 1: ... This takes you directly to the demo mode s Setting Menu so you will not have to go through the main Menu Screen Rotate the MENU Wheel 1 to select OFF and press it NOTES When a tape whose Erase Protection tab is in the position that allows recording is loaded in the camcorder demonstration is not available If you do not detach the Lens Cap you cannot see the actual changes of the Automatic Demonst...

Page 2: ...f the camcorder provided cables may be equipped with one or more core filter If a cable has only one core filter the end that is closest to the filter should be connected to the camcorder Shoulder Strap AP V13U or AP V11U Remote Control Unit RM V715U GR SXM967 SXM367 only AAA R03 Battery x 2 for Remote Control Unit GR SXM967 SXM367 only GR SXM967 EN 3 11 03 10 33 AM 2 ...

Page 3: ...k with your local solid waste officials for details in your area for recycling options or proper disposal CAUTIONS This camcorder is designed to be used with NTSC type color television signals It cannot be used for playback with a television of a different standard However live recording and LCD monitor viewfinder playback are possible anywhere Use the JVC BN V11U V12U V20U V400U battery packs and...

Page 4: ...ETY INSTRUCTIONS 1 Read these instructions 2 Keep these instructions 3 Heed all warnings 4 Follow all instructions 5 Do not use this apparatus near water 6 Clean only with dry cloth 7 Do not block any ventilation openings Install in accordance with the manufacturer s instructions 8 Do not install near any heat sources such as radiators heat registers stoves or other apparatus including amplifiers ...

Page 5: ...one Effect pg 24 Mosaic Effect pg 24 N ND Effect Mode pg 24 Nega Posi Mode pg 24 Night Alive pg 23 P Picture Stabiliser pg 18 Playback pg 11 Playback Special Effects pg 14 Playback Zoom pg 26 Programme AE with Special Effects pg 24 Provided Accessories pg 2 Q Quick Review pg 13 R Recording Advanced Features pg 23 24 Recording Start Stop pg 11 Recording Format S VHS S VHS ET pg 20 Recording Mode pg...

Page 6: ...ry pack USING THE BATTERY PACK Perform step 1 of CHARGING THE BATTERY PACK Approximate recording time unit min 1When using GR SXM967 SXM767 2When using GR SXM367 SXM767 2When using GR SX897 when the video light is on Battery pack BN V11U BN V12U optional BN V20U optional BN V400U optional LCD monitor on 1 2 75 75 40 40 75 75 40 40 120 125 70 75 285 300 180 180 USING AC POWER Connect the AC Adapter...

Page 7: ...wer Adapter Charger you can charge the BN V11U V12U V20U V400U battery pack without the camcorder However it cannot be used as an AC adapter To avoid interference with reception do not use the AC Adapter near a radio Recording time is reduced significantly when Zoom or Record Standby mode is engaged repeatedly or the LCD monitor is used repeat edly Before extended use it is recommended that you pr...

Page 8: ...settes have removable tabs If the tab has been removed cover the hole with adhesive tape The cassette holder cannot be opened while the camcorder is in the record mode or detached from the power source Applicable models only Tripod Mounting Align the screw and camera direction stud on the tripod with the tripod mounting socket Q Then tighten the screw CAUTION When using a tripod be sure to open an...

Page 9: ... a d P s R Y I E T U 30 30 5 m CONTROLS CONNECTORS AND INDICATORS Eyepiece During shooting Refer to this diagram while reading the instructions Keep the lens cap attached to the camcorder Cassette holder Turn the gear to take up slack Erase protection tab LCD monitor Applicable models only Video light Microphone During Recording During Playback Viewfinder Speaker Applicable models only pg 25 for W...

Page 10: ...ME Button pg 26 ANIM Button pg 26 O START STOP Button Functions the same as 0 P FF Button Functions the same as a PAUSE Button pg 11 s A DUB Button pg 26 d INT TIME Button pg 26 SELF TIMER Button non functional 1 Tape Remaining Time pg 21 2 Recording Mode Indicator pg 20 3 Video Light Indicator pg 13 4 Backlight Compensation Indicator pg 12 5 Recording Format Indicator S S ET pg 20 6 Digital Effec...

Page 11: ...ssing down the Lock Button located on the switch To start playback press 4 6 or R To stop playback temporarily Still Playback press 4 6 or a To stop playback press 5 r Press 2 e to rewind or 3 to fast forward the tape High speed picture search Shuttle Search is possible by pressing 2 e or 3 during playback holding 2 e or 3 down during playback continues search until released To resume normal playb...

Page 12: ... by pressing 5SEC REC 2 Backlight Compensation To quickly increase the brightness of the subject relative to the background 1 Press BACK LIGHT r during recording is displayed and the subject is brightened 2 To cancel Backlight Compensation press BACK LIGHT r again disappears and the brightness returns to the previous level Backlight Compensation functions in both recording modes or Using BACK LIGH...

Page 13: ...ode is engaged the light will not activate pg 24 Programme AE with Special Effects Zooming To produce the zoom in out effect Digital circuitry extends the maximum magnification offered by optical zoom This system is called Digital Zoom Slide the Power Zoom Lever 3 towards T to zoom in or W to zoom out The further you slide the Power Zoom Lever 3 the quicker the zoom action Focusing may become unst...

Page 14: ...a few seconds before TBC actually starts working The picture may be distorted if the TBC mode is activated or deactivated at the edit in out points or when normal playback resumes after Still Playback or Shuttle Search pg 11 If the playback picture is distorted when TBC is set to on turn off TBC Counter Memory Makes it easier to locate a specific tape segment 1 Press COUNTER R M w and hold for mor...

Page 15: ...ervice Conter described on the sheet included in the package for details on its availability Make sure to connect the end with a core filter to the camcorder The core filter reduces interference Tape Dubbing 1 Connect the camcorder and the VCR Connections To A TV VCR Set the Power Switch to PLAY while pressing down the Lock Button located on the switch turn on the VCR s power and insert the approp...

Page 16: ...t attempt to force the adapter open Then insert your finger in the hole and push up and remove the cassette During tape loading and unloading do not touch the reels for safety and tape protection Tapes recorded in S VHS or S VHS ET mode cannot be played back on a regular VHS VCR Playback is possible with a VCR equipped with the S VHS function During special effect playback slow motion still frame ...

Page 17: ... 180 180 90 90 o p Q W O a d P s R Y I E T U 30 30 5 m Eyepiece During shooting Refer to this diagram while reading the instructions Keep the lens cap attached to the camcorder Cassette holder Turn the gear to take up slack Erase protection tab LCD monitor Applicable models only Video light Microphone During Recording During Playback Viewfinder Speaker Applicable models only pg 25 for Warning Indi...

Page 18: ...t 4NEXT and press it To return to CAMERA MENU from page 2 of SYSTEM MENU rotate the MENU Wheel 1 to select 4TO CAMERA MENU and press it CAMERA MENU EXPOSURE Manual exposure adjustment is recommended in the following situations When shooting using reverse lighting or when the background is too bright When shooting on a reflective natural background such as at the beach or when skiing When the backg...

Page 19: ...is turned off or the battery removed White balance cannot be used when the SEPIA or MONOTONE mode pg 24 Digital Effects is activated TITLE Allows you to superimpose one of eight preset titles shows the selected title which remains until OFF is selected TITLE SETUP Adjust the settings for TITLE SIZE When LARGE is selected the title is twice enlarged vertically more than selected NORMAL Even if LARG...

Page 20: ...cords in S VHS With a VHS cassette S ET appears and the camcorder records with S VHS picture quality which is called Super VHS ET Expansion Technology S VHS REC appears during recording OFF Records in VHS on a VHS or S VHS cassette JVC EHG Extra High Grade tapes are recommended for superior results Use S VHS tape for storing recordings for an extended period or for recording important scenes as it...

Page 21: ...mation REC MODE should be set to SP Select the desired recording time and press the Recording Start Stop Button 0 after focusing on the subject The remote control can also be used for this setting pg 26 Animation And Time Lapse Fade or wipe in out cannot be performed This function is cancelled when the power is shut off or when the cassette is ejected To use this function it is recommended that SC...

Page 22: ...ic Demonstration activated on the LCD monitor or viewfinder Applicable models only DATE TIME Allows you to set the current date and time pg 7 LCD BRIGHT To adjust the brightness of the LCD monitor perform the following steps quickly within approx 1 second by each interval 1 Select LCD BRIGHT in SYSTEM MENU The BRIGHT ON message appears 2 Press the BRIGHT Wheel 1 in to return to normal screen 3 Rot...

Page 23: ...ade or wipe out works at recording end 1 Set the Power Switch to while pressing down the Lock Button located on the switch 2 Press FADE WIPE w repeatedly until the desired mode appears 3 Press the Recording Start Stop Button 0 to activate fade in out or wipe in out Pressing and holding the Recording Start Stop Button 0 allows you to vary the length for the image during fade in out or wipe in out T...

Page 24: ...s slightly dark Use in well lit situations Digital Effects 1 Set the Power Switch to while pressing down the Lock Button located on the switch 2 Press DIGIFECT repeatedly until the desired mode appears To cancel the effect press DIGIFECT repeatedly until OFF appears This function cannot be activated during Night Alive pg 23 Picture Stabiliser pg 18 cannot be activated during the CLASSIC FILM STROB...

Page 25: ...rding Start Stop Button on the camcorder Retake forward pg 13 Time Lapse pg 26 With the camcorder s Power Switch set to Zoom in out pg 26 Playback start pg 11 Rewind Reverse Shuttle Search pg 11 Stop pg 11 Insert Editing pg 26 Fast Forward Forward Shuttle Search pg 11 Pause pg 11 Audio dubbing pg 27 RM V715U This function is unavailable with this camcorder USING THE REMOTE CONTROL UNIT GR SXM967 G...

Page 26: ...You can record a new scene onto a previously recorded tape Only the video signal is recorded in this mode 1 Set the Power Switch to while pressing down the Lock Button located on the switch 2 Play back the tape locate the edit out point and press PAUSE a Press and hold COUNTER R M w for more than 1 second to reset the tape counter then press it again for less than 1 second so that M appears 3 Pres...

Page 27: ...dio Dubbing stops automatically and the camcorder enters the Audio Dub Standby mode To end Audio Dubbing press STOP Y Do not press REW T or FF P during Audio Dub Standby or the edit points will not be accurate If the microphone is too close to the TV or if the TV s volume is too high whistling or howling may occur For Insert Editing Audio Dubbing Insert Editing and Audio Dubbing may not work corre...

Page 28: ...for 5 seconds after power is turned on if the lens cap is attached CONDENSATION OPERATION PAUSED PLEASE WAIT These 2 warnings appear alternately every 3 seconds if condensation occurs In this case all functions except tape eject and power on off are disabled Remove the tape turn the unit off without removing the power supply wait a few minutes for the warnings to clear and turn it on again HEAD CL...

Page 29: ...metallic objects when not in use allow inflammables water or metallic objects to enter the unit remove the battery pack or disconnect the power supply while the power is on leave the battery pack attached when the camcorder is not in use CAUTIONS Video Light DANGER The video light becomes extremely hot Do not touch it either while in operation or soon after turning it off otherwise serious injury ...

Page 30: ...ng the shoulder strap LCD Monitor for applicable models 1 To prevent damage to the LCD monitor DO NOT push it strongly or apply any shocks place the camcorder with the LCD monitor on the bottom 2 To prolong service life avoid rubbing it with coarse cloth 3 Be aware of the following phenomena for LCD monitor use These are not malfunctions While using the camcorder the surface around the LCD monitor...

Page 31: ... Approx 840 g 1 9 lbs GR SXM367 SXM267 only Approx 760 g 1 7 lbs GR SX897 only Dimensions 113 mm x 117 mm x 199 mm W x H x D GR SXM967 SXM767 SXM367 SXM267 only 108 mm x 117 mm x 199 mm GR SX897 only with the LCD monitor closed and with the viewfinder fully tilted downward Applicable models only Pickup 1 6 format CCD Lens F1 6 f 2 7 mm to 43 2 mm 16 1 power zoom lens with auto iris and macro contr...

Page 32: ... for SP mode unless otherwise indicated E O E Design and specifications subject to change without notice Optional Accessories Battery Packs BN V12U BN V20U BN V400U Compact S VHS Cassettes ST C 40 30 20 Compact VHS Cassettes TC 40 30 20 Cassette Adapter C P7U AC Adapter Power requirement AC 110 V 240 V 50 Hz 60 Hz Output DC 11 V 1 A GR SXM967 EN 3 11 03 10 33 AM 32 ...

Reviews: