33
IMPORT
ANT!
PREP
ARE
USE
SETTINGS
TROUBLE?
When “Auto” is selected in Zoom, the aspect ratio will turn to the ratio obtained from the information the TV
received.
The aspect ratio will turn to the ratio obtained from WSS (Wide Screen Identification Signal), video signal, or
control signal of the external devices. Without receiving the aspect information, it will be the setting in “4:3 Auto
Aspect” (P. 24)
Not available in PC mode.
Auto in “Zoom”
Some digital channels are broadcasted with “Dolby Digital” signals.
In these cases, “Dolby Digital” signals can be output from the “DIGITAL AUDIO OUT” terminal.
1. Connect an audio system with a “Dolby Digital” decoder. (P. 9)
2. Change the “Digital Audio Output” setting from “PCM” to “Dolby Digital”. (P. 26)
When changing the setting, the message “Dolby Digital selected! No analogue audio available.” may be
displayed for a few seconds.
Each time the channel is changed to a channel that is broadcast with “Dolby Digital” signals, the message
“Dolby Digital selected! No analogue audio available.” may be displayed for a few seconds.
Even if “Dolby Digital” is set, “linear PCM” signals will be output by a channel that is not broadcast with “Dolby
Digital” signals.
Set the audio system so that it is compatible with both “Dolby Digital” and “linear PCM”. (For details, refer to
the audio system instruction manual.)
When you want to temporarily change the setting from “Dolby Digital” to “PCM”, change with the “Audio
Selection” menu (P. 19).
Set “Digital Audio Output” to “PCM” in the following cases.
The sound of a channel broadcast with “Dolby Digital” signals cannot be heard even when “Dolby
Digital” is set.
When listening with the TV speakers.
When listening with an audio system that does not have a “Dolby Digital” decoder.
When listening with an audio system that is connected to the “AUDIO OUT” terminal.
When recording a programme.
If a language with “Dolby” is selected when “Dolby” is displayed in the “Audio Selection” menu
(P. 19), the “Digital Audio Output” setting can be temporarily changed from “PCM” to “Dolby Digital”.
A message recommending you to change the “Digital Audio Output” setting to “Dolby Digital” is displayed for a
few seconds.
If you want to record a “Dolby Digital” signal using timer-record (P. 18), change the “timer-record
setting” from “PCM / Analogue” to “Dolby Digital”. However, if the setting is changed to “Dolby Digital”,
you cannot record analogue sound with a recording device that is connected to the EXT-2 terminal.
“Dolby” and the double-D symbol are trademarks of Dolby Laboratories.
“Dolby Digital” output from the “DIGITAL AUDIO OUT” terminal
Digital channels that cannot be watched on this TV
If a digital channel service uses new formats (such as DVB-H or MPEG4, etc.), or MHP, it cannot be watched even
though the channel name appears.
If the channel is selected, the picture will not appear and audio cannot be heard.
You can delete these channels by using the “Delete” in the “Edit PR”
“Editing digital channels” (P. 28)
“T-V LINK” allows the TV to share information easily with a connected “T-V LINK” compatible device.
By using T-V LINK :
You can send the channel information programmed on the TV to the “T-V LINK” compatible device, so that
both the TV and the external device have the same channel settings. When connecting a new external device,
channel information is loaded into it, allowing channel setup to be completed very quickly. For more details, refer
to the external device’s manual.
You can easily record the TV programme you are viewing on a “T-V LINK” compatible device by using the
“DIRECT REC” feature. For more details, refer to the external device’s manual.
If the signal doesn’t appear, check that the vertical
frequency on the PC is set to “60Hz”.
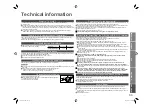
Technical information
Some cable companies transmit a signal called “ACI” which contains information that allows TV channels to be
registered automatically on your TV.
When an ACI signal is received, “ACI Start / ACI Skip” appears in the “Auto Program” screen.
Connect a “DVI“ device to “EXT-5 (HDMI)” using “DVI-HDMI” conversion cable. Connect analogue sound output of
the DVI device to L and R terminals in AUDIO (ANALOGUE).
Set “Audio” in “HDMI Setting” to “Analogue” or “Auto” (P. 22)
EXT-6 input does not support analogue sound.
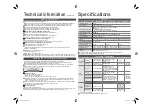
Resolution
640 x 480 (VGA) 1024 x 768 (XGA)
Vertical frequency (Hz)
60.0
60.0
What is “T-V LINK”?
What is “ACI” (Automatic Channel Installation)?
PC Signals that can be displayed
Connect “DVI” devices
When using an indoor aerial which needs external power, set “Antenna Power” to “On” during “Initial settings” (P. 10).
The TV will supply DC 5V, 50mA (max) from the aerial socket through the cable to the aerial.
Supplying power to outdoor and indoor aerials which does not need external power, may cause damage to the
aerial. If you are uncertain whether the aerial needs external power, select “Off”.
Connect the aerial directly to the TV. When a recording device is connected between the aerial and the TV,
power cannot be supplied to the aerial.
Power is supplied to the aerial only when the TV is on.
To change the setting after “Initial settings” is complete “Antenna Power” (P. 26)
Power supply for the indoor aerial
Fuse
Attach a new plug following the steps below. If in doubt, contact your local retailer.
Never connect to the larger terminal marked with an “E”, the safety earth symbol “ ” or coloured green or green-
and-yellow.
The wires in the mains lead on this product are coloured with the following code:
· Blue: Neutral wire (connect to the black terminal, or one marked “N”)
· Brown: Live wire (connect to the red terminal, or one marked “L”)
Open the plug as illustrated on the right.
When replacing the fuse, always use a correctly rated and approved type and
re-fit the fuse cover when finished.
If in doubt, contact your local retailer.
If you accidentally cut the power cord
Change the fuse in the plug
Important
LCT2235-002A-Af.indb 33
LCT2235-002A-Af.indb 33
6/29/2007 5:00:23 PM
6/29/2007 5:00:23 PM


