background image

Page 9

January 15, 2004 10:38 am

— 9 —

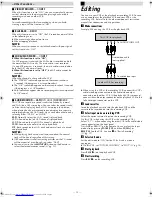
Setting channels manually
— Manual Channel Set

You can add the channels you want or delete the channels you do 
not want manually.

A

Access Main Menu screen, then Tuner 
Set screen

Press 

MENU

 on the Remote. Press 

rt

 to 

move the highlight bar (arrow) to “TUNER 
SET”, then press 

OK

 or 

e

.

B

Access Manual Channel Set screen

Press 

rt

 to move the highlight bar 

(arrow) to “MANUAL CHANNEL SET”, 
then press 

OK

 or 

e

.

C

Add or skip desired channels

To add channels

A

Press the 

Number keys

 on the Remote 

to input a channel number you want to 
add.

B

Press 

OK

 or 

e

 to set to “ADD”.

C

Repeat 

A

 to 

B

 to add other channels. 

Press 

MENU

 to return to normal screen.

To skip channels

A

Press 

rt

 or the 

Number keys

 to select a channel number you 

want to skip.

B

Press 

OK

 or 

e

 to set to “SKIP”.

C

Repeat 

A

 and 

B

 to skip other channels. Press 

MENU

 to return 

to normal screen. 

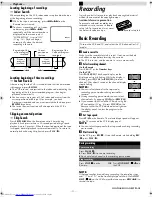
Playback

Basic Playback

A

Load a cassette

Make sure the window side is up, the rear label side is facing you 
and the arrow on the front of the cassette is pointing towards the 
VCR.

Do not apply too much pressure when inserting.

The VCR turns on, and the counter on the on-screen display is 
reset, automatically.

If the cassette’s record safety tab has been removed, playback 
begins automatically.

B

Start playback

Press 

PLAY

 (

4

).

After a power failure occurs, band selection will be reset to 
“CATV”.

MAIN MENU

FUNCTION SET

TUNER SET

INITIAL SET


PRESS (   ,   ), THEN (OK)
PRESS (MENU) TO END

TUNER SET

BAND

CATV

AUTO CHANNEL SET

MANUAL CHANNEL SET

SELECT WITH (   ,   ) AND (OK)

PRESS (MENU) TO END

MANUAL CHANNEL SET

(CATV)

CH    45  ADD

PRESS NUMBER KEY (0–9)

OR (   ,   ), THEN (OK)

PRESS (MENU) TO END

Turn on the VCR and TV, and select the VCR channel (or AV 
mode).

During playback

Stop playback

Press 

STOP

 (

8

) on the 

Remote.

OR

Press 

STOP/EJECT

 (

0

) on 

the VCR.

Pause playback and view still picture

Press 

PAUSE

 (

9

).

Press 

PLAY

 (

4

) to resume normal playback.

NOTE:

During still picture, vertical vibration may appear on the TV 
screen. Use 

CH

r

/

t

 on the Remote to get a clearer picture.

Pause and Frame-by-Frame playback

Press 

PAUSE

 (

9

) to pause, then press 

6

 (or 

PAUSE

 (

9

)) 

repeatedly.

Press 

PLAY

 (

4

) to resume normal playback.

High-Speed Picture Search

Press 

REW

 (

3

) or 

FF

 (

5

).

Press 

PLAY

 (

4

) to resume normal playback

If you press and hold 

REW

 (

3

) or 

FF

 (

5

) for more than 2 

seconds, simply releasing it cancels the picture search, and 
normal playback resumes.

Variable-Speed Picture Search (including slow-motion)

Press 

2

 or 

6

 repeatedly.

Press 

PLAY

 (

4

) to resume normal playback.

Each time you press 

2

 or 

6

, the playback speed 

changes. To decrease the speed during picture search, press the 
opposite direction button repeatedly.

During still picture, press and hold 

6

 to start forward slow 

motion playback (or 

2

 to start reverse slow motion 

playback). When you release the button, still picture resumes. 
During still picture, holding 

PAUSE

 (

9

) for more than 

2 seconds also starts forward slow motion playback. If you 
press 

PAUSE

 (

9

) again, still picture resumes.

NOTE:

During slow motion picture, some noise might appear on the TV 
screen. Press 

CH

r

/

t

 on the Remote to eliminate the noise.

REC

PAUSE

PLAY

STOP/EJECT

– Initial Settings –

CONTINUED ON NEXT PAGE

HR-J693U_EN-new.fm  Page 9  Thursday, January 15, 2004  10:38 AM

Summary of Contents for HR-J693U

Page 1: ...f the FCC Rules These limits are designed to provide reasonable protection against harmful interference in a residential installation This equipment generates uses and can radiate radio frequency energy and if not installed and used in accordance with the instructions may cause harmful interference to radio communications However there is no guarantee that interference will not occur in a particul...

Page 2: ... should be mounted to a wall or ceiling only as recommended by the manufacturer ANTENNA INSTALLATION INSTRUCTIONS 1 Outdoor Antenna Grounding If an outside antenna or cable system is connected to the product be sure the antenna or cable system is grounded so as to provide some protection against voltage surges and built up static charges Article 810 of the National Electrical Code ANSI NFPA 70 pro...

Page 3: ...rized substitutions may result in fire electric shock or other hazards 4 Safety Check Upon completion of any service or repairs to this product ask the service technician to perform safety checks to determine that the product is in safe operating condition How to use the Remote Before use insert the lithium battery CR2032 correctly with the plus side up into the battery compartment To open it pres...

Page 4: ...PAUSE PLAY STOP EJECT Display panel Timer mode indicator VCR mode indicator Play indicator Record indicator Channel and auxiliary input Clock timer Infrared beam receiving window VIDEO AUDIO input connectors Cassette loading slot AC power cord CONTINUED ON NEXT PAGE ...

Page 5: ...ecording mode A Channel and auxiliary input B Day and clock time C STEREO program indication D SAP indication E Audio monitor indications F Time counter G Index number H Tape position I Cassette mark J Tape speed K VCR operation mode L Timer warning display TIMER CANCEL B E CH125 RECORD THU 12 00 AM PAUSE STEREO WARNING SP SAP TIMER RECORDING TO START SOON CANCEL INDEX 1 NORM HI FI COUNT 1 23 45 A...

Page 6: ...l in your area ATTENTION If you use a cable box Plug Play will not function set the clock and tuner channels separately pg 7 8 To check the time press the DISPLAY button on the Remote or turn off the VCR What to do if Plug Play setting failed If an incorrect time is displayed on the display panel perform the Semi Auto Clock Set pg 8 or Manual Clock Set pg 8 procedure If appears on the display pane...

Page 7: ...e to view menus and some messages in English Spanish or French Press rt to move the highlight bar arrow to LANGUAGE then press OK or e repeatedly until the desired language is selected Press MENU to return to normal screen Clock Setting Perform clock setting only if the clock has not been set correctly by the Plug Play setting or if you use a cable box Preparations A Access Main Menu screen then I...

Page 8: ...e appears then press OK or e Set the date and year in the same way Holding rt changes the time in 30 minute intervals or changes the date in 15 day intervals B Select D S T mode Press OK or e to move the highlight bar to D S T then press rt to select the desired setting ON Adjustment will be made by the built in clock itself OFF Select when Daylight Saving Time does not apply to you C Start clock ...

Page 9: ... SET MANUAL CHANNEL SET SELECT WITH AND OK PRESS MENU TO END MANUAL CHANNEL SET CATV CH 45 ADD PRESS NUMBER KEY 0 9 OR THEN OK PRESS MENU TO END Turn on the VCR and TV and select the VCR channel or AV mode During playback Stop playback Press STOP 8 on the Remote OR Press STOP EJECT 0 on the VCR Pause playback and view still picture Press PAUSE 9 Press PLAY 4 to resume normal playback NOTE During s...

Page 10: ...ack NOTE The above indication appears when SUPERIMPOSE is set to ON pg 14 though the monitor sound changes in sequence Automatic operations after rewinding Next Function Memory The Next Function Memory tells the VCR what to do after rewinding is complete Ensure that the VCR is in stop mode For Automatic Playback Start Press REW 3 then press PLAY 4 within 2 seconds For Automatic Power Off Press REW...

Page 11: ...c Recording A Load a cassette Make sure the record safety tab is intact If not cover the hole with adhesive tape before inserting the cassette The VCR turns on and the counter is reset automatically B Select recording channel On the Remote Press CHr t or the Number keys On the VCR Press PAUSE CH The channel display on the display panel starts blinking While the display is blinking press FF CH or R...

Page 12: ...ailure occurs the VCR keeps your timer programs However the clock time channel settings and other menu settings are lost As a result when the power is supplied again to this VCR after the power failure this VCR starts the Plug Play setting automatically to restore the clock time and channel setting If the clock time and channel setting are restored correctly each timer program you have made will s...

Page 13: ... Example Program 1 you have just made and Program 4 overlap each other A Select program to modify Press rt then press OK or e You can only select one of the overlapping programs If you do not mind this overlap press PROG to finish the timer program setting The program starting earlier or program with the lower program number will be recorded B Cancel or change program setting To cancel a program p...

Page 14: ...s NOTE Select EDIT when you are editing tapes After you finish editing the tapes select back to the mode of your choice AUTO TIMER ON OFF When this function is set to ON The timer recording standby mode is automatically engaged when the VCR is turned off It is temporarily canceled when the VCR is turned on You do not have to press TIMER to engage or disengage the timer recording standby mode When ...

Page 15: ...Hi Fi channel is played back NORM Sound on the normal track is played back MIX Both sounds on the Hi Fi track and normal track are mixed and played back NOTES While playing back a monaural tape sounds on the normal track will be heard regardless of this setting If RF connection is used for viewing pictures on the TV sound will be monaural even though you select HI FI You can also use the A MONITOR...

Page 16: ...10 video cassette VIDEO AUDIO Signal system NTSC type color signal and EIA monochrome signal 525 lines 60 fields Recording Playback system DA 4 Double Azimuth head helical scan system Signal to noise ratio 45 dB Horizontal resolution 230 lines Frequency range Normal audio 70 Hz to 10 000 Hz Hi Fi audio 20 Hz to 20 000 Hz Input Output RCA connectors IN x 1 OUT x 1 TUNER Tuning system Frequency synt...

Reviews: