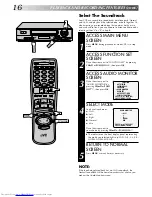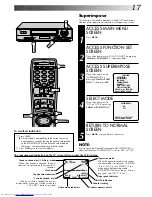
background image

18

5

/

8

£

3

2

q

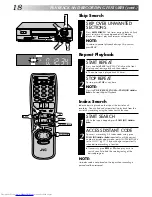
Skip Search

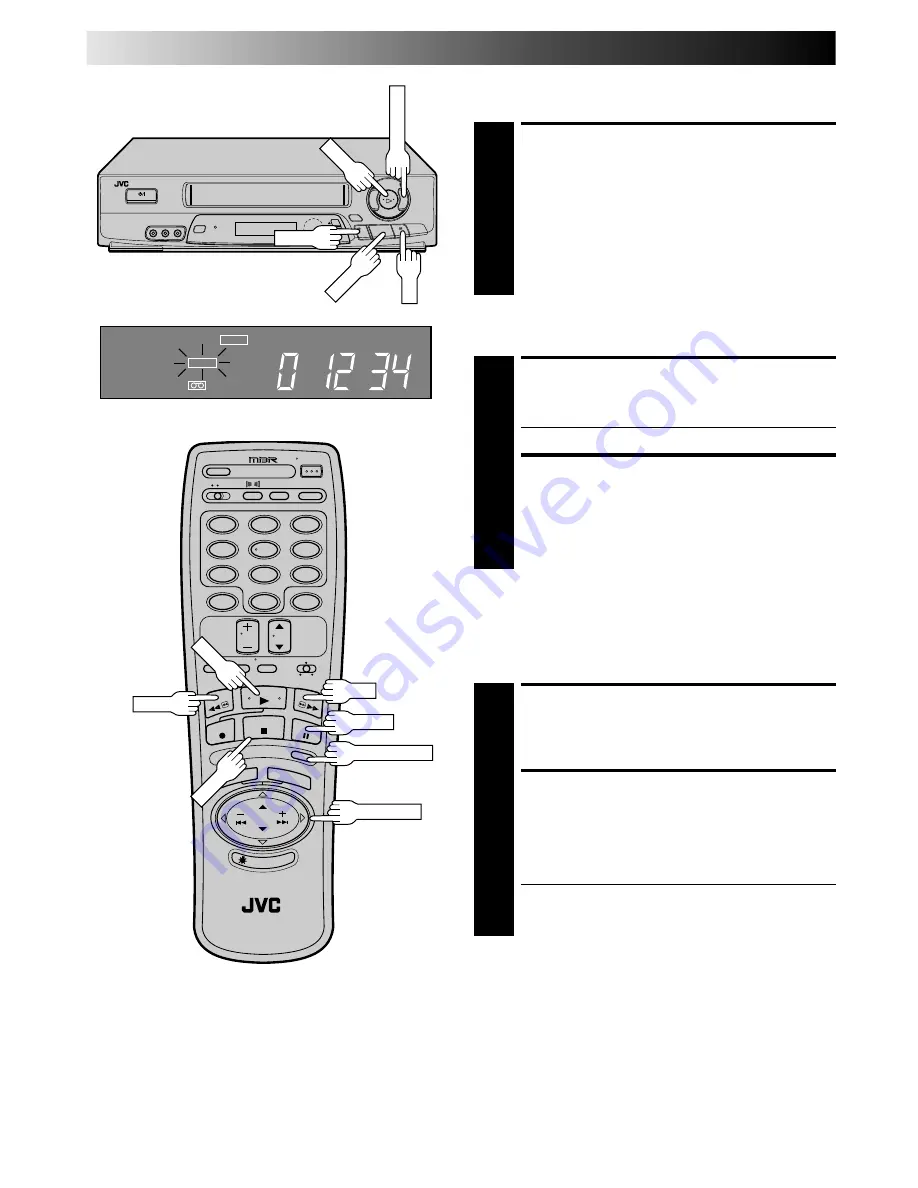
Repeat Playback

START REPEAT

1

Press and hold PLAY (until "PLAY" blinks on the front
display panel) during playback, then release.

The entire tape is played back 20 times.

STOP REPEAT

2

To stop, press STOP at any time.

NOTE:

Pressing PLAYREWFFPAUSE or PUSH JOG 

 or

£

 also stops Repeat Playback.

Index Search

Index codes are placed on the tape at the start of each
recording. You can find and automatically play back from the
start of any recording using the Index Search function.

SKIP OVER UNWANTED

SECTIONS

1

Press SKIP SEARCH 1 to 4 times during playback. Each
press initiates a 30-second period of fast- motion
playback. Normal playback resumes automatically.

NOTE:

To return to normal playback during a Skip Search,
press PLAY.

PLAYBACK AND RECORDING FEATURES (cont.)

START SEARCH

1

While the tape is stopped, press PUSH JOG 

 or

£

.

ACCESS DISTANT CODE

2

To access a recording 2–9 index codes away, press
PUSH JOG 

 or 

£

 repeatedly until the correct

number is displayed on screen (only if SUPERIMPOSE is
set to ON (

Z

 pg. 17). Playback begins automatically

when desired recording is located.

If necessary press REW or FF when play starts to
search visually to find the very beginning of the
desired program.

NOTE:

An index code is not placed on the tape when recording is
paused and then resumed.

FF

REW

PUSH JOG 

STOP

H

M

S

SP

PLAY

V C R

1

2

4

5

3

6

8

0

7

9

PAUSE

PLAY

FF 

REW

STOP

SKIP SEARCH

PLAY

PUSH JOG 

Summary of Contents for HR-J7004UM

Page 1: ...INSTRUCCIONES CH 5 8 POWER OK PLAY STOP EJECT REW FF SUPER LIVE SURROUND MENU VIDEO MONO L AUDIO R PUSH JOG 3 2 H M S SP AM PM R E C PLAY SAP ST TIMER PAUSE M V C R 8 4 0 6 10 20dB NORM L R q REC ILLUMI GUIDE SKIP SEARCH POWER ENTER C MEMORY PLAY STOP OSD ADD DAILY M F AUX C RESET CH SKIP CANCEL TV VOL CH DISPLAY TV VCR TV CABLE VCR TIMER WEEKLY A 1 2 4 5 3 6 8 0 7 9 B REW REC FF PAUSE MENU OK MUL...

Page 2: ...dure or feature The Index on pages 42 44 lists frequently used terms and the number of the first page on which they are used or explained in the manual This section also illustrates the controls and connections on the front and rear panel the front display panel and the remote control The Z mark signals a reference to another page for instructions or related information Operation buttons necessary...

Page 3: ... Basic Connections 4 INITIAL SETTINGS 5 Plug Play 5 Clock 6 Preparation 6 Language Select 6 Clock Setting 7 Tuner 8 Set Receivable Channels 8 Add Or Delete A Channel 10 SIMPLE PLAYBACK AND RECORDING 11 Simple Playback 11 Simple Recording 12 PLAYBACK AND RECORDING FEATURES 13 Playback Features 13 Still Picture 13 Slow Reverse Reverse Slow Or Fast Motion Picture 13 Manual Tracking 14 Super Live Surr...

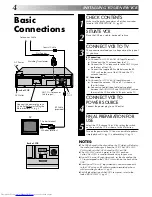
Page 4: ...nel 3 or 4 by setting the switch on the rear of the VCR as shown in the illustration Turn on the power to the TV You are now able to perform simple playback Z pg 11 and recording Z pg 12 NOTES The VCR channel is the channel on the TV which will display the audio and video signals from the VCR The VCR s CH3 CH4 switch sets the VCR channel to CH3 or CH4 The CH3 CH4 switch is preset to the CH3 positi...

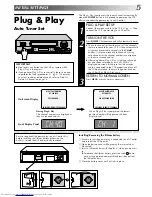
Page 5: ...ery otherwise the battery s service life will be drastically shortened A PLUG PLAY SETUP 1 Connect the antenna cable to the VCR Z pg 4 Then connect the VCR s power plug to an AC outlet TURN ON THE VCR 2 Press POWER The tuner channels will automatically be set The auto channel set function scans all the channels that are receivable by your VCR It then automatically assigns each receivable channels ...

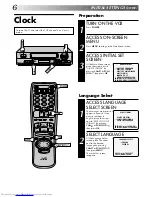
Page 6: ...SS LANGUAGE SELECT SCREEN 1 The messages are preset to appear in Spanish If you want to see them in English place the arrow next to SELECCION DE IDIOMA by pressing CH5 or PUSH JOG fi then press OK SELECT LANGUAGE 2 At the Language Select screen place the arrow next to the desired language by pressing CH5 or PUSH JOG fi then press MENU The Initial Set screen reappears MENU PRINCIPAL AJUSTE DE PROGR...

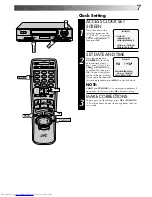
Page 7: ...et begins flashing When you re finished with this set up procedure press MENU to start the clock NOTE CH5 and PUSH JOG fi can be used to perform all operations In this case press OK after each setting MAKE CORRECTIONS 3 To change any of the settings press OK or PUSH JOG until the item you want to change blinks then set as in step 2 INITIAL SET CLOCK SET LANGUAGE SELECT SUPER LIVE SURROUND PRESS 5 ...

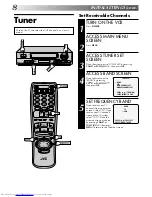
Page 8: ...NCY BAND 5 If you receive your TV channels from an external antenna select TV If you receive your TV channels from a cable TV system select CATV Place the arrow next to your choice by pressing CH5 or PUSH JOG fi then press MENU to return to the Tuner Set screen TUNER SET BAND AFC AUTO CHANNEL SET MANUAL CHANNEL SET PRESS 5 THEN OK PRESS MENU TO END Turn on the TV and select the VCR channel 3 or 4 ...

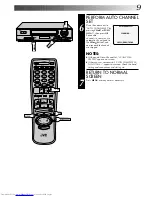
Page 9: ...matically assigned to the CH5 buttons and non receivable channels are skipped NOTES At the end of Auto Channel Set SCAN COM PLETED appears on screen If the scan was unsuccessful SCAN COMPLETED NO SIGNAL appears on screen Check the band setting and connections and start again RETURN TO NORMAL SCREEN 7 Press MENU as many times as necessary 1 2 4 5 3 6 8 0 7 9 5 8 3 2 q MENU OK MENU CH C H OK PUSH JO...

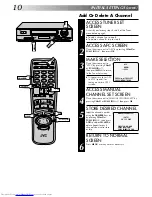
Page 10: ...uning on certain CATV systems ACCESS MANUAL CHANNEL SET SCREEN 4 Place the arrow next to MANUAL CHANNEL SET by pressing CH5 or PUSH JOG fi then press OK STORE DESIRED CHANNEL 5 Input the channel number using the NUMBER keys or by pressing CH5 or PUSH JOG fi then press ADD to add or CH SKIP to delete Repeat for each channel you want to store or skip RETURN TO NORMAL SCREEN 6 Press MENU as many time...

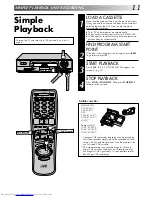
Page 11: ... PLAYBACK 4 Press STOP or STOP EJECT Then press STOP EJECT to remove the cassette Simple Playback Full Size VHS T 30 ST 30 T 60 ST 60 T 90 T 120 ST 120 T 160 ST 160 ST 210 Compact VHS TC 20 ST C20 TC 30 ST C30 TC 40 ST C40 Compact VHS camcorder recordings can be played on this video recorder Simply place the recorded cassette into a VHS Cassette Adapter and it can be used just like any full sized ...

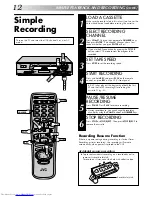
Page 12: ...irst SP and the first EP recording after inserting the cassette Z pg 23 PAUSE RESUME RECORDING 5 Press PAUSE Press PLAY to resume recording During record pause you can change the recording channel by using the CH5 buttons or NUMBER keys STOP RECORDING 6 Press STOP or STOP EJECT Then press STOP EJECT to remove the cassette Turn on the TV and select the VCR channel 3 or 4 or AV mode Recording Resume...

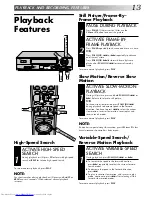
Page 13: ...everse play and reverse search modes To resume normal playback press PLAY NOTE If noise bars appear during slow motion press CH 5 or a few times to remove the noise bars from screen Variable Speed Search Reverse Motion Playback ACTIVATE VARIABLE SPEED SEARCH 1 During playback press PUSH JOG or To increase the speed in the forward direction press repeatedly to select the various forward search mode...

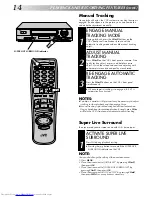
Page 14: ...aneously When automatic tracking is re engaged B E S T is automatically activated NOTES To obtain a noiseless still picture it may be necessary to adjust tracking in slow playback and then engage Pause Manual tracking is possible during hands free slow motion During hands free slow motion playback simply press CH5 or on the VCR s front panel or remote to adjust tracking Super Live Surround To enjo...

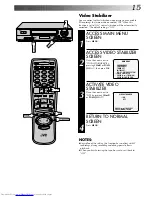
Page 15: ...pressing CH5 or PUSH JOG fi then press OK ACTIVATE VIDEO STABILIZER 3 Place the arrow next to ON by pressing CH5 or PUSH JOG fi RETURN TO NORMAL SCREEN 4 Press MENU NOTES Regardless of the setting this function has no effect with SP recordings during recording and during special effects playback When you finish viewing the tape be sure to set it back to OFF MENU C H OK CH MENU OK PUSH JOG MAIN MEN...

Page 16: ... pressing CH5 or PUSH JOG fi then press OK SELECT MODE 4 You have five choices a Hi Fi b Left c Right d Normal e Mix Place the arrow next to your choice by pressing CH5 or PUSH JOG fi The indicator on the front display panel representing the mode you selected lights up Hi Fi L R L L R R NORM NORM MIX L R RETURN TO NORMAL SCREEN 5 Press MENU as many times as necessary NOTE If the tape being played ...

Page 17: ...ton is pushed CH 125 RECORD THU 12 00 AM PAUSE SP INDEX 1 NORM MEMORY OFF HI FI COUNT 1 23 45 Tuned in channel or AUX iliary mode When the channel is changed the new channel is displayed on the screen for 5 seconds Clock time Tape position indicator Operation mode When the operation mode is changed the new mode is displayed RECORD 5 sec PLAY 5 sec FF REW 5 sec when engaged from Stop mode RECORD PA...

Page 18: ...d period of fast motion playback Normal playback resumes automatically NOTE To return to normal playback during a Skip Search press PLAY PLAYBACK AND RECORDING FEATURES cont START SEARCH 1 While the tape is stopped press PUSH JOG or ACCESS DISTANT CODE 2 To access a recording 2 9 index codes away press PUSH JOG or repeatedly until the correct number is displayed on screen only if SUPERIMPOSE is se...

Page 19: ...it will play the tape from the beginning It will not fast forward to an index code The Instant Review function will also operate if the VCR s power is on 5 8 3 2 q RESET COUNTER TO ZERO 1 Press C RESET NOTE By pressing the DISPLAY button you can change the display to show the counter reading channel number or clock time Channel number is not displayed during playback Counter Memory When activated ...

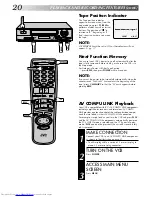
Page 20: ...r reads 0H00M00S instead of at the beginning of the tape press C MEMORY so that the M mark appears before pressing REW AV COMPU LINK Playback Your VCR is compatible with JVC s AV COMPU LINK components including amplifiers or receivers and televisions AV COMPU LINK provides one touch control of the audio and video compo nents that are linked via their AV COMPU LINK connectors For example simply loa...

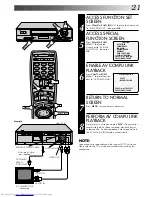
Page 21: ...s been removed playback begins automatically Linked components are turned on and the TV set to its VIDEO mode automatically NOTE Connection varies depending on the type of JVC TV you have Please refer to the TV s instruction manual when making this connection FUNCTION AUTO TIMER SUPERIMPOSE 2ND AUDIO AUDIO MONITOR AUX INPUT AUTO SP EP TIMER SPECIAL FUNCTION PRESS 5 THEN OK PRESS MENU TO END SPECIA...

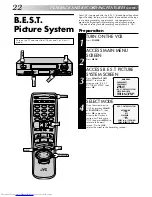
Page 22: ...U TURN ON THE VCR 1 Press POWER ACCESS MAIN MENU SCREEN 2 Press MENU ACCESS B E S T PICTURE SYSTEM SCREEN 3 Press CH5 or PUSH JOG fi to place the arrow next to B E S T PICTURE SYSTEM then press OK SELECT MODE 4 Place the arrow next to ON by pressing CH5 or PUSH JOG fi then press OK to move the arrow to the Playback section Set Playback to ON then press MENU to return to the normal screen Pressing ...

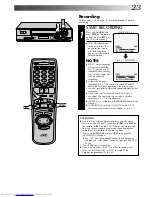
Page 23: ...regardless of the tape speed selected for that recording Once the cassette is ejected the B E S T data is canceled The next time the cassette is used for recording B E S T is re performed While B E S T is operative the PAUSE button will not function SUPERIMPOSE must be set to ON or the B E S T Picture System screen will not appear Z pg 17 ATTENTION n As B E S T takes place before recording actuall...

Page 24: ...based on the quality of the tape in use NOTES When using rental tapes or tapes recorded on other VCRs set PLAYBACK in step 4 of the Preparation procedure to either ON or OFF as desired Z pg 22 The B E S T Picture System screen only appears at the beginning of automatic tracking Even though the screen doesn t appear after that the B E S T function is operative SUPERIMPOSE must be set to ON or the B...

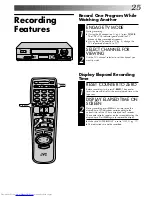
Page 25: ...RO 1 Before recording starts press C RESET The counter resets to zero and displays the exact elapsed time as the tape runs DISPLAY ELAPSED TIME ON SCREEN 2 During recording press OSD at any time to see the elapsed time All indications corresponding to the current status of the VCR are displayed for 5 seconds The counter display remains on the screen indicating the elapsed time Press OSD again to r...

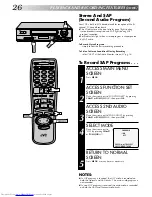
Page 26: ...creen Z pg 16 To Record SAP Programs ACCESS MAIN MENU SCREEN 1 Press MENU ACCESS FUNCTION SET SCREEN 2 Place the arrow next to FUNCTION SET by pressing CH5 or PUSH JOG fi then press OK ACCESS 2ND AUDIO SCREEN 3 Place the arrow next to 2ND AUDIO by pressing CH5 or PUSH JOG fi then press OK SELECT MODE 4 Place the arrow next to ON by pressing CH5 or PUSH JOG fi RETURN TO NORMAL SCREEN 5 Press MENU a...

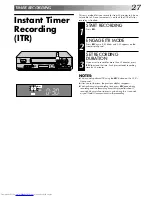
Page 27: ...If you want to record for more than 30 minutes press REC to extend the time Each press extends recording time by 30 minutes NOTES You can only perform ITR using the REC button on the VCR s front panel After you set the time the previous display reappears To check remaining recording time press REC once during recording and the remaining time is displayed for about 5 seconds Be careful not to press...

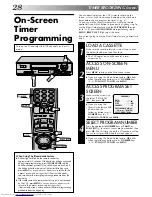
Page 28: ... MENU SELECT PROGRAM NUMBER 4 Press the appropriate NUMBER keys or CH5 or PUSH JOG fi to select a vacant program number then press OK The first time you do this all numbers will be vacant so just press OK when the screen appears If you are using the Illumi Guide feature OK blinks when the following buttons are lit NUMBER keys 0 9 PUSH JOG CANCEL and MENU 5 8 3 2 q 1 2 4 5 3 6 8 0 7 9 NUMBER When U...

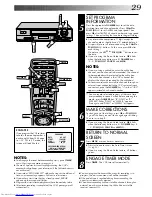
Page 29: ... Then set as in step 5 If you are using the Illumi Guide feature OK blinks when the following buttons are lit NUMBER keys 0 9 PUSH JOG CANCEL and MENU RETURN TO NORMAL SCREEN 7 Press MENU as many times as necessary Press just once to access the Auto Timer screen Z pg 32 If you are using the Illumi Guide feature all buttons go out ENGAGE TIMER MODE 8 Press TIMER The VCR turns off automatically 5 8 ...

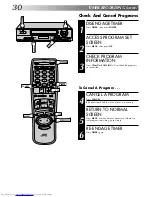
Page 30: ... CH5 or PUSH JOG fi to check the programs in succession Check And Cancel Programs CANCEL A PROGRAM 4 Press CANCEL Repeat steps 3 and 4 as many times as necessary RETURN TO NORMAL SCREEN 5 Press MENU as many times as necessary If there are still programs remaining go to step 6 RE ENGAGE TIMER 6 Press TIMER again To Cancel A Program OK C H MENU POWER POWER TIMER CANCEL CH OK MENU PUSH JOG ...

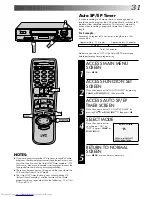
Page 31: ...P EP TIMER by pressing CH5 or PUSH JOG fi then press OK SELECT MODE 4 Place the arrow next to your choice ON or OFF by press CH5 or PUSH JOG fi RETURN TO NORMAL SCREEN 5 Press MENU as many times as necessary NOTES If you have programmed the VCR to timer record 2 or more programs the second program and those thereafter may not fit on the tape if you set the Auto SP EP Timer mode to ON In this case ...

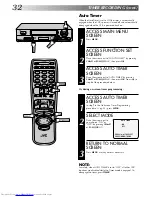
Page 32: ...CH5 or PUSH JOG fi then press OK Now skip to step 2 of the procedure below Or during on screen timer programming ACCESS AUTO TIMER SCREEN 1 In step 7 in the On Screen Timer Programming procedure Z pg 29 press MENU SELECT MODE 2 Place the arrow next to your choice ON or OFF by pressing CH5 or PUSH JOG fi RETURN TO NORMAL SCREEN 3 Press MENU as many times as necessary NOTE For safety when AUTO TIMER...

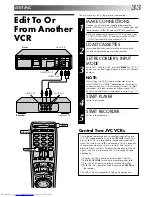
Page 33: ...rect AUX input connector follow steps 4 5 9 11 from the Edit From A Camcorder section Z pg 34 START PLAYER 4 Set to its play mode START RECORDER 5 Set to its record mode EDITING Control Two JVC VCRs The supplied remote control is capable of controlling two JVC VCRs independently using the A B CODE switch You can set this VCR so it responds to remote commands only when the switch is set to B and an...

Page 34: ...n into your VCR and the playback cassette into the camcorder SET RECORDER S INPUT MODE 3 Press NUMBER key 0 to set your VCR to AUX ACCESS MAIN MENU SCREEN 4 Press MENU ACCESS FUNCTION SET SCREEN 5 Press CH5 or PUSH JOG fi to place the arrow next to FUNCTION SET then press OK If you re using a JVC Master Edit Control equipped camcorder step 6 If not step 9 ACCESS SPECIAL FUNCTION SCREEN 6 Press CH5...

Page 35: ...are connecting the AV cable to the AV connectors on the back of the VCR place the arrow next to REAR by pressing CH5 or PUSH JOG fi RETURN TO NORMAL SCREEN 11 Press MENU as many times as necessary START PLAYER 12 Set the camcorder to its play mode START RECORDER 13 Set your VCR to its record mode If you are using a Master Edit Control equipped JVC camcorder it can put the recorder automatically in...

Page 36: ...ering another OPERATE TV 4 First press POWER on the remote to see if the TV s power goes off as it should If it does try other operations The POWER TV VCR CH5 TV VOL and NUMBER keys on the remote can all be used to operate the TV For some brands of TV you must press ENTER after having pressed the NUMBER keys If you have a JVC TV equipped with Hyper Surround or Live Effex the button may work to ope...

Page 37: ...box s power goes off as it should If it does try other functions CH5 and the NUMBER keys can be used to operate the cable box For some brands of cable box you must press ENTER after having pressed the NUMBER keys To return the remote to VCR control set the TV CABLE VCR switch to VCR NOTES Depending on the kind of cable box there may be cases where some or all functions cannot be operated using the...

Page 38: ... batteries OPERATE SATELLITE RECEIVER 4 First press POWER to see if the satellite receiver s power goes off as it should If it does try other functions CH5 and the NUMBER keys can be used to operate the satellite receiver For some brands of satellite receiver you must press ENTER after having pressed the NUMBER keys To return the remote to VCR control set the TV CABLE VCR switch to VCR NOTES Depen...

Page 39: ... VCR can t find the program I want to see Why not A There may be index codes too close together Q During playback on screen operational indicators sometimes jitter Why does this happen A If the condition of the tape being played back is not good jittering of the video including on screen indicators may occur RECORDING Q When I pause and then resume a recording the end of the recording before the p...

Page 40: ...aler Set AUDIO MONITOR to HI FI Z pg 16 CORRECTIVE ACTION Insert a cassette Remove the cassette and cover the hole with adhesive tape or load a cassette on which the record safety tab is intact POSSIBLE CAUSE There s no cassette loaded The loaded cassette has had its record safety tab removed SYMPTOM 1 Recording won t start CORRECTIVE ACTION Make sure the window side is up the rear label side is f...

Page 41: ...cassette is automatically ejected and TIMER and on the front display panel won t stop blinking 5 TIMER blinks for 10 seconds and the timer mode is disengaged 6 The cassette is automatically ejected the power shuts off and TIMER and won t stop blinking POSSIBLE CAUSE The clock and or the timer have been set incorrectly The timer is not engaged The VCR has not been set up properly Timer recording is...

Page 42: ...R LIVE SURROUND indicator Z pg 14 9 Front Display Panel Z pg 43 0 Remote Control Sensor Channel 5 Buttons Z pg 6 Record REC Button Z pg 12 Rewind REW Button Z pg 11 STOP EJECT Button Z pg 11 Fast Forward FF Button Z pg 11 CH 5 8 POWER OK PLAY STOP EJECT REW FF SUPER LIVE SURROUND MENU VIDEO MONO L AUDIO R PUSH JOG 3 2 H M S SP AM PM R E C PLAY SAP ST TIMER PAUSE M V C R 8 4 0 6 10 20dB NORM L R q ...

Page 43: ...itch Z pg 4 8 RF OUT Connector Z pg 4 1 Play Mode Indicator Z pg 11 2 Recording Mode Indicator Z pg 12 3 VCR Mode Indicator Z pg 25 4 Multichannel TV Sound Indicators Z pg 26 5 AM PM Indicators Z pg 7 6 Clock Display Z pg 7 7 Audio Level Meter 8 Pause Mode Indicator Z pg 12 9 Cassette Loaded Mark 0 Counter Memory Mark Z pg 19 Tape Speed Indicators Z pg 12 Timer Mode Indicator Z pg 29 Channel Displ...

Page 44: ... pg 29 TIMER Button Z pg 29 Channel CH 5 Buttons Z pg 6 q TV VCR Button Z pg 25 w TV CABLE VCR Switch Z pg 36 e Fast Forward FF Button Z pg 11 r PAUSE Button Z pg 12 t STOP Button Z pg 11 y SKIP SEARCH Button Z pg 18 u OK Button Z pg 6 i PUSH JOG Button Z pg 6 o ILLUMI GUIDE Button Z pg 28 INDEX cont Installing Batteries 1 Open the battery compartment cover 2 Insert 2 AA size batteries provided in...

Page 45: ...ry x 2 Conversion plug Specifications shown are for SP mode unless otherwise specified E O E Design and specifications subject to change without notice SPECIFICATIONS Failure to heed the following precautions may result in damage to the VCR remote control or video cassette 1 DO NOT place the VCR in an environment prone to extreme temperatures or humidity in direct sunlight in a dusty environment i...

Page 46: ...MEMO ...

Page 47: ...MEMO ...

Page 48: ...HR J7004UM COPYRIGHT 1997 VICTOR COMPANY OF JAPAN LTD UM Printed in Malaysia 0397YOV UN PJ VICTOR COMPANY OF JAPAN LIMITED ...

Reviews: