background image

— 16 —

Page 16

November 8, 2002 9:15 am


Specifications shown are for SP mode unless specified otherwise.
E. & O.E. Design and specifications subject to change without 
notice.

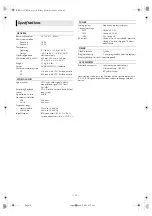
Specifications

GENERAL

Power requirement

: AC 120 V

d

, 60 Hz

Power consumption

Power on

: 16 W

Power off

: 1.5 W

Temperature

Operating

: 5°C to 40°C (41°F to 104°F)

Storage

: –20°C to 60°C (–4°F to 140°F)

Operating position

: Horizontal only

Dimensions (W x H x D) : 435 mm x 94 mm x 248 mm

(17-3/16" x 3-3/4" x 9-3/4")

Weight

: 2.7 kg (5.9 lbs)

Format

: S-VHS/VHS NTSC standard

Maximum recording time

SP

: 210 min. with ST-210 video cassette

EP

: 630 min. with ST-210 video cassette

VIDEO/AUDIO

Signal system

: NTSC-type color signal and EIA 

monochrome signal, 525 lines/
60 fields

Recording/Playback 
system

: DA-4 (Double Azimuth) head helical 

scan system

Signal-to-noise ratio

: 45 dB

Horizontal resolution

VHS

: 230 lines

S-VHS

: 400 lines

Frequency range

Normal audio

: 70 Hz to 10,000 Hz

Hi-Fi audio

: 20 Hz to 20,000 Hz

Input/Output

: RCA connectors (IN x 1, OUT x 1)

S-video connectors (IN x 1, OUT x 1)

TUNER

Tuning system 

: Frequency-synthesized tuner

Channel coverage

VHF

: Channels 2–13

UHF

: Channels 14–69

CATV

: 113 Channels

RF output

: Channel 3 or 4 (switchable; preset to 

Channel 3 when shipped) 75 ohms, 
unbalanced

TIMER

Clock reference

: Quartz

Program capacity

: 1-year programable timer/8 programs

Memory backup for timer is not supported.

ACCESSORIES

Provided accessories

: Infrared remote control unit,

Lithium battery –CR2032
RF cable (F-type)

HR-S2912U-EN.fm Page 16 Friday, November 8, 2002 9:15 AM

Summary of Contents for HR-S2912U

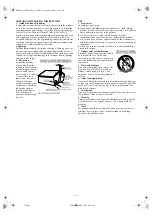
Page 1: ... 60Hz only To prevent electric shocks and fire hazards DO NOT use any other power source CAUTION TO PREVENT ELECTRIC SHOCK MATCH WIDE BLADE OF PLUG TO WIDE SLOT FULLY INSERT ATTENTION POUR ÉVITER LES CHOCS ÉLECTRIQUES INTRODUIRE LA LAME LA PLUS LARGE DE LA FICHE DANS LA BORNE CORRESPONDANTE DE LA PRISE ET POUSSER JUSQU AU FOND Note to CATV system installer This reminder is provided to call the CAT...

Page 2: ... not defeat the safety purpose of the grounding type plug 2 Power Sources Operate your product only from the type of power source indicated on the marking label If you are not sure of the type of power supply to your home consult your product dealer or local power company If your product is intended to operate from battery power or other sources refer to the operating instructions 3 Overloading Do...

Page 3: ... product on an unstable cart stand tripod bracket or table It may fall causing serious injury to a child or adult and serious damage to the product Use only with a cart stand tripod bracket or table recommended by the manufacturer or sold with the product Use a mounting accessory recommended by the manufacturer and follow the manufacturer s instructions for any mounting of the product Do not try t...

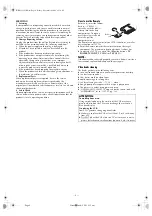
Page 4: ... 4 Safety Check Upon completion of any service or repairs to this product ask the service technician to perform safety checks to determine that the product is in safe operating condition How to use the Remote Before use insert the lithium battery CR2032 correctly with the plus side up into the battery compartment To open it press the release tab and carefully pull the compartment out The Remote ca...

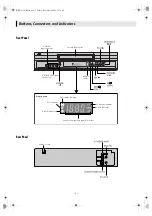
Page 5: ...lot VIDEO AUDIO input connectors Display panel VCR mode indicator Play indicator Record indicator Timer mode indicator Channel and auxiliary input Clock time Remote sensor S VHS indicator S VIDEO input connector S VIDEO AC power cord HR S2912U EN fm Page 5 Friday November 8 2002 9 15 AM ...

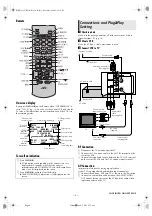
Page 6: ...ors on the rear of the VCR and the audio video input connectors on the TV A Press OSD OK All indications corresponding to the current status are displayed for 5 seconds After that the counter information and RECORD PAUSE if in the RecordPause mode are left displayed on the screen B Press OSD OK again to clear the display The RECORD PAUSE indication is left displayed on the screen TIMER CANCEL B E ...

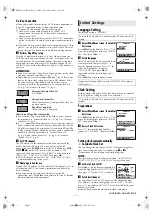
Page 7: ...basic playback or basic recording If you connect the TV and the VCR only using the RF connection press TV VCR on the Remote so that the VCR mode indicator lights on the display panel Language Setting The default setting is ENGLISH A Access Main Menu screen then Initial Set screen Press MENU on the Remote Press rt to move the highlight bar arrow to INITIAL SET then press OK or e B Select language T...

Page 8: ...s Press OK or e repeatedly until the item you want to change blinks then press rt Tuner Setting Setting channels automatically Auto Channel Set Perform Auto Channel Set only if channels have not been set correctly by the Plug Play setting A Access Main Menu screen then Tuner Set screen Press MENU on the Remote Press rt to move the highlight bar arrow to TUNER SET then press OK or e B Perform Auto ...

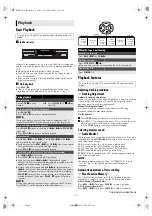
Page 9: ...o after rewinding is complete Ensure that the VCR is in stop mode For Automatic Playback Start Press REW 3 then press PLAY 4 within 2 seconds For Automatic Power Off Press REW 3 then press POWER 1 within 2 seconds Playback Turn on the VCR and TV and select the VCR channel or AV mode During playback Stop playback Press STOP 8 on the Remote OR Press STOP EJECT 0 on the VCR Pause playback and view st...

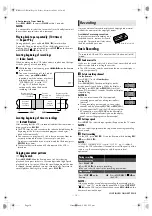
Page 10: ...g on a recorded cassette remove its record safety tab To record on it later cover the hole with adhesive tape Basic Recording A Load a cassette Make sure the record safety tab is intact If not cover the hole with adhesive tape before inserting the cassette The VCR turns on and the counter on the on screen display is reset automatically B Select recording channel On the Remote Press CHr t or the Nu...

Page 11: ...emember the clock must be set before you can program the timer NOTES If all the 8 programs have already been set PROGRAM FULL appears on the TV screen After timer recording is completed the VCR turns off automatically You can program the timer recording while a regular recording is in progress the menu screens will not be recorded Even if a power failure occurs the VCR keeps your timer programs Ho...

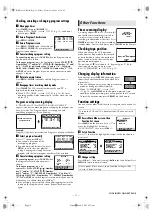
Page 12: ... put the VCR into timer recording standby mode To clear the display press CANCEL on the Remote Checking tape position When you change the VCR operation mode from the stop mode to fast forward or rewind mode or when you perform an Index Search or Instant Review the tape position indicator appears The position of q in relation to B Beginning or E End shows you where you are on the tape Set SUPERIMPO...

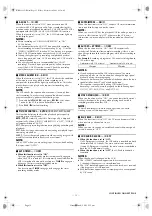
Page 13: ...emporarily canceled when the VCR is turned on You do not have to press TIMER to engage or disengage the timer recording standby mode When this function is set to OFF You have to press TIMER to engage or disengage the timer recording standby mode 䡵 SUPERIMPOSE ON OFF When this function is set to ON various VCR status information on screen display appears on the screen NOTE When you use this VCR as ...

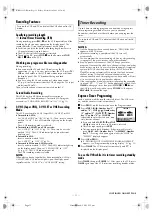
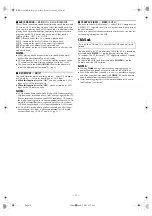
Page 14: ...mode allows you to make high quality video recordings with horizontal resolution of 400 lines comparing with the 230 lines of resolution of conventional VHS recordings To achieve the highest quality picture we recommended to record in S VHS mode But remember that a conventional VHS VCR without SQPB cannot play back S VHS tapes recorded in S VHS mode S VHS MODE setting does not affect recording on ...

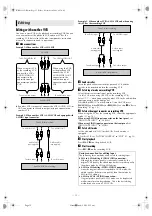
Page 15: ... Set the edit mode to ON for the VCRs if such a mode is equipped On this VCR set PICTURE CONTROL to EDIT 墌 pg 13 F Start playback Press PLAY 4 on the playback VCR G Start recording Press REC 7 on the recording VCR Editing To audio video input This VCR Another VCR To AUDIO VIDEO IN To AUDIO VIDEO OUT To audio video output When using this VCR as the recording VCR connect this VCR s AUDIO VIDEO IN co...

Page 16: ...or signal and EIA monochrome signal 525 lines 60 fields Recording Playback system DA 4 Double Azimuth head helical scan system Signal to noise ratio 45 dB Horizontal resolution VHS 230 lines S VHS 400 lines Frequency range Normal audio 70 Hz to 10 000 Hz Hi Fi audio 20 Hz to 20 000 Hz Input Output RCA connectors IN x 1 OUT x 1 S video connectors IN x 1 OUT x 1 TUNER Tuning system Frequency synthes...

Reviews: