1-2
1.2.2
Disassembly procedure
1.2 Removing the major parts
1.2.1
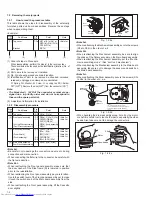
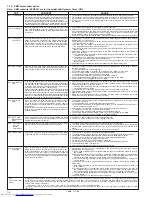
How to read the procedure table
This table shows the steps for disassembly of the externally
furnished parts and board assemblies. Reverse these steps
when re-assembling them.
Note:
•
The bracketed ( ) WR of the connector symbol are as-
signed nos. in priority order and do not correspond to
those on the spare parts list.
(5) Adjustment information for installation
(1)
(2)
(3)
(4)
(5)
Step/
Loc No.
Part Name
Fig.
No.
Point
Note
[1]
Top cover,
1-3a 4(S1a),(S1b),3(L1a),
<Note 1a>
2(SD1a),(P1a),(W1a),
CN1(WR1a),
Bracket
2(S1c)
<Example>
(1) Order of steps in Procedure
When reassembling, perform the step(s) in the reverse order.
These numbers are also used as the identification (location) No. of
parts Figures.
(2) Part name to be removed or installed.
(3) Fig. No. showing procedure or part location.
(4) Identification of part to be removed, unhooked, unlocked,
released, unplugged, unclamped or unsoldered.
P= Spring, W= Washer, S= Screw, L= Locking tab, SD= Solder,
CN**(WR**)= Remove the wire (WR**) from the connector (CN**).
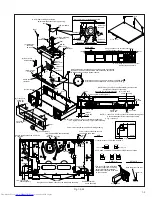
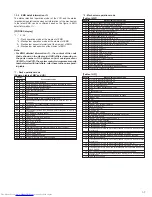
<Note 2a>
• Be careful not to damage the connector and wire etc. during
connection and disconnection.
• When connecting the flat wire to the connector, be careful with
the flat wire direction.
<Note 2b>
• When reattaching the Front panel assembly, make sure that
the door opener of the Side frame (R) is lowered in position
prior to the reinstallation.
• When reattaching the Front panel assembly, pay careful atten-
tion to the switch lever of the Front panel assembly not to make
it touch the switch knob of the Main board assembly from the
side.
• When reattaching the Front panel assembly, lift the Cassette
door slightly.
- - - - - - - - - - - - - - - - - - - - - - - - - - - - - - - - - - - - - - - -
Step/
Loc No.
Part Name
Fig.
No.
Point
Note
[1]
Top cover
1-2-2d 3(S1a), 2(L1a)
[2]
Front panel assembly
1-2-2d 2(S2a), 4(L2a), 3(L2b),
<Note 2a>
1-2-2a CN7001(WR2a),
<Note 2b>
CN7103(WR2b)
(Adv. Jog/SW board assembly)
3(S2b), Knob assembly
(Front S Jack board assembly)
2(S2c)
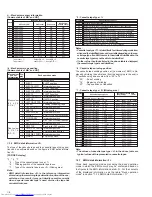
[3]
Mechanism assembly
1-2-2d CN2001(WR3a),
<Note 2a>
(S3a), (S3b)
<Note 3a>
(Drum Shield)
(S3f), (L3a)
<Note 3b>
(Drum assembly)
1-2-2b CN1(WR3b),
<Note 3c>
1-2-2c (S3c), (S3d), (S3e)
[4]
Main board assembly
1-2-2d 2(L4a), (L4b), 2(L4c)
Rear S Jack board assembly
- - - - - - - - - - - - - - - - - - - - - - - - - -
- - - - - - - - - - - - - - - - - - - - - - - - - - -
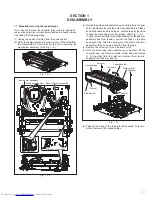
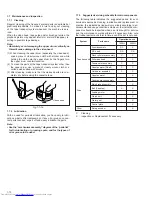
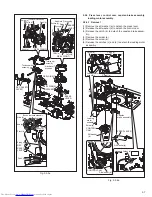
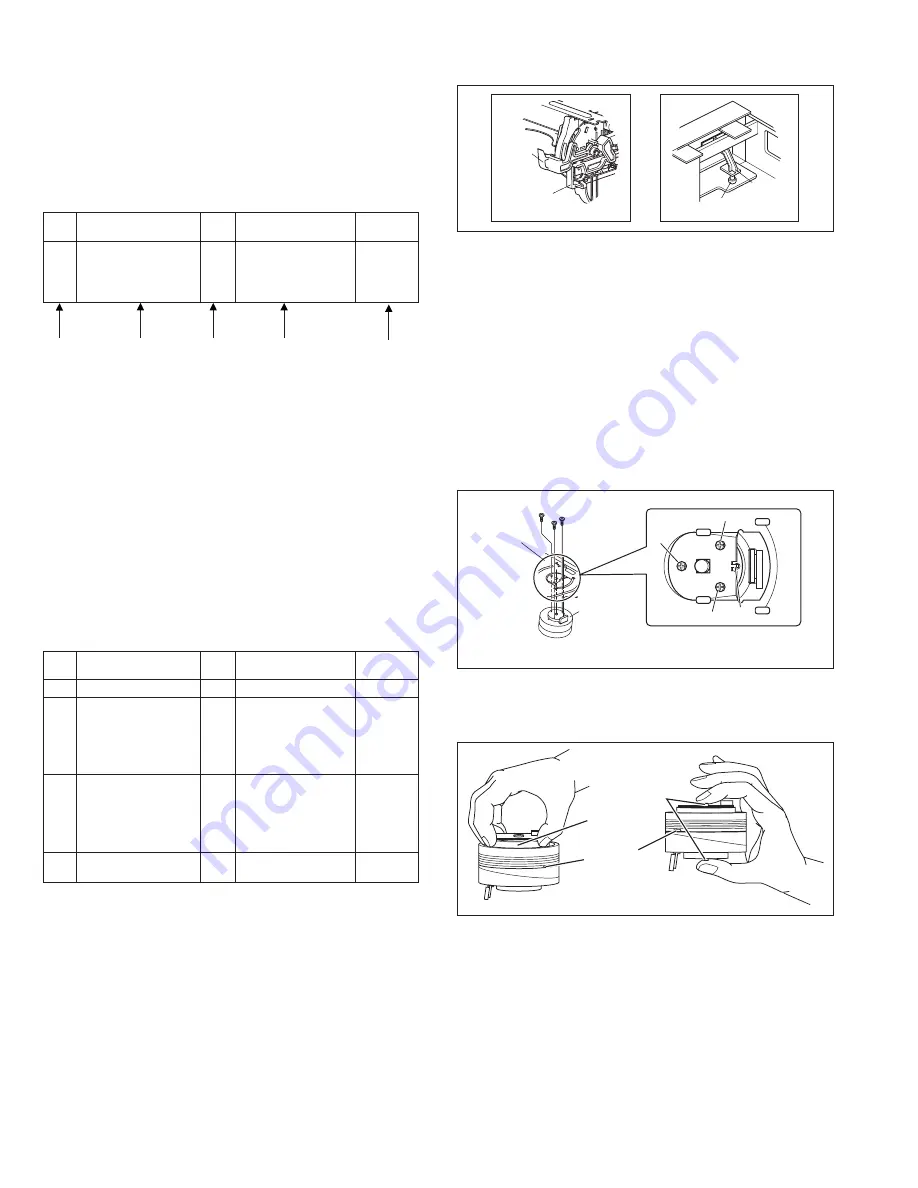
Fig. 1-2-2a
Fig. 1-2-2b
Door
opener
Side
frame(R)
Switch
knob
Switch
lever
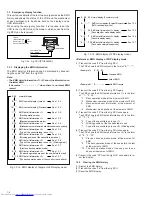
<Note 3c>
(S3c)
(S3c)
(S3e)
(S3e)
(S3d)
(S3d)
Mechanism
assembly
Drum
assembly
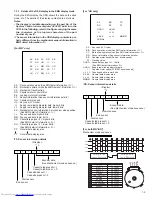
<NOTE>
Attach the Drum assembly appropriately,
since the installation state of the Drum assembly
influences the FM WAVEFORM LINEARITY
greatly.
HOOK
Fig. 1-2-2c
Shaft
Video heads
Motor
<Note 3a>
• When reattaching the Mechanism assembly, secure the screws
(S3a to S3b) in the order of a, b.
<Note 3b>
• When reattaching the Mechanism assembly, be sure to align
the phase of the Rotary encoder on the Main board assembly.
• When reattaching the Mechanism assembly, set the “Mecha-
nism assembling mode”. (See “section 2 mechanism”.)
• When reattaching the Mechanism assembly to the Main board
assembly, take care not to damage the sensors and switch on
the Main board assembly.
<Note 3c>
• When reattaching the Drum assembly, secure the screws (S3c
to S3e) in the order of c, d, e.
• When handling the drum assembly alone, hold it by the motor
or shaft. Be careful not to touch other parts, especially the video
heads. Also take care not to damage the connectors.
- - - - - - - - - - - - - - - - - - - - - - - - - -
- - - - - - - - - - - - - - - - - - - - - - - - - -


