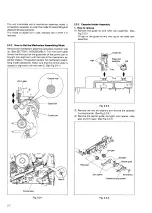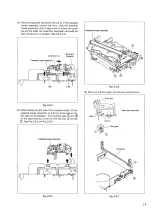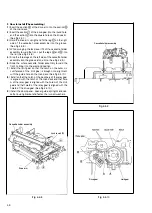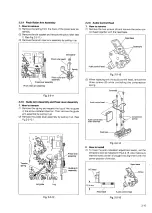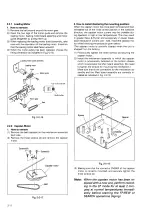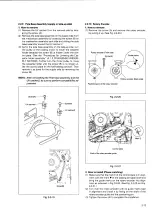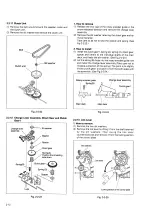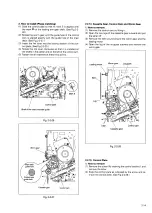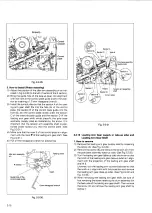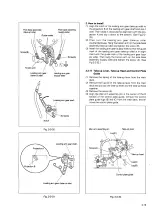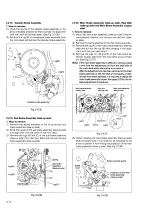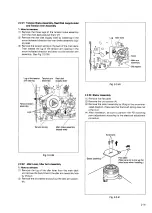
Note:
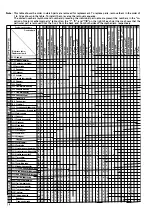
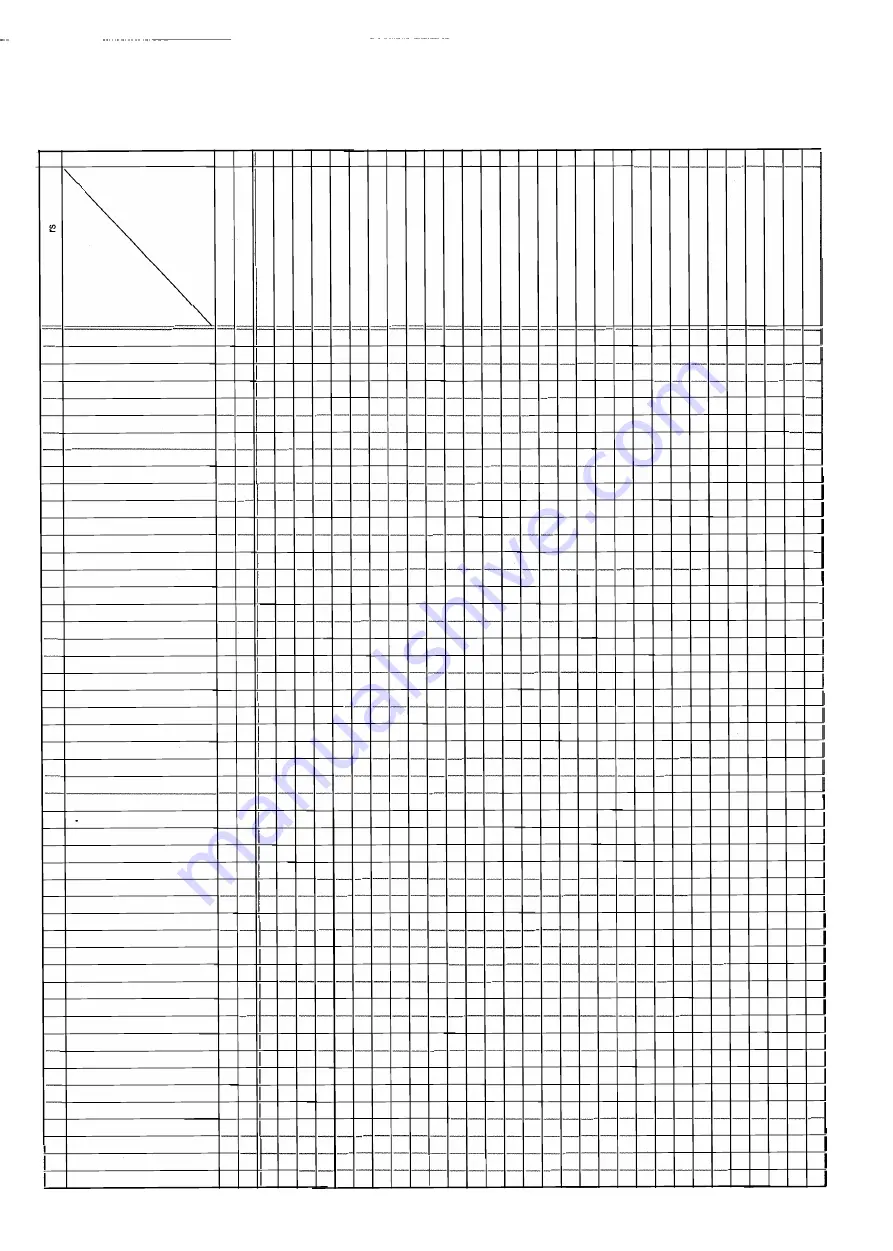
This table shows the order in which parts are removed for replacement. To replace parts, remove them in the order of
1 to 18 as shown in the table. To install them, reverse the removal sequence.
E
E
::,
C:
"C
C:
"'
"'
0
.0
E
>,
en
@
@
®
®
®
-
®
-
@
-
@
@
@)
@
®
®
®,®
@
@
@
@
@
@
-
@
@
@
@)
�
®
@
®
®
-
@
@
-
®
@
§
@
@
@
@
@
®
(@
(@
@
€,
2-5
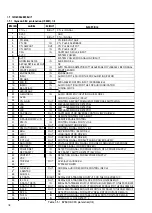
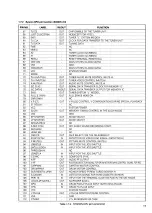
The circled numbers (symbols and numbers) preceding the individual part names represent the numbers in the "Lo
cation of major mechanical parts" table. Also, the "T", "B", and "T/8" on the right of each part name shows that the
particular part is removed from the front, from the back, and from both sides of the mechanism, respectively.
Symbols and numbers
@ @
@) @)
- -
@) -
@ @
®
�
@ @ @
©
@ @
@)
® ®
@)
@ @ @
(@
@ @ @
0
Removal parts
Q) Q)
E
Q)
"C
i
.!!l
Q)
:2
·cn
C.
C:
i
C.
::,
"'
"'
::,
�
..c:
>,
:a'
>,
C.
�
&l
"'
a;
::,
C.
-"'
]5
:a'
ci
�
g
i
>,
E
*
u
E
E
C.
,::.
]5
:a'
0
:a'
e!
3l
a, 2:-
:a'
E
::,
g
:a' :a'
·cn
E
"'
!!,.
3l
E
ol
.0
"'
"'
.0
a,
@:
>
E
Cl
"'
"'
E E
�
oi oi
E E
C.
gj
�
0
a,
C:
l;;
�
a,
3l
�
a, a,
a, a,
j
-"'
E
lil
·cn
"'
a;
]j
"'
gj
Cl
Cl
"' "'
�
"'
a! �
"'
::,
�
32
"'
8
�
a,
� "'
"'
0
0
"'
'i::!
�
�
E
"'
"'
e!
E
�
0
E
..c:
::,
oi
..c:
oi
a;
E
�
a,
�
oi
oi
1ij
�
a, ,::.
a;
�
Cl
�
e
..c:
C:
�
a;
a,
ci
"'
�
-"' -"'
.0
"'
l;;
>
rl i'l
a, a,
2l,
a,
a,
e!
.2l
a;
Cl
!
"'
�
�
::,
a,
Cl
>
Cl
Cl
Cl
C.
_?]
"'
C:
C:
>
�
a,
�
..c:
Cl
�
e e
C:
C:
1
.0
i5
.Q
0
�
(Reference items)
c
�
l;;
"'
C:
�
�
-�
..c:
� �
C:
t,
E
i5
'g
·cn
a,
E
�
u
.El
�
-"'
c c
C:
ai
"'
si
e
'a
"'
"'
"'
�
"'
.0
C:
C:
Replacement parts
e
0
::,
"'
a,
"'
ts
.s
·5
�
>
0
..c:
C:
�
0
0 0 0
�
::,
·o;
a, a, a,
u..
z
(!)
a:
(.)
0
a:
(.)
0
c..
(!)
c..
:::i
a: t5
(.)
i5
::::;
(.)
(.)
_, _,
en
::;; a:
I- I- 32 al
2.2.3 Guide rail
T 1
2.2.3 Roller cam assembly
T 1
2.2.3 Cassette housing brad<et
T 1
2.2.3 Opener guide
T 2
1
2.2.3 Door opener
T 3
1
2
2.2.3 Relay gear
T 3
1 2
2.2.3 Limit gear
T 3
1
2
2.2.3 Cassette holder assembly
T 6
1
2 3 4 5
2.2.3 Drive gear
T 4
1 2
3
2.2.3 Drive arm
T 8
1
2 3 4 5 6 7
2.2.4 Pinch roller arm assembly
T 1
2.2.5 Guide arm assembly
T 1
22.5
Press lever assembly
T 3
1
2
2.2.6 Audio control head
T 1
22.7
Loading motor
T 1
22.8
Capstan motor
T/B 1
22.9
UV catcher2
T 1
2.2.9 Pole base assembly (take-up side) T/B 2
1
2.2.9 Pole base assembly (slW!y side) T/B 2
1
2.2.1 0 Rotary encoder
B
1
22.11 Clutch unit
B
1
22.12 Change lever assembly
B
3
1 2
22.12 Directgear
B
4
1 2 3
2.2.12 Clutch gear1
B
5
1 2 3
4
2.2.13 Linklever
B
1
22.14 Cassette gear
B
2
1
2.2.14 Control cam
B
2
1
2.2.14 Worm gear
B
1
Lid guide
T/B 5
1
2 3
4
2.2.15 Control boo<et1
B
1
2.2.15 Control plate
B
6
1 2 3
4
5
2.2.16 Loading arm gear (supply side)
B
7
1
2 3
4
5 6
2.2.16 Loading arm gear (take-1.4> side)
B
8
1
2 3
4
5 6
7
2.2.16 Loading arm gear shaft
B
9
1
2 3
4
5 6
7 8
2.2.17 Take-up lever
T/B 7
1
2 3
4
5 6
2.2.17 Take-up head
T/B 8
1
2 3
4
5
6
7
2.2.17 Control plate guide
T/B 8
1 2 3
4
5 6
7
2.2.18 capstan brake assembly
T/B 7
1
2 3
4
5 6
2.2.19 Sub brake assembly(take-up side) T/B 15
1 2
3 4 5 6
7 8
9
10 11
12
13 14
2.2.20 Main brake �bly(take-up side) T/B 16
1 2
3 4
5
6
7 8
9
10 11
12
13 14
15
2.2.20 Main brake assembly(supply side) T/B 9
1 2
3 4 5
6
7 8
2.2.20 Reel disk (take-up side)
T/B 16
1 2
3 4 5 6
7 8
9
10 11
12
13 14
15
2.221 Tension brake assembly
T/B 9
1 2
3 4 5 6
7 8
2.2.21 Reel disk (supply side)
T/B 10
1 2
3 4 5
6
7 8
9
2.2.21 Tension arm assembly
T/B 10
1 2
3 4 5 6
7 8
9
2.2.21 Tension arm bearing
T/B 10
1 2
3 4 5
6
7 8
9
2.2.22 Idler lever
T/B 17
1 2
3 4 5 6
7 8
9
10 11
12
13 14
15 16
2.2.22 Idler arm assembly
T/B 18
1 2
3 4 5 6
7 8
9
10 11
12
13 14
15 16 17
-
Brake lever
T/B 18
1 2
3
4
5
6
7 8
9
10 11
12
13 14
15 16 17
-
Rotary encoder guide
T/B 19
1
2 3
4 5
6
7 8
9
10 11
12
13 14
15 16 17
18
Summary of Contents for HR-S7600EU
Page 1: ......
Page 2: ......
Page 3: ......
Page 5: ......
Page 6: ......
Page 7: ......
Page 8: ......
Page 9: ......
Page 11: ......
Page 13: ......
Page 14: ......
Page 15: ......
Page 16: ......
Page 17: ......
Page 19: ......
Page 20: ......
Page 21: ......
Page 23: ......
Page 24: ......
Page 25: ......
Page 26: ......
Page 27: ......
Page 28: ......
Page 29: ......
Page 30: ......
Page 31: ......
Page 32: ......
Page 33: ......
Page 34: ......
Page 35: ......
Page 36: ......
Page 37: ......
Page 38: ......
Page 39: ......
Page 40: ......
Page 41: ......
Page 42: ......
Page 43: ......
Page 44: ......
Page 45: ......
Page 46: ......
Page 47: ......
Page 48: ......
Page 49: ......
Page 50: ......
Page 51: ......
Page 52: ......
Page 55: ......
Page 56: ......
Page 57: ......
Page 58: ......
Page 59: ......
Page 60: ......
Page 61: ......
Page 62: ......
Page 63: ......
Page 64: ......
Page 65: ......
Page 66: ......
Page 67: ......
Page 68: ......
Page 69: ......
Page 72: ......
Page 73: ......
Page 74: ......
Page 75: ......
Page 76: ......
Page 77: ......
Page 78: ......
Page 79: ......
Page 80: ......
Page 81: ......
Page 82: ......
Page 83: ......
Page 84: ......
Page 85: ......
Page 86: ......
Page 87: ......
Page 88: ......
Page 89: ......
Page 90: ......
Page 91: ......
Page 92: ......
Page 93: ......
Page 94: ......
Page 95: ......
Page 96: ......
Page 97: ......
Page 98: ......
Page 99: ......
Page 100: ......
Page 101: ......
Page 102: ......
Page 103: ......
Page 104: ......
Page 105: ......
Page 106: ......
Page 107: ......
Page 108: ......
Page 109: ......
Page 110: ......
Page 111: ......
Page 112: ......
Page 113: ......
Page 114: ......
Page 115: ......
Page 116: ......
Page 117: ......
Page 118: ......
Page 119: ......
Page 120: ......
Page 121: ......
Page 122: ......

