background image

51

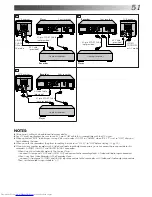
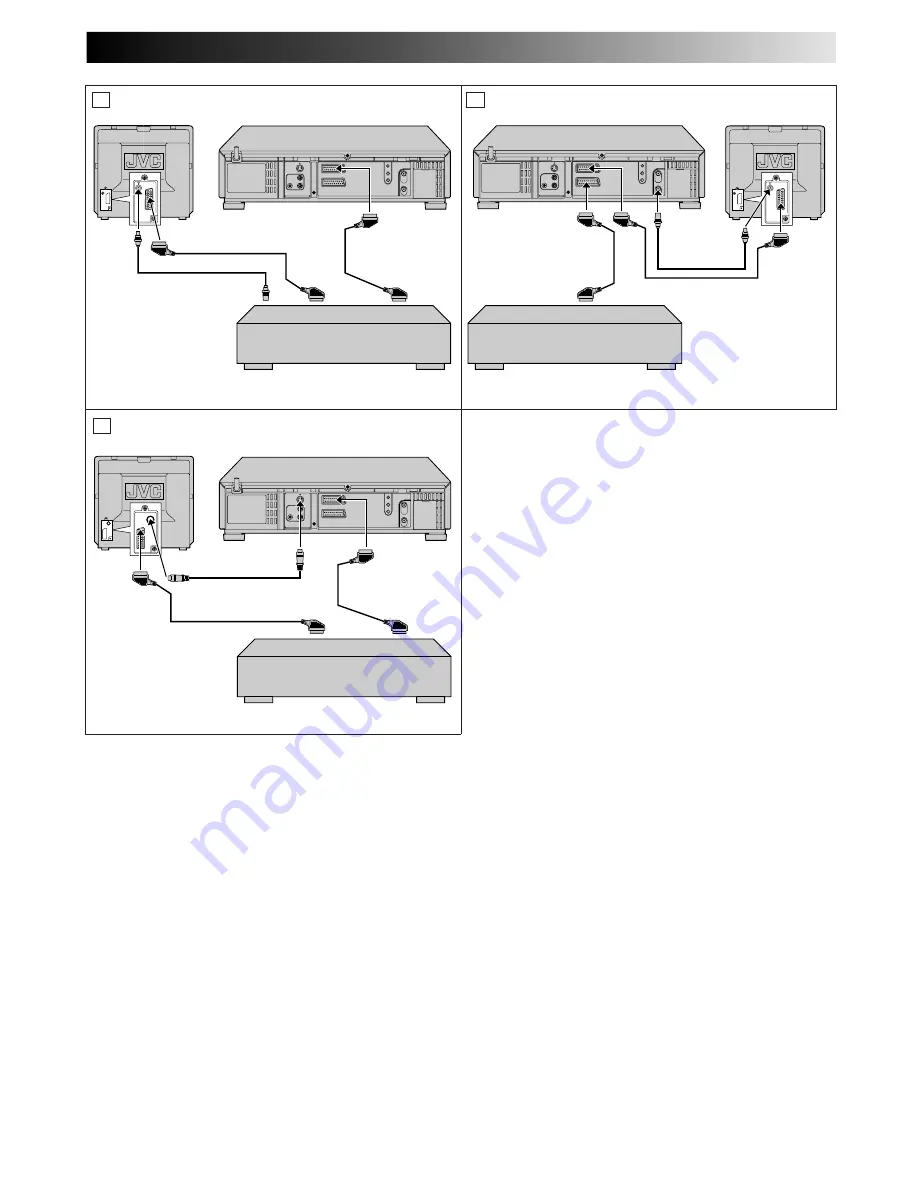
RF Cable
(provided)

21-pin SCART Cable
(not provided)

Player

Your recorder

Recorder

Your recorder

TV Receiver

TV Receiver

RF Cable
(provided)

21-pin SCART Cable
(not provided)

VIDEO
CHAN-
NEL or
AV mode

VIDEO
CHANNEL
or AV mode

Another recorder

Another recorder

Recorder

Player

A

B

NOTES:

All necessary cables can be obtained from your dealer.

For Y/C signal input/output, be sure to use a 21-pin SCART cable that is compatible with the Y/C signal.

When you select "EDIT" to dub tapes in step 

3

, be sure to select "AUTO" (or "NORM" when "B.E.S.T." is set to "OFF") after you

finish dubbing the tapes.

When you use this recorder as the player for editing, be sure to set "O.S.D." to "OFF" before starting (

Z

 pg. 59).

If you are using another recorder with S-Video and Audio input/output connectors, you can connect those connectors to this
recorder's S-VIDEO IN/S OUT and AUDIO IN/OUT connectors.

When Using Your Video Recorder As The Source Player ...
... connect its rear panel S OUT and AUDIO OUT connectors to the recording deck's S-Video and Audio input connectors.
When Using Your Video Recorder As The Recording Deck ...
... connect its front panel S-VIDEO and AUDIO input connectors to the source player's S-Video and Audio output connectors.
Then, set the recorder's input mode to "S-1".

Another recorder

Recorder

Player

Your recorder

TV Receiver

21-pin SCART Cable
(not provided)

S-Video Cable
(provided)

C

Summary of Contents for HR-S9700EK

Page 1: ...ming 18 Express Timer Programming 20 VIDEO NAVIGATION 24 Navigation 24 Title Editing 26 Finding Title 30 ADVANCED OPERATIONS 32 Playback Picture Adjustment 32 Selecting The Sound You Want 34 Looking For The Scene You Want 36 Recording According To Tape Type 37 Playback Recording According To Tape Characteristics 38 TimeScan 40 Automatic Satellite Programme Recording 42 Remote Control Functions 44 ...

Page 2: ...ove the fuse and dispose of the plug immediately to avoid a possible shock hazard by inadvertent connection to the mains supply If this product is not supplied fitted with a mains plug then follow the instructions given below DO NOT make any connection to the Larger Terminal coded E or Green The wires in the mains lead are coloured in accordance with the following code If these colours do not corr...

Page 3: ...order or remote control 4 DO NOT place anything which might spill on top of the recorder or remote control 5 AVOID violent shocks to the recorder during transport MOISTURE CONDENSATION Moisture in the air will condense on the recorder when you move it from a cold place to a warm place or under extremely humid conditions just as water droplets form in the surface of a glass filled with cold liquid ...

Page 4: ... stated that it is de signed for unattended operation or has a standby mode Switch off using the switch on the equipment and make sure that your family knows how to do this Special arrangements may need to be made for infirm or handicapped people DON T use equipment such as personal stereos or radios so that you are distracted from the requirements of road safety It is illegal to watch television ...

Page 5: ...V TV ENTER ENTREE STEP 1 CHECK THE CONTENTS CHECK ALL THE CONTENTS SHOWN BELOW Dear Customer Thank you for purchasing this JVC Video Cassette Recorder Please use this QUICK SET UP GUIDE to help you to set up your video cassette recorder Video Cassette Recorder Infrared Remote Control Unit RF Cable AA Batteries x 2 You are now ready to install your video recorder DIGITAL TBC NR SAT S VHS ET SAT S V...

Page 6: ...tor For switching the TV s mode refer to the instruction manual of your television To obtain high quality S VHS pictures you can also use the S VIDEO CONNECTION described on page 7 STEP 2 INSTALLATION CONNECT VIDEO RECORDER TO TV Place the recorder on a stable flat surface Make this connec tion if your TV has a 21 pin AV input connector SCART in order to reduce the possibility of interference And ...

Page 7: ...ode refer to the instruction manual of your television ATTENTION n Do NOT Plug the mains power cord into a mains outlet until all connections are completed n Do NOT press the button on the recorder or on the remote control to turn on the recorder s power before you start the Auto Set Up procedure described on page 8 Go to Step 3 AUTO SET UP AFTER YOU FINISH THIS STEP Mains outlet Mains Power Cord ...

Page 8: ...gram numbers for those stations according to the broadcast area For RF connection users The video recorder detects the channels which are not occupied by local stations and selects one channel automatically for your Video Channel that is located in the middle of more than 5 vacant channels If there is a power cut or if you press or MENU while Auto Set Up is in progress Auto Set Up will be inter ru...

Page 9: ...you can set the recorder s tuner channels by downloading preset data from your TV instead of using the Auto Set Up function Z pg 8 After downloading is completed the recorder sets the clock and the VIDEO Plus system assigned Guide Program numbers automatically For details refer to the instruction manual for your TV NOTES In areas where no TV station transmits the PDC signal the recorder cannot per...

Page 10: ...on s If station names ID Z pg 71 have also been stored in the recorder s memory the station name will be displayed at the top left corner of the screen for about 5 seconds each time the recorder is tuned to a different station If you want to set the tuner manually such as to add or skip channels to change preset positions or to set or change station names see pages 68 70 Now you have finished the ...

Page 11: ...control or press RECORD on the recorder Follow the procedure below to use this function TURN ON THE RECORDER 1 Press ACCESS MAIN MENU SCREEN 2 Press MENU ACCESS MODE SET SCREEN 3 Press fi to move the highlight bar pointer to MODE SET then press OK or SELECT DIRECT REC MODE 4 Press fi to move the highlight bar pointer to DIRECT REC then press OK or to set to ON RETURN TO NORMAL SCREEN 5 Press MENU ...

Page 12: ...Plus timer recording Z pg 18 or Express timer programming Z pg 20 starts the recorder sets its input mode to L 2 and automatically switches the satellite receiver s channels using the provided Satellite Controller Your recorder Back of Recorder Satellite receiver Satellite Controller Satellite receiver Satellite Controller suggested locations Transmitter AV2 L 2 IN DECODER SATELLITE RECEIVER CONTR...

Page 13: ... pointer to NOT CHANGED then press OK or Then perform the procedure again from step 5 SATELLITE TUNER BRAND CODE JVC 73 AMSTRAD 60 61 62 63 92 CANAL SATELLITE 81 CANAL 81 D BOX 85 ECHOSTAR VIA DIGITAL 82 FINLUX 68 FORCE 89 GALAXIS 88 GRUNDIG 64 65 HIRSCHMANN 64 78 ITT NOKIA 68 JERROLD 75 KATHREIN 70 71 LUXOR 68 MASCOM 93 MASPRO 70 NOKIA 87 PACE 65 67 74 86 92 PANASONIC 74 PHILIPS 66 84 RFT 69 SAGE...

Page 14: ...rded cassette into a VHS Cassette Adapter and it can be used just like any full sized VHS cassette This video recorder can record on regular VHS and Super VHS cassettes While only VHS signals can be recorded on regular VHS cassettes both VHS and Super VHS signals can be recorded and played back using Super VHS cassettes By using the S VHS ET function it is possible to record and play back with S V...

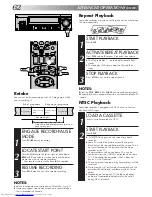
Page 15: ...back prior to engaging the still picture mode TIME SCAN AUDIO must be set to ON or the sound will not be heard Z pg 41 ACTIVATE FRAME BY FRAME PLAYBACK 2 Turn the JOG dial to the right for forward frame by frame playback or to the left for reverse frame by frame playback OR Press PAUSE Each time PAUSE is pressed the tape will advance one frame OR Press or Each time one of these buttons is pressed ...

Page 16: ...e step 5 PAUSE RESUME RECORDING 5 Press PAUSE Press PLAY to resume recording During the Record Pause mode you can change the preset by pressing the PR buttons or the NUMBER keys STOP RECORDING 6 Press STOP on the remote control or STOP EJECT on the recorder Then press STOP EJECT to remove the cassette 1 2 3 4 5 6 7 8 9 1 2 1 2 3 0 3 4 4 PAUSE 5 4 5 RECORD 4 6 NUMBER 3 1 2 2 6 4 5 2 Accidental eras...

Page 17: ...fore starting recording or playback The counter is reset to 0 00 00 and shows the exact elapsed time as the tape runs SELECT PRESET TO WATCH 1 Once recording is in progress all you need to do is to set the preset controls on the TV for the station you wish to view The programme selected with the TV s preset controls appears on the TV screen while the one selected with the recorder s PR buttons is ...

Page 18: ...Guide Program Number Set on page 19 VIDEO Plus Timer Programming Before performing the VIDEO Plus Timer Programming Make sure that the recorder s built in clock is set properly Insert a cassette with the safety tab in place The recorder will come on automatically Turn on the TV and select the VIDEO channel or AV mode With the VIDEO Plus system timer programming is greatly simplified because each T...

Page 19: ...et the Guide Program Number The VIDEO Plus Program screen appears Ex To timer record a BBC2 programme with the VIDEO Plus system If your recorder receives BBC2 on the preset position 2 press OK or after entering 2 using fi buttons Satellite Receiver Users To timer record a satellite broadcast using the VIDEO Plus system 1 Perform Satellite Receiver Control Setting Z pg 12 2 Perform steps 1 7 In st...

Page 20: ...te at a time The front display panel looks like this ENTER PROGRAMME STOP TIME 4 Press STOP to enter the time you want recording to stop Press and hold STOP to move in 30 minute increments or press and release repeatedly to move 1 minute at a time ENTER PROGRAMME DATE 5 Press DATE to enter the date on which you wish to record The current date first appears on screen The date you enter will appear ...

Page 21: ...nth PROGRAM FULL appears on screen and FULL appears on the front display panel To record the extra programme you must first cancel any unnecessary programmes Z pg 22 Now available from some TV stations PDC Programme Delivery Control is a service designed to assure safe accurate timer recording With this system special code signals are transmitted together with the audio video signals These code si...

Page 22: ...amme press the appropriate button START STOP DATE PR SP LP EP PDC You can change TV PROG to SAT for the preset position by pressing the NUMBER key 0 RETURN TO NORMAL SCREEN DISPLAY 5 Press as many times as necessary If there are still some programmes to be recorded go on to step 6 RETURN TO TIMER MODE 6 Press NOTE You can also check the programmes on the display panel even if the recorder s power ...

Page 23: ... you do not want is shown PROGRAM COMPLETED appears on the screen for about 5 seconds then normal screen appears To change a programme press the appropriate button START STOP DATE PR SP LP EP and or PDC when the Program screen on which you want to make changes is shown then press OK PROGRAM COMPLETED appears on the screen for about 5 seconds then normal screen appears NOTE If the overlap is not ye...

Page 24: ...s located Navigation Turn on the TV and select the AV mode When you record a TV programme with this recorder the recorder automatically stores in its memory the recording start time date channel etc If the tape is recorded on this recorder for the first time new tape number and the recording date are also registered On the tape only the tape number information is recorded 1 2 3 4 5 6 7 8 9 1 2 1 2...

Page 25: ...move the highlight bar pointer to NAVIGATION then press OK or to set to OFF RETURN TO NORMAL SCREEN 2 Press MENU Turn Off Navigation If you don t want to record information on the programmes set NAVIGATION to OFF Perform steps 1 to 2 of Check Memory on page 24 before continuing VIDEO NAVIGATION EDIT TITLE FIND TITLE FIND BLANK SPACE CHECK MEMORY NAVIGATION OFF 5 MENU EXIT CHECK MEMORY 3 Press fi t...

Page 26: ...e the highlight bar pointer to FIND BLANK SPACE then press OK SELECT TAPE NUMBER 2 Press fi to move the highlight bar pointer to the tape number on which you want to record a programme then press OK The calculated blank space is based on the current tape speed SP LP or EP selected on the recorder If the cassette on which the blank space you have found exists is loaded the recorder searches the beg...

Page 27: ...0 _ ACCESS MAIN MENU SCREEN 1 Press MENU ACCESS VIDEO NAVIGATION SCREEN 2 Press fi to move the highlight bar pointer to VIDEO NAVIGATION then press OK or ACCESS EDIT TITLE SCREEN 3 Press fi to move the highlight bar pointer to EDIT TITLE then press OK or SELECT TAPE NUMBER 4 Press fi to move the highlight bar pointer to the number of the tape whose title you want to edit then press OK or The mark ...

Page 28: ... category you want then press OK or RETURN TO NORMAL SCREEN 4 Press MENU Perform steps 1 to 4 of Edit Tape Title on page 27 before continuing 0114 18 03 99 1 3 20 00 27 02 99 BBC2 22 00 26 02 99 BBC1 21 00 28 02 99 L 1 22 15 28 02 99 PR 07 8 15 15 01 00 PR 99 20 00 21 30 1 30 SP TITLE CATEGORY 5 EDIT DELETE MENU EXIT 0114 18 03 99 1 3 20 00 27 02 99 BBC2 22 00 26 02 99 BBC1 21 00 28 02 99 L 1 22 1...

Page 29: ...necessary data of tape or programme from the recorder s memory 0114 18 03 99 1 3 20 00 27 02 99 BBC2 22 00 26 02 99 BBC1 21 00 28 02 99 L 1 22 15 28 02 99 PR 07 8 15 15 01 00 PR 99 20 00 21 30 1 30 SP TITLE CATEGORY 5 EDIT DELETE MENU EXIT 20 00 27 02 99 BBC2 DELETE YES NO 5 MENU EXIT Delete Tape Data SELECT TAPE TITLE 1 Press fi to move the highlight bar pointer to the tape number you want to del...

Page 30: ...ECT PROGRAMME 5 Press fi to move the highlight bar pointer to the programme you want to play back then press OK If the cassette on which the programme you have found is recorded is loaded playback begins automatically after the selected programme is located LOAD A CASSETTE 6 Insert the cassette whose number is displayed on the screen Playback begins automatically after the selected programme is lo...

Page 31: ... 21 12 98 0975 GUNDAM1 30 10 99 0960 ZDF 2100 28 11 97 0960 PR99 1000 01 01 00 0951 GODILLA 25 11 97 0926 CNN 115 06 06 98 0910 RA11 930 05 02 99 2 3 PAGE MEMU EXIT 5 EDIT ACCESS DATE SCREEN 1 Press fi to move the highlight bar pointer to BY DATE then press OK or SELECT PROGRAMME 2 Press fi to move the highlight bar pointer to the programme you want to play back then press OK If the cassette on wh...

Page 32: ...R ADVANCED OPERATIONS Digital TBC NR Your video recorder is equipped with a Digital TBC Time Base Corrector that removes jitter from fluctuating video signals to deliver a stable picture even with old tapes and rental cassettes The on off of Digital 3 DNR Noise Reduction which cuts noise and enables clear picture reproduction is also linked to this function The default setting is ON We recommend t...

Page 33: ...y turned OFF Digital 3R Digital 3R picture system applies edge correction to the luminance signal to enhance detail ACCESS MAIN MENU SCREEN 1 Press MENU ACCESS MODE SET SCREEN 2 Move the highlight bar arrow to MODE SET by pressing fi then press OK or SELECT DIGITAL 3R SET MODE 3 Move the highlight bar arrow to DIGITAL 3R by pressing fi then press OK or to set to ON RETURN TO NORMAL SCREEN 4 Press ...

Page 34: ...r fi briefly 5 times to move the on screen s audio levels by one division on the scale To move the audio levels faster keep or fi pressed Adjust the recording level while watching the recorder s audio level meters Set the level so that maximum volume causes the meters to vary between 0dB to 4dB RETURN TO NORMAL SCREEN 4 Press MENU NOTES Noise will increase if the recording level is too low while d...

Page 35: ...f stereo and bilingual broadcasts possible When the recorder is tuned to a different station the type of broadcast being received will be displayed on the TV screen for a few seconds To listen to a stereo programme press AUDIO until and appear on the front display panel or HI FI L R appears on the screen To listen to a bilingual programme press AUDIO until either or appears on the front display pa...

Page 36: ...king For The Scene You Want SKIP OVER UNWANTED SECTIONS 1 Press 30 SEC 1 to 4 times during playback Each press initiates a 30 second period of fast motion playback Normal playback resumes automatically NOTE To return to normal playback during a Skip Search press PLAY Skip Search 30 SEC OK RECORD PLAY Manual Index Mark Erase To mark an index code during playback press INDEX MARK on the recorder The...

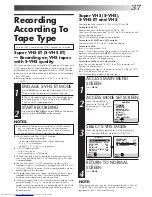
Page 37: ...with the S VHS ET function You can activate this function only before you start recording on a VHS tape Before recording make sure that B E S T is set to ON Z pg 38 ENGAGE S VHS ET MODE 1 Press S VHS ET on the recorder s front panel The S VHS ET indicator on the recorder s front panel lights up The S VHS indicator lights up on the front display panel To disengage the S VHS ET mode press S VHS ET T...

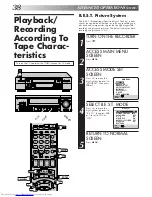
Page 38: ...ENU SCREEN 2 Press MENU ACCESS MODE SET SCREEN 3 Press fi to move the highlight bar pointer to MODE SET then press OK or SELECT B E S T MODE 4 Press fi to move the highlight bar pointer to B E S T then press OK or to set to ON or OFF RETURN TO NORMAL SCREEN 5 Press MENU PAUSE PLAY OK RECORD Turn on the TV and select the VIDEO channel or AV mode MAIN MENU MODE SET AUTO CH SET MANUAL CH SET OUTPUT I...

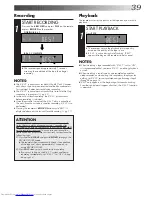
Page 39: ...tape in use B E S T is active during Auto Tracking BEST appears blinking on the recorder s display panel NOTES When watching a tape recorded with B E S T set to ON it is recommended that you leave B E S T on during playback as well When watching a rental tape or one recorded on another video recorder or when using this recorder as the player for editing set B E S T to your preference by performing...

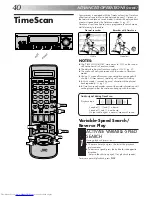
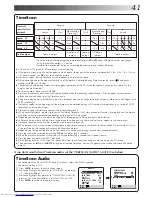
Page 40: ...ed will also be 1 5 times normal so dialog will sound fast talking In Pause mode 3 seconds approx of audio will be played back repeatedly Z pg 15 In TimeScan search modes some of the audio information will not be played so that the audio can keep up with the video OK 1 2 3 4 5 Audio signal during TimeScan Sound of 1 3 and 5 is heard Sound of 2 and 4 is not heard Output audio signal is normal monau...

Page 41: ...he audio and noise may appear in the audio signal TimeScan sound quality will differ in comparison to normal playback When material such as music videos where there is non stop sound very few breaks in the soundtrack are viewed at 1 5x or 2x normal speed the audio playback may be faster than normal Depending on the type of tape contents the sound may not be clear during forward slow motion playbac...

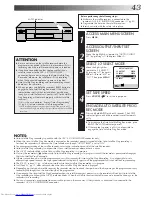
Page 42: ...matic Satellite Programme Recording NOTE Refer to the instructions supplied with your satellite receiver Mains outlet TV Aerial cable Aerial connector Satellite Receiver Unit Satellite Cable Outdoor Unit Aerial Back of TV 21 pin AV input connector SCART RF OUT ANT IN Back of Recorder ADVANCED OPERATIONS cont IMPORTANT When you set L 2 SELECT to SAT Z pg 52 it is possible to view a satellite broadc...

Page 43: ...SAT indicator goes off If the recorder s power is off it is not possible to engage the Auto Satellite Prog Rec mode NOTES Auto Satellite Prog recording is possible with the AV2 L 2 IN DECODER connector only When the Auto Satellite Prog Rec mode is engaged or the recorder s power is turned off after Auto Satellite Prog recording is finished the recorder will not enter the Timer mode even though AUT...

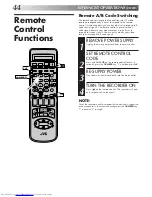
Page 44: ... signals You can easily modify your video recorder to respond to B code signals REMOVE POWER SUPPLY 1 Unplug the mains power cord from the mains outlet SET REMOTE CONTROL CODE 2 Press and hold VCR on the remote control for over 2 seconds press the NUMBER key 2 and then press OK RE SUPPLY POWER 3 Plug the mains power cord back into the mains outlet TURN THE RECORDER ON 4 Press on the remote control...

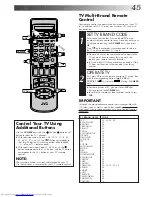
Page 45: ...me instances may have limited function capability TV Multi Brand Remote Control Your remote control can operate the basic functions of your TV set In addition to JVC TVs other manufacturer s TVs can also be controlled OK TV PR TV Control Your TV Using Additional Buttons Use the NUMBER keys and the button button or button to select the TV s channel With televisions under Code 01 02 07 10 11 14 20 2...

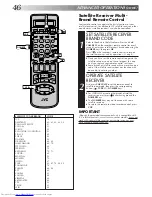
Page 46: ...code try entering another OPERATE SATELLITE RECEIVER 2 First press CABLE SAT to set the remote control to satellite tuner mode then press the corresponding button TV PR NUMBER keys For VIDEOWAY or some other brands of satellite receiver you must press after having pressed the NUMBER keys The NUMBER keys may not function with some satellite receivers To return the remote to video recorder control p...

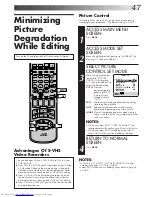
Page 47: ...faces such as cartoons NOTES When you select EDIT SOFT or SHARP the selected mode will not change until you select again When you select EDIT to dub tapes be sure to select AUTO after you finish dubbing the tapes RETURN TO NORMAL SCREEN 4 Press MENU NOTES When B E S T is OFF PICTURE CONTROL switches automatically from AUTO to NORM Select EDIT when you are dubbing tapes Refer to page 48 49 or 50 MO...

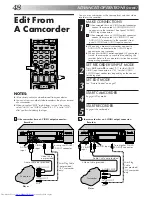
Page 48: ...he AUDIO VIDEO input connectors or S 1 for the AUDIO S VIDEO input connectors depending on the connec tors being used SET EDIT MODE 3 See Picture Control on page 47 START CAMCORDER 4 Engage its Play mode START RECORDER 5 Engage its Record mode Mini Plug Cable not provided JVC camcorder only VIDEO OUT EDIT Camcorder VIDEO input Recorder To rear panel PAUSE R A EDIT connector AUDIO OUT Video Cable n...

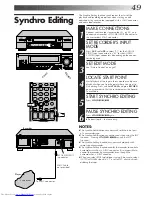
Page 49: ...ORD on your recorder so that the recorder enters the Record Pause Mode START SYNCHRO EDITING 5 Press SYNCHRO 8 PAUSE SYNCHRO EDITING 6 Press SYNCHRO 8 again Repeat steps 4 6 as necessary NOTES The Synchro Edit function may not work with the initial part of a camcorder tape The Synchro Edit function cannot be used when using the JLIP function Pressing SYNCHRO 8 cancels the JLIP function The Synchro...

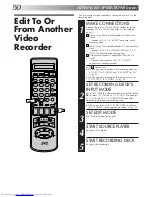
Page 50: ...le With The Y C Signal connect your recorder s AV1 L 1 IN OUT connector to another recorder With C connection When using your recorder as the recording deck set L 1 INPUT to S VIDEO and L 2 SELECT to A V Z pg 52 When using your recorder as the source player set L 1 OUTPUT to S VIDEO Z pg 52 SET RECORDING DECK S INPUT MODE 2 Set to AUX With this video recorder press AUX and or PR to select L 1 for ...

Page 51: ... When you use this recorder as the player for editing be sure to set O S D to OFF before starting Z pg 59 If you are using another recorder with S Video and Audio input output connectors you can connect those connectors to this recorder s S VIDEO IN S OUT and AUDIO IN OUT connectors When Using Your Video Recorder As The Source Player connect its rear panel S OUT and AUDIO OUT connectors to the rec...

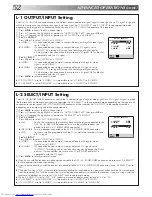
Page 52: ...s expired due to a power cut or because the AC was removed from the recorder A V will be automatically selected when the power is restored to the recorder If you are using a satellite receiver or a decoder be sure to set L 2 SELECT back to appropriate mode When L 2 SELECT is set to SAT SAT appears on screen or display panel instead of L 2 or L2 If L 2 SELECT is set to DECODER it is impossible to s...

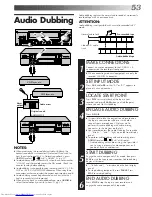
Page 53: ...ible if you re using a monaural audio component or if you don t have an audio mixer START DUBBING 5 Engage the audio component s Play mode then press PLAY to start the tape in your recorder Audio dubbing begins at this point blinks and is displayed on the front display panel To stop dubbing temporarily press PAUSE Press PLAY to resume dubbing END AUDIO DUBBING 6 Press STOP to stop the tape in your...

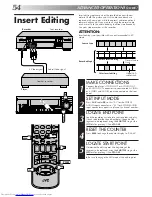
Page 54: ...or the VIDEO AUDIO input connectors or S 1 for S VIDEO AUDIO input connectors appears in place of a channel number LOCATE END POINT 3 Load the recording cassette into your recorder and play it back to determine the edit out point the end of the segment to be replaced using the SHUTTLE ring or the JOG dial or pressing and PAUSE RESET THE COUNTER 4 Press 0000 to change the counter display to 0 00 00...

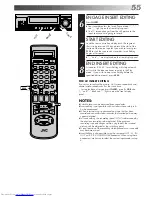
Page 55: ...dtrack and normal audio soundtrack all at the same time In step 6 above after you press INSERT press A DUB also and blink and lights up on the front display panel NOTES Suitable leads can be obtained from your dealer Insert editing is not possible with cassettes whose safety tab has been removed When insert editing is performed on a tape that has been recorded on another video recorder the inserte...

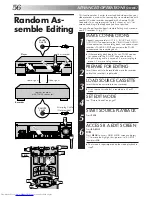
Page 56: ...ck If the recording deck doesn t have a PAUSE connec tor connect to the R A EDIT connector instead The Mini plug cable is a mono 3 5 mm mini plug to mono 3 5 mm mini plug connector PREPARE FOR EDITING 2 Insert the cassette to be recorded on into the recorder and set the recorder s input mode LOAD SOURCE CASSETTE 3 Insert the source cassette into your recorder Use a source cassette that is recorded...

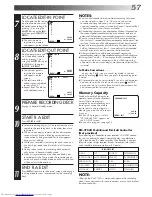
Page 57: ...r reading that is at least 1 second after the corresponding edit in point Any less than 1 second and the edit out point will not be registered Since the source recorder prerolls during Random Assemble Editing there must be at least 15 seconds worth of recorded material prior to any edit in point on the source tape If the search time for an edit in point exceeds 5 minutes the recording deck enters ...

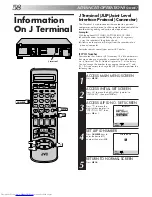
Page 58: ...ique when your recorder is connected to another device via its J terminal The ID Number is preset to 1 at the factory You can change this number to any number between 1 and 99 If it is necessary to change the JLIP ID number perform the following steps J terminal ACCESS MAIN MENU SCREEN 1 Press MENU ACCESS INITIAL SET SCREEN 2 Press fi to move the highlight bar pointer to INITIAL SET then press OK ...

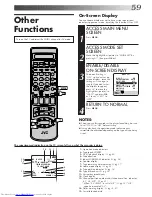
Page 59: ...nter to O S D and press OK or to set O S D to OFF RETURN TO NORMAL 4 Press MENU Other Functions 1 Operation mode indicators 2 Tape speed SP LP EP 3 NTSC playback display Z pg 62 4 Tape direction 5 Index MARK ERASE indicator Z pg 36 6 Counter display 7 Tape remaining time indicator Z pg 17 8 Audio mode display Z pg 35 9 Tape position indicator Z pg 14 10 Type of Broadcast Z pg 35 11 Current day mon...

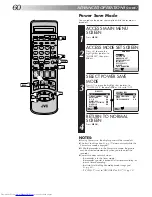
Page 60: ... engaged While the recorder is in the Power Save mode the picture may be distorted momentarily when you turn on off the recorder Power Save does not work when the recorder is in the Timer mode the recorder s power is turned off after timer recording or Instant Timer Recording the Auto Satellite Prog Recording mode is engaged Z pg 42 L 2 SELECT is set to DECODER or SAT Z pg 52 MAIN MENU MODE SET AU...

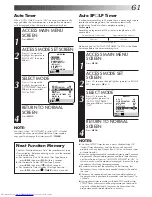
Page 61: ... 2 Press fi to move the highlight bar pointer to MODE SET then press OK or SELECT MODE 3 Press fi to move the highlight bar pointer to AUTO SP LP TIMER then press OK or to select ON RETURN TO NORMAL SCREEN 4 Press MENU MODE SET B E S T ON PICTURE CONTROL AUTO AUTO TIMER OFF O S D ON DIRECT REC ON AUTO SP LP TIMER ON DIGITAL 3R ON NEXT PAGE 5 MENU EXIT Auto Timer When AUTO TIMER is set to ON the ti...

Page 62: ...trol found on some TVs This cannot be corrected if the TV does not have a V HOLD control The counter and tape remaining time readings will be incorrect During search still or frame by frame playback the picture will be distorted and there may be a loss of colour Depending on the type of TV the top and bottom portions of superimposed displays may be cut off during NTSC playback Retake You can cut o...

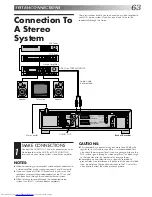
Page 63: ...ure you connect L and R correctly If you can receive NICAM TV broadcasts in your area this recorder can record them independently of the TV set and play them back through the connected stereo system When listening to sound through the connected stereo system turn the TV s volume down completely CAUTIONS This recorder has a dynamic range of more than 80 dB with regards to its Hi Fi audio capability...

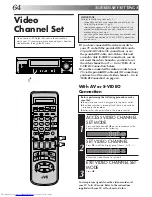
Page 64: ... RF cable an S Video cable and an audio cable S VIDEO connection you do not need the video channel so you have to set the video channel to off Go to With AV or S VIDEO Connection below If you have connected the video recorder to your TV via the provided RF cable only RF connection you have to set the correct video channel Go to With RF Connection on page 65 Before performing the following procedur...

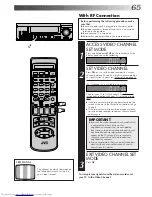
Page 65: ...e screen as shown in the illustration at bottom left go to step 3 If the two vertical white bars do not appear clearly re set the video recorder to another vacant channel and try again IMPORTANT If you set the video recorder to a channel which is occupied by a local station or has neighbouring channels that are occupied by local stations the picture reception quality will be affected and some inte...

Page 66: ...ess ACCESS MAIN MENU SCREEN 2 Press MENU PERFORM AUTO CHANNEL SET 3 Move the highlight bar pointer to AUTO CH SET by pressing fi then press OK or When you have connected the video recorder to a TV offering T V Link via the AV connection Z pg 6 and the TV is turned on the recorder automati cally performs the Preset Download Z pg 9 even if you select AUTO CH SET The Auto Set screen appears and remai...

Page 67: ...ored correctly and auto Guide Program Number Set may not work properly If the Guide Program numbers are not set properly when you timer record a TV programme using the VIDEO Plus system the recorder will record a TV programme of a different station When programming the timer using the VIDEO Plus system be sure to check that the preset position corresponding to the broadcasting station you wish to ...

Page 68: ... program ming with the VIDEO Plus system in this state the GUIDE PROG SET screen appears set the Guide Program numbers on this screen Z ATTENTION Regarding Guide Program Number Set on page 19 Or perform Guide Program Number Set Z pg 74 The blueback screen and the programme currently being broadcast by the selected channel appear alternately for 8 seconds each SELECT BAND 4 Press fi to change the b...

Page 69: ...nuing SELECT CHANNEL TO FINE TUNE 1 Press fi until the channel you want to tune begins blinking ACCESS MANUAL CHANNEL SET SCREEN 2 Press OK twice The Manual Channel Set screen appears PERFORM TUNING 3 Press until begins blinking then press fi until the picture is clearest Then press OK The Confirmation screen appears Repeat steps 1 through 3 as necessary CLOSE CONFIRMATION SCREEN 4 Press MENU Fine...

Page 70: ...begins blinking ACCESS MANUAL CHANNEL SET SCREEN 2 Press OK twice SELECT NEW STATION 3 Press until the station name ID begins blinking then press fi until the new station s name ID you want to store begins blinking Registered station names Z pg 71 appear as you press fi SWITCH STATIONS 4 Press OK The Confirmation screen appears Repeat steps 1 through 4 as necessary CLOSE CONFIRMATION SCREEN 5 Pres...

Page 71: ... RAI2 RAI2 RAI3 RAI3 RB1 RB1 RB3 RB3 Rikisutvarpid S RKPS RTBF 1 RTB1 RTBF 2 RTB2 RTE 1 RTE1 RTL RTL RTL 2 RTL2 RTP RTP STATION NAME ID SAT SAT SAT 1 SAT1 Scottish TV SCOT SC4 SC4 SDR SDR SDR1 SDR1 SFB1 SFB1 SFB3 SFB3 SKY SKY Sky One SKY1 Sky Net SKYN Sport SPRT SR 1 SR1 Super RTL SRTL STV Test STVT STV 1 STV1 STV 2 STV2 Suedwest3 SWR SWF 1 SWF1 Schweiz4 SWZ4 TYNE TEES TEES Text TEXT TF1 TF1 TNT i...

Page 72: ...65 52 Midlands Ridge Hill 22 28 25 32 35 Sutton Coldfield 46 40 43 50 37 The Wrekin 26 33 23 29 35 Waltham 58 64 61 54 35 North Belmont 22 28 25 32 56 Emley Moor 44 51 47 41 37 BBC1 BBC2 ITV CH4 CH5 North West Caldbeck 30 34 28 32 56 Winter Hill 55 62 59 65 48 North East Bilsdale West Moor 33 26 29 23 35 Chatton 39 45 49 42 Pontop Pike 58 64 61 54 68 Scotland Angus 57 63 60 53 Black Hill 40 46 43 ...

Page 73: ...ock adjustments SET CLOCK DATA SOURCE PRESET 7 The recorder is preset to receive clock setting and adjustment data from preset position 1 Press fi to set the preset position to the number representing the station transmitting clock setting data BBC1 BBC2 etc then press OK or START CLOCK OPERATION 8 Press MENU Clock Set Turn on the TV and select the VIDEO channel or AV mode NOTES Just Clock when se...

Page 74: ...light bar pointer to GUIDE PROG SET then press OK or ENTER GUIDE PROG NUMBER 4 Press fi to enter the Guide Program number for the desired station as shown in the TV listings Then press OK or Ex When inputting the Guide Program number 4 for CH4 ENTER RECEIVING PRESET POSITION NUMBER 5 Press the NUMBER key 0 to select TV PROG or SAT Then press fi to input the number of the preset position on which t...

Page 75: ...mal It reduces distortion at the pause and resume points Q Can the video recorder indefinitely remain in the Record Pause mode A No The video recorder shuts off automatically after 5 minutes to protect the heads Q What happens if the tape runs out during recording A The video recorder automatically rewinds it to the beginning or if Timer Recording the cassette is ejected ATTENTION This recorder co...

Page 76: ...you re using the AV or S VIDEO connection the TV receiver is not set to the AV mode This is normal during visual search other than TimeScan The automatic tracking mode is engaged The video heads may be dirty Automatic tracking is engaged CORRECTIVE ACTION If you are using the RF connection set the TV receiver to the VIDEO channel Z pg 8 Perform Video Channel Set Z pg 64 If you are using the AV or ...

Page 77: ...ts microphone is away from the TV Turn the TV s volume down If you need the skipped channels restore them Z pg 68 Press PAUSE to pause the recording change presets then press PLAY to resume recording Perform manual setting again Turn off the recorder once and connect the TV aerial cable to the recorder properly then turn on the recorder again The recorder will try Auto Set Up again Z pg 8 Turn off...

Page 78: ...disables the Auto Satellite Prog Rec mode Z pg 43 S VHS ET Button enables disables S VHS ET mode Z pg 37 DIGITAL TBC NR Button enables disables Digital TBC NR Z pg 32 TIMER Button engages timer standby mode Z pg 19 21 S VIDEO Input Connector enables S VIDEO connection to camcorder or second recorder Z pg 48 AUDIO Input Connector L enables easy connection of audio output mono from an other recorder...

Page 79: ...p during Digital TBC NR Z pg 32 0 INSERT Button engages Insert Editing mode Z pg 55 TIMER Indicator lights when has been pressed to engage Timer mode Z pg 19 21 A DUB Button engages Audio Dubbing mode Z pg 53 JOG Dial plays back frame by frame during Still or Play mode Z pg 15 SHUTTLE Ring performs forward and reverse slow motion and search during Still or Play mode Z pg 14 15 START Button accesse...

Page 80: ...enables connection to camcoder equipped with LANC connector for easy editing Z pg 49 6 ANT IN Connector enables connection of aerial Z pg 6 REAR VIEW SUBSIDIARY INFORMATION cont 7 Remote PAUSE Connector enables connection to second recorder equipped with R A Edit connector or to JVC camcorder equipped with Master Edit Control for easy editing Z pg 48 R A EDIT Connector enables connection to second...

Page 81: ...d Z pg 17 0 Cassette Loaded Mark lights once a cassette is inserted remains lit until cassette ejected PDC Indicator lights when PDC has been engaged for timer recording Z pg 19 21 VPS Video Programme System recording is not currently available in the U K and not possible with this recorder VCR Indicator lights when the video recorder is in the video mode At this point the TV auto matically enters...

Page 82: ... pg 16 the VIDEO Plus timer programming Z pg 18 7 DAILY Button enables timer recording of daily serials Z pg 19 21 8 PDC Button enables disables PDC recording Z pg 19 21 VPS Video Programme System recording is not currently available in the U K and not possible with this recorder 9 Button cancels timer programme Z pg 23 0000 Button resets counter to 0 00 00 Z pg 17 0 Button accesses Program screen...

Page 83: ...xpress Timer Programming and the VIDEO Plus Timer Programming operations To perform a TV operation again switch to TV mode first Accessing main menu To perform a TV operation again switch to TV mode first CABLE SAT Button enables remote control of connected satellite receiver Z pg 46 Remote Control LCD in the right column STANDBY ON Button same as button on recorder Display Button switches display...

Page 84: ...ency range 70 Hz to 10 000 Hz Normal audio 20 Hz to 20 000 Hz Hi Fi audio Input Output 21 pin SCART connectors IN OUT x 1 IN DECODER x 1 RCA connectors VIDEO IN x 1 AUDIO IN x 1 AUDIO OUT x 1 S Video connectors IN x 1 OUT x 1 TUNER TIMER TV channel storage capacity 99 positions AUX position Tuning system Frequency synthesized tuner Channel coverage VHF 44 5 MHz 143 MHz 143 MHz 470 MHz UHF 470 MHz ...

Reviews: