EN
19
Basic
Recording
This VCR can check the tape condition during recording
(and playback), and realizes the best possible pictures.
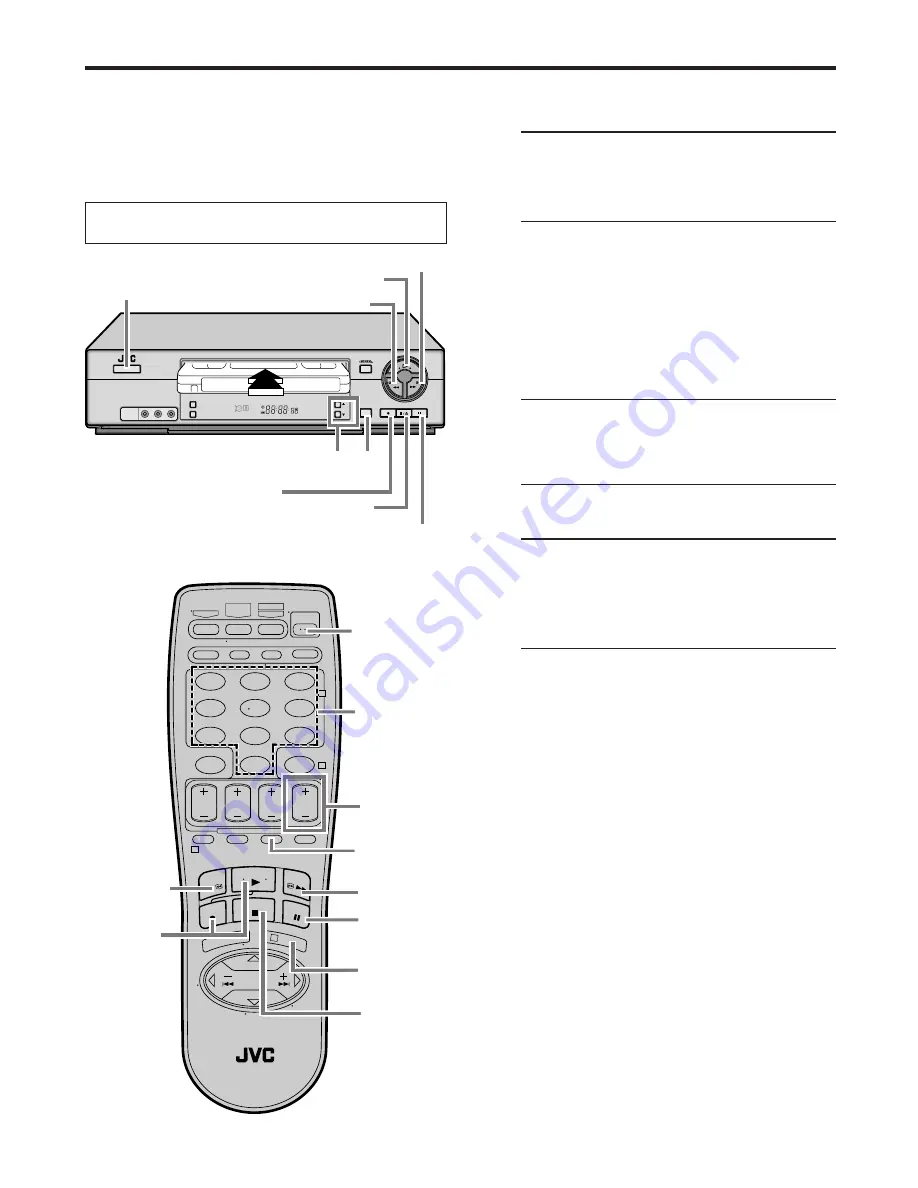
1
Load a cassette
Make sure the record safety tab is intact. If not,
cover the hole with adhesive tape before
inserting the cassette.
2
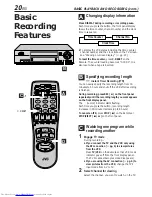
Select recording channel
On the front panel:
Press CH
5∞
.
On the Remote:
a– Press CH + or –.
or
b– Press the Number keys then ENTER.
(The channel changes after a few seconds
whether you press ENTER or not.)
●
If you connect the TV and the VCR only using
the RF connection, press TV/VCR on the Remote
so that the VCR mode indicator lights on the front
display panel, to view the program to be recorded.
3
Set tape speed
Press SP/EP to set the recording speed.
4
Start recording
On the front panel:
Press REC (
).
On the Remote:
While holding REC (
), press PLAY (
3
).
●
If “VIDEO CALIBRATION” is set to “ON” (default
setting:
Z
pg. 33), this VCR checks the tape con-
dition for about seven seconds, then starts record-
ing. (This means that the first seven seconds of
the program will not be recorded. If this is incon-
venient for you, follow the steps below:
1
Press REC (
) and PAUSE (
8
) to start
Video Calibration.
2
Then press PLAY (
3
) to start recording
after Video Calibration is complete.
To pause recording
Press PAUSE (
8
). To resume recording, press PLAY (
3
).
To stop recording
Press STOP (
7
) on the Remote or STOP/EJECT (
7
/
0
)
on the front panel.
To rewind the tape
Press REW (
1
).
To fast-forward the tape
Press FF (
¡
).
To eject the tape
Press STOP/EJECT (
7
/
0
) on the front panel when the
tape is not running.
●
You can also eject the cassette with the VCR turned off.
To turn off the VCR
Press POWER.
Turn on the VCR and the TV, and select the VCR
channel 3 or 4 (or AV mode) on the TV.
1
2
3
4
5
6
7
8
9
0
2
4
1
3
STOP (
7
)
FF (
¡
)
REW (
1
)
3
2
–
a
2
–
b
2
–
b
POWER
PAUSE (
8
)
4
SP
EP
VCR
STOP/EJECT
(
7
/
0
)
3
PAUSE (
8
)
PLAY (
3
)
POWER
REW (
1
)
FF (
¡
)
4
2


