(No.YA436)1-9
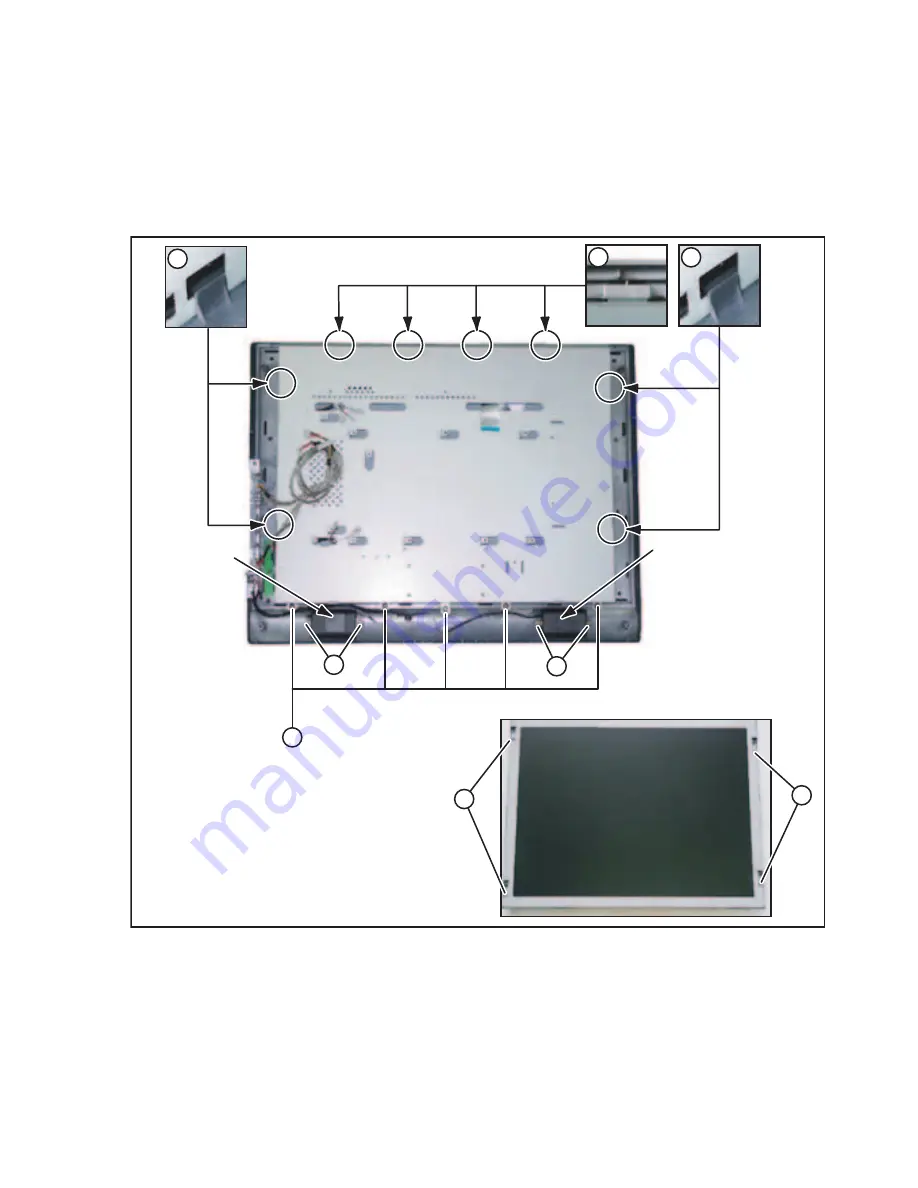
3.1.6 REMOVING THE LCD PANEL UNIT (Fig.4)
• Remove the STAND ASS'Y.
• Remove the REAR COVER.
• Remove the MAIN PWB SHIELD.
• Remove the MAIN PWB.
• Remove the INVERTER PWB.
(1) Remove the 5 screws
[K]
.
(2) Remove the 2 claws
[L]
, 2 claws
[M]
and 4 claws
[N]
, then
remove the LCD PANEL UNIT and LCD BRACKET.
(3) Remove the 4 screws
[P]
, then remove the LCD PANEL UNIT.
3.1.7 REMOVING THE SPEAKER (Fig.4)
• Remove the STAND ASS'Y.
• Remove the REAR COVER.
(1) Disconnect the connectors from the KEY PWB.
(2) Remove the 4 screws [Q], then remove the SPEAKER (L/R).
NOTE:
• It is advisable to take note of the connecting location (con-
nector number) of the removed connectors.
Fig.4
SPEAKER
Q
[FRONT SIDE]
Q
P
P
SPEAKER
K
L
N
M


