background image

Summary of Contents for JVC KW-R910BT

Page 1: ... best possible performance from the unit Por favor lea detenidamente este manual para comprender a fondo todas las instrucciones y obtener un maximo disfrute de esta unidad Veuillez Iires les instructions attentivement avant d utitiser l appareil afin d obtenir les meilleures performances possibles de l appareil For customer Use Enter below the Model No and Ser ial No which are located on the top ...

Page 2: ...user could lose the authorityto operate this equipment ifan unauthorized change or modification is made FCC NOTE This equipment has been tested and found to comply with the limits for aClass Bdigital device pursuant to Part 15 ofthe FCC Rule These limits are designed to provide reasonable protection against harmful interferehce in aresidential installation This equipment may cause harmful interfer...

Page 3: ...of RF energy that it deemed to comply without maximum permissive exposure evaluation MPE But it is desirable that it should be installed and operated keeping the radiator atleast 20cm or more awayfrom person s body excluding extremities hands wrists feetand ankles Under Industry Canada regulations this radio transmitter may only operate using an antenna ofatype and maximum or lesser gain approved ...

Page 4: ...s coins or metal tools inside the unit to prevent a short circuit It a disc error occurs due to condensation on the laser lens eject the disc and wait for the moisture to evaporate Remote control RM RK52 Do not leave the remote control in hot places such as on the dashboard The Lithium battery is in danger of explosion if replaced incorrectly Replace it only with the same or equivalent type The ba...

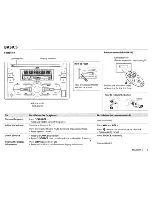
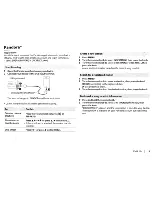
Page 5: ...urce Change the display information Volume knob turn press Press C SOURCE Press and hold to turn off the nn AICH Turn the volume knob Press the volume knob to mute the sound or pause playback Press again to cancel Press C SOURCE repeatedly Press C SOURCE then turn the volume knob within 2 seconds Press DISP repeatedly 20 Press and hold to scroll the current information not available Press VOL or V...

Page 6: ...ake a selection see the following table then press the knob 3 Press MENU to exit To return to the previous setting item or hierarchy press PTY Default XX CLOCKADJ AUTO The clock ime is automatically set using the Clock Time CT data in CLOCK DISP FM Radio Broadcast Data OFF Cancels ON The clock time is shown on the display even when the u nit is turned off OFF Cancels AM ON Enables AM in source sel...

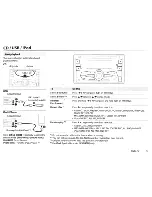
Page 7: ...or press and hold on RM RK52 Fast forward ____ ________ _________________ Repeat play 4 Press 3 b repeatedly to m ake a selection Audio CD or JVC Playlist Creator JPC I JVC Music Control JMC file 20 TRACK RPT RPT OFF MP3 WMA WAV file TRACK RPT FOLDER RPT RPT OFF iPod ONE RPT ALL RPT RPT OFF Random ptay 4 Press 2 X repeatedly to make a selection Audio CD ALL RND RND OFF MP3 WMA WAVfile or JPC I JMC...

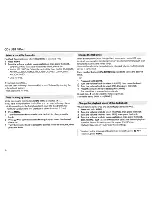
Page 8: ... knob 6 When a smartphone Mass Storage Class is connected to the USB input terminal you can select its internal memory or external memory such as an SD card to playback the stored songs You can also select the desired drive to playback when a multiple drives device is connected Press number button 5 iPod MODE repeatedly to select the desired drive or 1 Press and hold MENU 2 T urn the volume knob t...

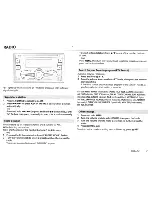
Page 9: ... the volume knob to select a preset number and press the knob to confirm Available only for FM source 1 Press and hold PTY 2 Turn the volume knob to select a PTY code then press the k ob to start searchi ng If there is a station broadcasting a program of the same PTY code as you have selected that station is tuned in PTY code NEWS IN FORM information SPORTS TALK ROCK CLS ROCK classic rock ADLTHIT ...

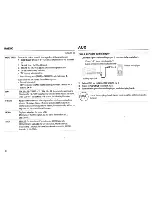
Page 10: ... BAND AUTO Increases the tuner selectivity to reduce interference noises from adjacent FM stations Stereo effect may be lost WIDE Subjects to interference noises from adjacent FM stations but sound quality will not be degraded and the stereo effect will remain MONO Displayed only when the source is FM ON Improves the FM reception but the stereo effect will be lost OFF Cancels AREA AREA US For Nort...

Page 11: ... If thumbs down is selected the current track is skipped Skip a track Press or press on RM RK52 reate a new s tation 1 Press MENU 2 Turn the volume knob to select NEW STATION then press the knob 3 Turn the volume knob to select FROM TRACK or FROM ARTIST then press the knob A new station is created based on the current song or artist 1 Press MENU 2 Turn the volume knob to make a selection then pres...

Page 12: ...n RM RK52 If thumbs down is selected the current track is skipped ____________ Skip a track for custom station Press or press _ on RM RK52 Create a new custom station Press and hold the volume knob Add to favorite stations for Press and hold 3 live station Scan for live station Press 3 1 ____________ 1 Press MENU 2 Turn the volume knob to select acategory then press the knob 3 Turn the volume knob...

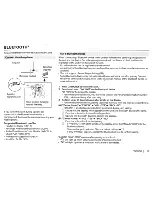
Page 13: ... Connect the device tothe unit manually Refer to the instruction manual of the Bluetooth device for more information 1 Press C SOURCE to turn on the unit 2 Search and select JVC UNIT on the Bluetooth device BT PAIRING flashes on the display For some Bl etooth devices you may need to enter the Personal Identification Number PIN code immediately after searching 3 Perform A or B depending on what scr...

Page 14: ...atible with Hands Free Profile HFP 2 Compatible with Advanced Audio Distribution Profile A2DP 3 Compatible with Phonebook Access Profile PBAP After 30 seconds PAIRING DELETED appears to indicate that pairing has been deleted and the unit exits check mode To cancel press and hold 9 SOU CE to turn off the power then turn on the power again 12 Bluetooth mobile phone Do this Receive a ca II Press I or...

Page 15: ...ny contacts 14 Select acontact by name BLUETOOTH DIAL NUMBER 1 Turn the volume knob to select anumber 0 to 9 or character 2 Press to move the entry position Repeat steps 1 and 2 until you finish entering the phone number 3 Press the volume knob to call VOICE Speak the name ofthe contact you want to call orthe voice ommand to control the phone functions 14 Use Voice Recognition SETTINGS Default XX ...

Page 16: ...IAL NUMBER then press the knob 3 Turn the volume knob to select a Contact or enter a phone number If a contact is selected press the volume knob to show the phone number 4 Press and hold one of the number buttons 1 to 6 MEMORY P selected preset numbert appears when the contact is stored To erase a contact from the preset memory select DIAL NUMBER in step 2and store a blank number 14 Makea callfrom...

Page 17: ...nebook and etc NO Cancels n INFORMATION MY BT NAME Displays the unit name JVC UNIT MY ADDRESS Shows address ofthis unit 1 JVC Smart Music Control is designed to view JVC car receiver status and perform simple control operations on Android smart phones For JVC Smart Music Controt operations visit JVC website http www jvc net cs car 2 Selectable only when the connect d phone supports OPP Preparation...

Page 18: ...ct a preset equalizer Store your own sound settings Default OO 1 2 3 4 l othis Press EQ repeatedly or Press EQ then turn the volume knob within 2 seconds FLAT default HARD ROCK JAZZ POP R B TALK USER1 USER2 VOCAL BOOST BASS BOOST CLASSICAL DANCE Press and hold EQ Turn the volume knob to select EASY EQ then press the knob Turn the volume knob to select USERl or USER2 then press the knob Turn the vo...

Page 19: ...z I HIGH 120Hz Audio signals with frequencies lower than 55 Hz 85 Hz 120 Hz are sent to the subwoofer FADER 3 4 R06 F06 QQ Adjusts the front and rear speaker output balance BALANCE 3 L06 R06 00 Adjusts the left and right speaker output balance VOL ADJUST AMP GAIN D T EXP Digital Track Expander l 0 MODE 05 05 00 Presets the volume adjustment level of each source compared to the FM volume level Befo...

Page 20: ... For All ZONE you can also select acolor pattern Default color All ZONE COLOR 06 ZONE 1 COLOR 06 DISP ZONE COLOR 01 ZONE 2 COLOR 271 1 Select azone for setting Illustration on the left column 2 Select acolorfor the selected zone COLOR 01 to COLOR 29 USER The color you have created for DAY COLOR or NIGHT COLOR is shown COLOR FLOW 01 to COLOR FLOW 03 Color changes at differentspeeds SPECTRUM GROOVE ...

Page 21: ... 64 characters This unit can recognize atotal of 20 480 files 999 folders 999 files per folder including folder without unsupported files and of 8hierarchies This unit cannot recognize aUSB device whose rating is other than 5Vand exceeds 1A About iPod iPhone Made for iPod touch 1st 2nd 3rd Ath and 5th generation iPod classic iPod nano 3rd 4th 5th 6th and 7th generation iPhone iPhone 3G 3GS 4 4S 5 ...

Page 22: ... recorded NO NAME appears TROUBLES HOOTING Symptom Sound cannot be heard MISWIRING CHKWIRING THEN RESET UNIT I WARNING CHK WIRINGTHEN RESET UNIT appears and no operationscan be done Source cannotbeselected Radio reception is poor I Static noise while listening to the radio Remedy Adjustthe volumeto theoptimum level Checkthe cordsand connections Checkto be sure the terminalsofthe speakerwires are i...

Page 23: ...plication is impossible Symptom UPDATE APP PLS LOGIN TROUBLESHOOTING Remedy Make sure you have installed the latest version ofthe iHeart Link for JVC application on device You haven t log in in again 0 STATION NOT AVAILABLE Broadcast from the station is over STATION NOT SELECTED N o s t a t i o n i s s e l e c t e d c QJ STREAM ERR THUMBS ERR TIMED OUT No Bluetooth device is detected Pairing canno...

Page 24: ...try the operation again If H W ERROR appears again consult your nearest service center Update the Bluetooth firmware 4 If you have any troubles try the following 1 Check TROUBLESHOOTING 2 Reset the unit 3 3 Contact USA only Call 1 800 252 5722 or visit http www jvc com 22 SPECIFICATIONS FM Frequency Range 87 9 MHz to 107 9 MHz 200kHz step 87 5 MHz to 108 0 MHz 50 kHz step Channel Space Selection 5...

Page 25: ...AVE Power Class 2 Line ofsight approx 10m 32 8 ft HFP1 5 Hands Free Profile A2DP Advanced Audio Distribution Profile AVRCP1 3 AudioNideo Remote Control Profile OPP Object Push Profile PBAP Phonebook Access Profile SPP Serial Port Profile Maximum Output Power Full Bandwidth Power at less than 1 THD Speaker Impedance SPECIFICATIONS 50Wx4 22Wx4 40 80 Preout Level Load CD Preout Impedance 2500 mV 10 k...

Page 26: ...ange the AMP GALN setting to avoid damaging the speakers 17 Mount the unit at an angle of less than 30 Ifyour vehicle wiring harness does not have the ignition terminal connect Ignition wire red to the terminal on the vehicle s fuse box which provides 12 VDC power supply and is turned on and off by the ignition key Afterthe unit is ins alled check whetherthe brake lamps blinkers wipers etc on the ...

Page 27: ...ed For more information Metra Electronics www metraonline com Scosche Industries I To the steering wheel remote control adapter 8 L J e t 11 Antenna terminal Light blue yellow 8 Remote wire not supplied ____ j __________________________ _ y i Ignition switch i I I _J o o car fuse block Separate red wire Make this connection ifyour vehicle factory wiring harness does not have 12 Vignition switch wi...

Page 28: ...wireless performance iPhone iPod iPod classic iPod nano and iPod touch are trademarks ofApple Inc registered in the U S and other countries lightning is atrademark ofApple Inc Android is trademark ofGoogle Inc Pandora the Pandora logo and the Pandoratrade dress are trademarks or registered trademarks of Pandora Media Inc used with permission iHeartRadio8 is aregistered mark ofClear Channel Broadca...

Page 29: ...i i w w w 0 0 0 1 CAUTION CONNECT BLACK WIRE DGND TO GROUND FIRST OTHERWISE DAMAGE TO YOUR UNIT MAY OCCUR INCORRECT CONNECTION CAUSES SERIOUS DAMAGE TO THIS UNIT PLEASE READ INSTALLATION CONNECTION MANUAL CAREFULLY CONNECT GROUND FIRST METALLIC BODY OR CHASSIS OF THE CAR CONNECT OTHER WIRES CONNECT POWER CORD TO THE UNIT ...

Page 30: ...e obtained from ourwebsitehttp www jvc com 11 your product qualifies for in homeservice the service representative will require clearaccesstotheproduct If you have any questions concerningyour JVC Product please contact our Customer Care Center at800 252 5722 WHAT IS NOT COVERED Thislimited warranty provided by JVC does not cover l Products whichhave been subject toabuse accident alteration modifi...

Page 31: ...nte pour tout nouveau produit JVC distribue au Canada par JVC et vendu par un detailIant JVC autorise JVC vous garantit que ce produit est degage sous utilisation et entretien normal de tout defaut materiel et de fabrication sous reservedes modalites et conditions suivantes 1 Pour obtenir un service de garantie m PO UR LESPR ODUITS D AUTO MO BILE a Les produits JVC necessitant unservicedoit Ire pr...

Reviews: