background image

22

ENGLISH

MAINTENANCE

Center holder

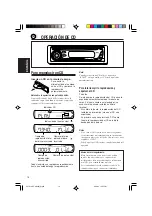
Handling discs

This unit has been designed to reproduce CDs,
CD-Rs (Recordable), and CD-RWs (Rewritable).

• This unit is not compatible with MP3 discs.

How to handle discs

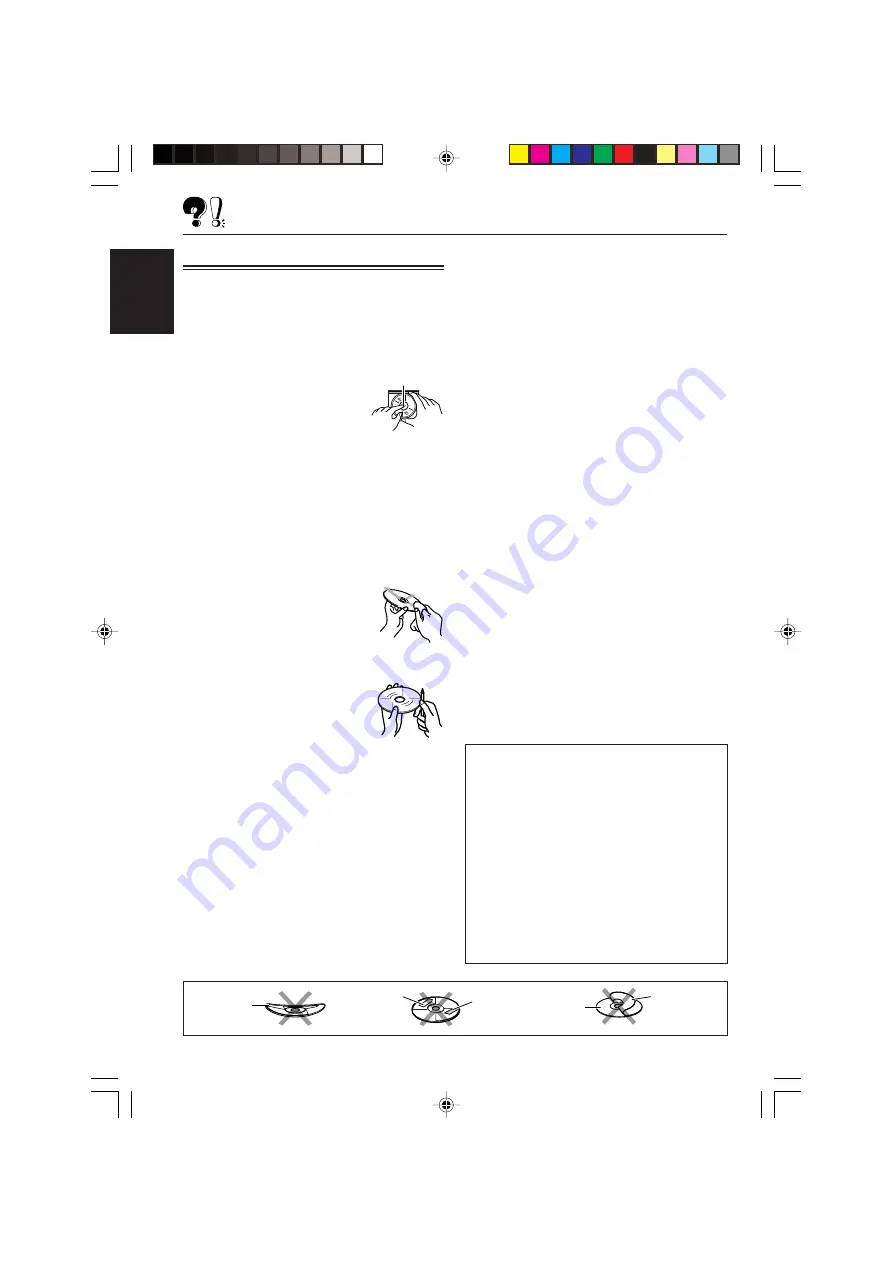
When removing a disc
from its case,

 press down

the center holder of the case
and lift the disc out, holding
it by the edges.
• Always hold the disc by the edges. Do not

touch its recording surface.

When storing a disc into its case,

 gently insert

the disc around the center holder (with the
printed surface facing up).
• Make sure to store discs into the cases after

use.

To keep discs clean

A dirty disc may not be played
correctly. If a disc does become
dirty, wipe it with a soft cloth in a
straight line from center to edge.

To play new discs

New discs may have some rough
spots around the inner and outer
edges. If such a disc is used, this
unit may reject the disc.
To remove these rough spots, rub the edges with
a pencil or ball-point pen, etc.

Moisture condensation

Moisture may condense on the lens inside the
CD player in the following cases:
• After starting the heater in the car.
• If it becomes very humid inside the car.
Should this occur, the CD player may
malfunction. In this case, eject the disc and leave
the unit turned on for a few hours until the
moisture evaporates.

When playing a CD-R or CD-RW

Before playing back CD-Rs or CD-RWs, read
their instructions or cautions carefully.
• Use only “finalized” CD-Rs or CD-RWs.
• Some CD-Rs or CD-RWs may not be played

back on this unit because of their disc
characteristics, and for the following reasons:
– Discs are dirty or scratched.
– Moisture condensation on the lens inside the

unit.

– The pickup lens inside the unit is dirty.

• CD-RWs may require a longer readout time

since the reflectance of CD-RWs is lower than
that of regular CDs.

• CD-Rs or CD-RWs are susceptible to high

temperatures or high humidity, so do not leave
them inside your car.

• Do not use following CD-Rs or CD-RWs:

– Discs with stickers, labels, or protective seal

stuck to the surface.

– Discs on which labels can be directly printed

by an ink jet printer.

Using these discs under high temperatures or
high humidity may cause malfunctions or
damage to discs. For example,
– Stickers or labels may shrink and warp a

disc.

– Stickers or labels may be peeled off so discs

cannot be ejected.

– Print on discs may get sticky.
Read instructions or cautions about labels and
printable discs carefully.

CAUTIONS:

• Do not insert 8 cm (3 3/16") discs (single CDs)

into the loading slot. (Such discs cannot be
ejected.)

• Do not insert any disc of unusual shape—like a

heart or flower; otherwise, it will cause a
malfunction.

• Do not expose discs to direct sunlight or any

heat source or place them in a place subject to
high temperature and humidity. Do not leave
them in a car.

• Do not use any solvent (for example,

conventional record cleaner, spray, thinner,
benzine, etc.) to clean discs.

Warped
disc

Sticker

Sticker
residue

Disc

Stick-on
label

EN21-23KD-AR200[J]f.p65

9/26/03, 7:56 PM

22

Summary of Contents for KD-AR200

Page 1: ...00 KD G200 RECEPTOR CON CD KD AR200 KD G200 For customer Use Enter below the Model No and Serial No which are located on the top or bottom of the cabinet Retain this information for future reference Model No Serial No This unit is equipped with the display demonstration To cancel it see page 8 Esta unidad está equipada con demostración en la pantalla Para cancelarla consulte la página 8 Cet appare...

Page 2: ... measures Reorient or relocate the receiving antenna Increase the separation between the equipment and receiver Connect the equipment into an outlet on a circuit different from that to which the receiver is connected Consult the dealer or an experienced radio TV technician for help How to reset your unit While holding SEL select press standby on attenuator for more than 2 seconds This will reset t...

Page 3: ...ing the sound 18 OTHER MAIN FUNCTIONS 19 Selecting the dimmer mode 19 Selecting the amplifier gain control 19 Detaching the control panel 20 TROUBLESHOOTING 21 MAINTENANCE 22 Handling discs 22 SPECIFICATIONS 23 BEFORE USE For safety Do not raise the volume level too much as this will block outside sounds making driving dangerous Stop the car before performing any complicated operations Temperature...

Page 4: ...uential Memory button t RPT repeat button y RND random button u MODE button i DISP display button o 4 buttons control panel release button a down button 1 reverse button Display window s Tuner reception indicators MO monaural ST stereo d CD indicator f RND random disc indicator g RPT repeat indicator h LOUD loudness indicator j EQ equalizer indicator k Sound mode C EQ custom equalizer indicators R...

Page 5: ...s the same as the control dial on the main unit Note These buttons are not used for adjusting DEMO CLOCK H CLOCK M DIMMER and AMP GAIN see pages 8 9 and 19 1 Turns on the unit if pressed when the unit is turned off Turns off the unit if pressed and held until SEE YOU appears on the display Drops the volume level in a moment if pressed briefly Press again to resume the volume 2 Searches for station...

Page 6: ...k or start a fire CAUTION DO NOT leave the remote controller in a place such as dashboards exposed to direct sunlight for a long time Otherwise it may be damaged Preparing the remote controller This section is only for KD AR200 Before using the remote controller Aim the remote controller directly at the remote sensor on the main unit Make sure there is no obstacle in between Do not expose the remo...

Page 7: ...l press the button briefly again If you turn the control dial you can also restore the sound To turn off the power Press and hold for more than one second SEE YOU appears then the unit turns off If you turn off the power while listening to a CD CD play will start from where playback has been stopped previously next time you turn on the power CAUTION on Volume Setting CDs produce very little noise ...

Page 8: ...ore you use the unit for the first time To cancel the display demonstration follow the procedure below 1 Press and hold SEL select for more than 2 seconds DEMO CLOCK H CLOCK M DIMMER or AMP GAIN appears on the display 2 Select DEMO if not shown on the display 3 Select DEMO OFF 4 Finish the setting To activate the display demonstration repeat the same procedure and select DEMO ON in step 3 DEMO OFF...

Page 9: ... Select CLOCK M minute 2 Adjust the minute 1 2 4 Finish the setting To check the current clock time or change the display mode Press DISP display repeatedly Each time you press the button the display changes as follows During tuner operation During CD operation During power off The power turns on and the clock time is shown for 5 seconds then the power turns off Clock Elapsed playing time Frequenc...

Page 10: ...hree FM bands FM1 FM2 FM3 You can use any one of them to listen to an FM broadcast 2 Start searching for a station When a station is received searching stops To stop searching before a station is received press the same button you have pressed for searching To search for stations of lower frequencies To search for stations of higher frequencies Selected band appears Lights up when receiving an FM ...

Page 11: ...lect the band FM1 3 AM Each time you press the button the band changes as follows Note This receiver has three FM bands FM1 FM2 FM3 You can use any one of them to listen to an FM broadcast 2 Press and hold or 4 until M manual starts flashing on the display 3 Tune in to a station you want while M manual is still flashing If you release your finger from the button the manual mode will automatically ...

Page 12: ...ations in memory Automatic preset of FM stations SSM Strong station Sequential Memory Manual preset of both FM and AM stations FM station automatic preset SSM You can preset 6 local FM stations in each FM band FM1 FM2 and FM3 1 Select the FM band FM1 3 you want to store FM stations into Each time you press the button the band changes as follows 2 Press MODE to enter the functions mode 3 Press and ...

Page 13: ...the 5 up or down button on the unit to select the next or previous preset stations Each time you press the 5 up or down button the next or previous preset station is tuned in 4 Repeat the above procedure to store other stations into other preset numbers Notes A previously preset station is erased when a new station is stored in the same preset number Preset stations are erased when the power suppl...

Page 14: ... you change the source CD play also stops without ejecting the CD Next time you select CD as the source CD play starts from where playback has been stopped previously Notes If the ejected CD is not removed for about 15 seconds the CD is automatically inserted again into the loading slot to protect it from dust CD play will not start this time You can eject the CD even when the unit is turned off A...

Page 15: ...he next or previous tracks To go to a particular track directly Press the number button corresponding to the track number to start its playback To select a track number from 1 6 Press 1 7 6 12 briefly To select a track number from 7 12 Press and hold 1 7 6 12 for more than one second Press and hold while playing a CD to fast forward the track Press and hold 1 while playing a CD to reverse the trac...

Page 16: ...rs on the display and the CD ejects from the loading slot To play back tracks repeatedly Track Repeat Play You can play back the current track repeatedly 1 Press MODE to enter the functions mode while playing a CD 2 Press RPT repeat while MODE is still flashing on the display so that TRK RPT appears on the display Each time you press the button track repeat play mode turns on and off alternately W...

Page 17: ... make an adjustment it is automatically stored for the currently selected sound mode See Adjusting the sound on page 18 Selecting preset sound modes C EQ custom equalizer You can select a preset sound mode C EQ custom equalizer suitable to the music genre Select the sound mode you want Each time you press the button the sound modes change as follows Ex When you select ROCK Indication pattern chang...

Page 18: ...d for the currently selected sound mode C EQ including USER 2 If you are using a two speaker system set the fader level to 00 3 Normally the control dial works as the volume control So you do not have to select VOL to adjust the volume level 4 Depending on the amplifier gain control setting See page 19 for details 2 Adjust the setting 3 Repeat steps 1 and 2 to adjust the other items To reset each ...

Page 19: ... unit When the maximum power of the speakers is less than 50 W select LOW PWR to prevent them from being damaged When shipped from the factory HIGH PWR is selected 1 Press and hold SEL select for more than 2 seconds DEMO CLOCK H CLOCK M DIMMER or AMP GAIN appears on the display 2 Select AMP GAIN if not shown on the display 3 Select the desired mode HIGH PWR or LOW PWR LOW PWR You can adjust the vo...

Page 20: ...trol panel out of the unit 3 Put the detached control panel into the provided case Attaching the control panel 1 Insert the left side of the control panel into the groove on the panel holder 2 Press the right side of the control panel to fix it to the panel holder Note on cleaning the connectors If you frequently detach the control panel the connectors will deteriorate To minimize this possibility...

Page 21: ...onnections Insert a CD into the loading slot Insert the CD correctly Causes The volume level is set to the minimum level Connections are incorrect The built in microcomputer may have functioned incorrectly due to noise etc Signals are too weak The antenna is not connected firmly CD is inserted upside down CD R CD RW is not finalized CD is locked The CD player may have functioned incorrectly You ar...

Page 22: ...carefully Use only finalized CD Rs or CD RWs Some CD Rs or CD RWs may not be played back on this unit because of their disc characteristics and for the following reasons Discs are dirty or scratched Moisture condensation on the lens inside the unit The pickup lens inside the unit is dirty CD RWs may require a longer readout time since the reflectance of CD RWs is lower than that of regular CDs CD ...

Page 23: ...quency Response 40 Hz to 15 000 Hz Stereo Separation 35 dB Capture Ratio 1 5 dB AM Tuner Sensitivity 20 µV Selectivity 35 dB CD PLAYER SECTION Type Compact disc player Signal Detection System Non contact optical pickup semiconductor laser Number of channels 2 channels stereo Frequency Response 5 Hz to 20 000 Hz Dynamic Range 96 dB Signal to Noise Ratio 98 dB Wow and Flutter Less than measurable li...

Page 24: ...e lugar Aumente la separación entre el equipo y el aparato receptor Enchufe el equipo a una toma de corriente situada en un circuito distinto del aparato receptor Consulte a su distribuidor o a un técnico experto en radio televisión Cómo reposicionar su unidad Mientras mantiene pulsado SEL selección pulse en espera encendido atenuador durante más de 2 segundos Esto hará que se reposicione el micro...

Page 25: ...sta que se cancele el modo de funciones Pulsado botón MODE otra vez también se cancela el modo de funciones Indicador de cuenta atrás Cómo reposicionar su unidad 2 Cómo utilizar el botón MODE 3 UBICACIÓN DE LOS BOTONES 4 Panel de control 4 Control remoto sólo para KD AR200 5 Preparación del control remoto sólo para KD AR200 6 OPERACIONES BASICAS 7 Conexión de la alimentación 7 Cancelación de la de...

Page 26: ...ón RPT repetición y Botón RND aleatorio u Botón MODE i Botón DISP pantalla o Botones 4 Botón soltar panel de control a Botón abajo Botón 1 retroceso Ventanilla de visualización s Indicadores de recepción del sintonizador MO monofónico ST estéreo d Indicador CD f Indicador RND aleatoria del disco g Indicador RPT repetición h Indicador LOUD sonoridad j Indicador EQ ecualizador k Indicadores del modo...

Page 27: ...el dial de control de la unidad principal Nota Estos botones no se utilizan para ajustar DEMO CLOCK H CLOCK M DIMMER y AMP GAIN véase páginas 8 9 y 19 1 La unidad se enciende si es pulsado estando la unidad apagada La unidad se apaga si pulsa y mantiene pulsado hasta que aparezca SEE YOU en la pantalla El nivel de volumen disminuye instantáneamente si pulsa de manera breve Vuelva a pulsar para vol...

Page 28: ...NO deje el control remoto en un lugar expuesto a la luz directa del sol como los cubretableros durante un tiempo prolongado De lo contrario se podría dañar Preparación del control remoto Esta sección es sólo para el KD AR200 Antes de emplear el control remoto Apunte el control remoto directamente hacia el sensor remoto de la unidad principal Asegúrese de que no haya obstáculos en el camino No expo...

Page 29: ...uelva a presionar brevemente el botón Si gira el dial de control también se podrá restablecer el sonido Para apagar la unidad Pulse y mantenga pulsado durante más de 1 segundo Aparece SEE YOU y seguidamente la unidad se apaga Si desconecta la alimentación mientras está escuchando un CD cuando vuelva a conectar la alimentación la próxima vez el CD se empezará a reproducir desde el punto en que fue ...

Page 30: ...d por primera vez Para cancelar la demostración en pantalla siga el procedimiento de abajo 1 Pulse y mantenga pulsado SEL selección durante más de 2 segundos DEMO CLOCK H CLOCK M DIMMER o AMP GAIN aparecen en la pantalla 2 Seleccione DEMO si no está visualizado en la pantalla 3 Seleccione DEMO OFF 4 Finalice el ajuste Para activar la demostración en pantalla repita el mismo procedimiento y selecci...

Page 31: ...2 Ajuste los minutos 1 2 4 Finalice el ajuste Para verificar la hora actual en el reloj o cambiar el modo de pantalla Pulse DISP pantalla repetidamente Cada vez que pulsa el botón el modo de pantalla cambia de la siguiente manera Durante la operación del sintonizador Durante la operación del CD Durante el apagado La unidad se enciende y la hora del reloj aparece durante 5 segundos Luego la unidad ...

Page 32: ... FM2 FM3 Podrá usar cualquiera de ellas para escuchar un radiodifusión en FM 2 Comience la búsqueda de la emisora La búsqueda se interrumpe cada vez que se recibe una emisora Para cancelar la búsqueda antes de recibir una emisora pulse el mismo botón que el pulsado para la búsqueda Para buscar emisoras de frecuencias más bajas Para buscar emisoras de frecuencias más altas Aparece la banda seleccio...

Page 33: ...l 1 Seleccione la banda FM1 3 AM Cada vez que pulsa el botón la banda cambia de la siguiente manera Nota Este receptor tiene tres bandas FM FM1 FM2 FM3 Podrá usar cualquiera de ellas para escuchar un radiodifusión en FM 2 Pulse y mantenga pulsado o 4 hasta que M manual comience a parpadear en la pantalla 3 Sintonice la emisora deseada mientras M manual está parpadeando Si aparta su dedo del botón ...

Page 34: ...guientes Preajuste automático de emisoras FM SSM Memoria secuencia de las emisoras más fuertes Preajuste manual de ambas emisoras FM y AM Preajuste automático de emisoras FM SSM Pueden preajustarse 6 emisoras FM locales en cada banda FM FM1 FM2 y FM3 1 Seleccione la FM banda FM1 3 en que desea almacenar las emisoras FM Cada vez que pulsa el botón la banda cambia de la siguiente manera 2 Pulse MODE...

Page 35: ...ajo en la unidad para seleccionar las emisoras preajustadas siguientes o anteriores Cada vez que pulsar los botones 5 arriba o abajo se sintonizará las emisoras preajustadas siguientes o anteriores 4 Repita el procedimiento de arriba para almacenar otras emisoras en los otros números de preajuste Notas La emisora preajustada previamente se borra cuando se almacena una emisora nueva en el mismo núm...

Page 36: ...cibida en último término Si cambia la fuente la reproducción del CD también se interrumpe sin que el CD sea expulsado La próxima vez que selecciona CD como fuente la reproducción del CD se iniciará desde donde la detuvo Notas Si no saca el CD expulsado en unos 15 segundos será reinsertado automáticamente en la ranura de carga para protegerlo del polvo En este caso no se reproduce el CD Podrá expul...

Page 37: ...ntes o anteriores Para seleccionar directamente una determinada pista Pulse el botón de número correspondiente al número de pista que desea reproducir Para seleccionar un número de pista del 1 6 Pulse 1 7 6 12 por un tiempo breve Para seleccionar un número de pista del 7 12 Pulse y mantenga pulsado 1 7 6 12 durante más de 1 segundo Pulse y mantenga pulsado mientras se está reproduciendo el CD para...

Page 38: ... y el CD será expulsado de la ranura de carga Para reproducir las pistas repetidamente Reproducción repetida de pistas Podrá escuchar la pista actual repetidamente 1 Pulse MODE para entrar en modo de funciones mientras se está reproduciendo un CD 2 Pulse RPT repetición mientras MODE sigue parpadeando en la pantalla de manera que aparezca TRK RPT en la pantalla Cada vez que pulsa el botón el modo d...

Page 39: ...á almacenado automáticamente para el modo de sonido seleccionado Consulte Ajuste del sonido en la página 18 Selección de los modos de sonido preajustados C EQ ecualizador personalizable Puede seleccionar un modo de sonido preajustado C EQ ecualizador personalizable adecuado al género musical Seleccione el modo de sonido deseado Cada vez que pulsa el botón los modos de sonido cambian de la siguient...

Page 40: ...nido seleccionado C EQ incluyendo USER 2 Si está usando un sistema de dos altavoces ajuste el nivel del desvanecedor a 00 3 El dial de control funciona normalmente como control de volumen Por consiguiente no es necesario seleccionar VOL para ajustar el nivel de volumen 4 Depende del ajuste de control de ganancia del amplificador Para los detalles consulte la página 19 2 Realice el ajuste 3 Repita ...

Page 41: ...ambiar el nivel máximo de volumen de esta unidad Cuando la potencia máxima de los altavoces es de menos de 50 W seleccione LOW PWR para evitar que se dañen La unidad se expide de fábrica con la opción HIGH PWR seleccionada 1 Pulse y mantenga pulsado SEL selección durante más de 2 segundos DEMO CLOCK H CLOCK M DIMMER o AMP GAIN aparecen en la pantalla 2 Seleccione AMP GAIN si no está visualizado en...

Page 42: ...l de la unidad 3 Ponga el panel de control desmontado en el estuche suministrado Cómo instalar el panel de control 1 Inserte el lado izquierdo del panel de control en la ranura del portapanel 2 Pulse el lado derecho del panel de control para fijarlo al portapanel Nota sobre la limpieza de los conectores Si acostumbra a desmontar frecuentemente el panel de control se podrán deteriorar los conectore...

Page 43: ...conexiones Inserte un CD en la ranura de carga Inserte el CD correctamente Causas El nivel de volumen está ajustado al mínimo Las conexiones son incorrectas El microcomputador incorporado podría haber funcionado incorrectamente debido a los ruidos etc Las señales son muy débiles La antena no está firmemente conectada El CD está insertado boca abajo El CD R CD RW no está finalizado El CD está bloqu...

Page 44: ...o CD RWs no se puedan reproducir en esta unidad debido a las características propias del disco y por los siguientes motivos Discos sucios o rayados Hay condensación de humedad en el lente interior de la unidad Suciedad en el lente captor del interior del reproductor Los CD RWs pueden requerir más tiempo de lectura debido a que la reflectancia de los mismos es menor que la de los CDs comunes Los CD...

Page 45: ...eofónica 35 dB Relación de captura 1 5 dB Sintonizador de AM Sensibilidad 20 µV Selectividad 35 dB SECCION DEL REPRODUCTOR DE CD Tipo Reproductor de discos compactos Sistema de detección de la señal Captor óptico sin contacto láser de semiconductor Número de canales 2 canales estéreo Respuesta de frecuencia 5 Hz a 20 000 Hz Gama dinámica 96 dB Relación señal a ruido 98 dB Lloro y trémolo Inferior ...

Page 46: ...ui ci est réinitialisé Faites attention de ne pas faire tomber le CD SEL sélection attente en service sourdine IMPORTANT POUR PRODUITS LASER 1 PRODUIT LASER CLASSE 1 2 ATTENTION N ouvrez pas le couvercle supérieur Il n y a aucune pièce réparable par l utilisateur à l intérieur de l appareil confiez toute réparation à un personnel qualifié 3 ATTENTION Risque de radiations laser visible et invisible...

Page 47: ...TIONS PRINCIPALES 19 Sélection du mode de gradateur 19 Sélection de la commande de gain de l amplificateur 19 Détachement du panneau de commande 20 DÉPANNAGE 21 ENTRETIEN 22 Manipulation des disques 22 SPÉCIFICATIONS 23 AVANT D UTILISER L APPAREIL Par sécurité N augmentez pas trop le volume car cela bloquerait les sons de l extérieur rendant la conduite dangereuse Arrêtez la voiture avant de réali...

Page 48: ...lleures stations t Touche RPT répétition y Touche RND aléatoire u Touche MODE i Touche DISP affichage o Touches 4 Touche déblocage du panneau de commande a Touche bas Touche 1 retour rapide Fenêtre d affichage s Indicateurs de réception du tuner MO monaural ST stéréo d Indicateur CD f Indicateur RND disque aléatoire g Indicateur RPT répétition h Indicateur LOUD contour j Indicateur EQ égaliseur k ...

Page 49: ...e la molette de commande de l appareil principal Remarque Ces touches ne sont pas utilisées pour ajuster DEMO CLOCK H CLOCK M DIMMER et AMP GAIN voir les pages 8 9 et 19 1 Met l appareil sous tension si vous appuyez sur cette touche quand l appareil est hors tension Maintenez pressée jusqu à ce que SEE YOU apparaisse sur l affichage pour mettre l appareil hors tension Appuyez brièvement sur cette ...

Page 50: ...a chaleur se fragmenter ou causer un incendie ATTENTION NE LAISSEZ pas la télécommande pendant longtemps dans un endroit exposé aux rayons directs du soleil tel que le tableau de bord Sinon elle risque d être endommagée Préparation de la télécommande Cette section est seulement pour le KD AR200 Avant d utiliser la télécommande Pointez la télécommande directement sur le capteur de télécommande de l...

Page 51: ...puyez de nouveau brièvement sur la touche Si vous tournez la molette de commande vous pouvez aussi rétablir le son Pour mettre l appareil hors tension Maintenez pressée pendant plus d une seconde SEE YOU apparaît et l appareil se met hors tension Si vous mettez l appareil hors tension lors de l écoute d un CD la lecture du CD débutera à partir de l endroit où elle a été interrompue la prochaine fo...

Page 52: ...areil pour la première fois Pour annuler la démonstration des affichages suivez la procédure ci dessous 1 Maintenez pressée SEL sélection pendant plus de 2 secondes DEMO CLOCK H CLOCK M DIMMER ou AMP GAIN apparaît sur l affichage 2 Choisissez DEMO s il n apparaît pas sur l affichage 3 Choisissez DEMO OFF 4 Terminez le réglage Pour mettre en service la démonstration des affichages répétez la même p...

Page 53: ...stez les minutes 1 2 4 Terminez le réglage Pour vérifier l heure actuelle ou changer le mode d affichage Appuyez sur DISP affichage répétitivement Chaque fois que vous appuyez sur la touche le mode d affichage change comme suit Pendant l utilisation du tuner Pendant l utilisation du CD Quand l appareil est hors tension L appareil se met sous tension et l horloge apparaît pendant 5 secondes Puis l ...

Page 54: ... FM3 Vous pouvez utiliser n importe laquelle pour écouter une station FM 2 Commencez la recherche d une station Quand une station est accordée la recherche s arrête Pour arrêter la recherche avant qu une station ne soit accordée appuyez sur la même touche que vous avez utilisée pour la recherche Pour rechercher des stations de fréquences inférieures Pour rechercher des stations de fréquences supér...

Page 55: ...FM1 3 AM Chaque fois que vous appuyez sur la touche la bande change comme suit Remarque Cet appareil a trois bandes FM FM1 FM2 FM3 Vous pouvez utiliser n importe laquelle pour écouter une station FM 2 Maintenez pressée ou 4 jusqu à ce que M manuel clignote sur l affichage 3 Accordez une station souhaitée pendant que M manuel clignote Si vous relâchez la touche le mode manuel est mis automatiquemen...

Page 56: ...stations FM SSM Mémorisation automatique des meilleures stations Présélection manuelle des stations FM et AM Présélection automatique des stations FM SSM Vous pouvez présélectionner 6 stations locales dans chaque bande FM FM1 FM2 et FM3 1 Choisissez le numéro de la bande FM FM1 3 où vous souhaitez mémoriser la station Chaque fois que vous appuyez sur la touche la bande change comme suit 2 Appuyez ...

Page 57: ...l appareil pour choisir les stations présélectionnées suivantes ou précédentes Chaque fois que vous appuyez les touches 5 haut ou bas les stations présélectionnées suivantes ou précédentes sont accordées 4 Répétez la procédure ci dessus pour mémoriser d autres stations sur d autres numéros de présélection Remarques La station précédemment présélectionnée est effacée quand une nouvelle station est ...

Page 58: ...çue Si vous changez la source la lecture de CD s arrête aussi sans éjecter le CD La prochaine fois que vous choisissez CD comme source la lecture du CD commence à partir de l endroit où elle a été interrompue Remarques Si le CD éjecté n est pas retiré avant environ 15 secondes le CD est automatiquement réinséré dans la fente d insertion pour le protégé de la poussière Dans ce cas la lecture du CD ...

Page 59: ...ler aux plages suivantes ou précédentes Pour aller directement à une plage particulière Appuyez sur la touche numérique correspondante au numéro de plage souhaité pour commencer sa reproduction Pour choisir un numéro de plage de 1 6 Appuyez brièvement sur 1 7 6 12 Pour choisir un numéro de plage de 7 12 Maintenez pressé 1 7 6 12 pendant plus d une seconde Maintenez pressée pendant la reproduction ...

Page 60: ...est éjecté de la fente d insertion Pour reproduire les plages répétitivement Lecture répétée de plage Vous pouvez reproduire la plage actuelle répétitivement 1 Appuyez sur MODE pour entrer en mode de fonction pendant l écoute d un CD 2 Appuyez sur RPT répétition pendant que MODE clignote sur l affichage de façon que TRK RPT apparaisse sur l affichage Chaque fois que vous appuyez sur la touche le m...

Page 61: ... est mémorisé automatiquement pour le mode sonore actuellement choisi Référez vous à Ajustement du son à la page 18 Sélection des modes sonores préréglés C EQ égaliseur personnalisé Vous pouvez choisir un mode sonore préréglé C EQ égaliseur personnalisé convenant à votre genre de musique Choisissez le mode sonore que vous souhaitez Chaque fois que vous appuyez sur la touche le mode sonore change c...

Page 62: ...ore actuellement choisi C EQ y compris USER 2 Si vous utilisez un système à deux enceintes réglez le niveau de fader sur 00 3 Normalement la molette de commande fonctionne comme commande de volume Alors vous n avez pas besoin de choisir VOL pour ajuster le niveau de volume 4 En fonction du réglage de commande du gain de l amplificateur Référez vous à la page 19 pour les détails 2 Ajustez le réglag...

Page 63: ...ximum de l appareil Quand la puissance maximum des enceintes est inférieure à 50 W choisissez LOW PWR pour éviter qu elles soient endommagées À l expédition de l usine HIGH PWR est choisi 1 Maintenez pressée SEL sélection pendant plus de 2 secondes DEMO CLOCK H CLOCK M DIMMER ou AMP GAIN apparaît sur l affichage 2 Choisissez AMP GAIN s il n apparaît pas sur l affichage 3 Choisissez le mode souhait...

Page 64: ...e panneau de commande de l appareil 3 Mettez le panneau de commande détaché dans la boîte fournie Comment attacher le panneau de commande 1 Insérez le côté gauche du panneau de commande dans la rainure située du côté droit du porte panneau 2 Appuyez sur le côté droit du panneau de commande pour le fixer au porte panneau Remarque sur le nettoyage des connecteurs Si vous détachez fréquemment le pann...

Page 65: ...les connexions Insérez un CD dans la fente d insertion Insérez le CD correctement Causes Le niveau de volume est réglé au niveau minimum Les connexions sont incorrectes Le micro ordinateur intégré peut fonctionner incorrectement à cause de parasites etc Les signaux sont trop faibles L antenne n est pas connectée fermement Le CD est inséré à l envers Le CD R CD RW n est pas finalisé Le CD est verro...

Page 66: ...cause de leurs caractéristiques et pour les raisons suivantes Les disques sont sales ou rayés De l humidité s est condensée sur la lentille à l intérieur de l appareil La lentille du capteur à l intérieur de l appareil est sale Les CD RW peuvent nécessiter une durée de mise en service plus longue car le facteur de réflexion des CD RW est inférieur à celui des CD ordinaires Les CD R ou CD RW sont s...

Page 67: ...t de synchronisation 1 5 dB Tuner AM Sensibilité 20 µV Sélectivité 35 dB SECTION LECTEUR CD Type Lecteur de disque compact Système de détection de signal Capteur sans contact optique semiconducteur laser Nombre de canaux 2 canaux stéréo Réponse en fréquence 5 Hz à 20 000 Hz Plage dynamique 96 dB Rapport signal sur bruit 98 dB Pleurage et scintillement Inférieur à la limite mesurable GÉNÉRAL Alimen...

Page 68: ...n Please reset your unit Refer to page of How to Reset Still having trouble USA ONLY Call 1 800 252 5722 http www jvc com We can help you http www jvcmobile com Visit us on line for Technical Support Customer Satisfaction Survey US RESIDENTS ONLY Cover001AKD AR200 J f p65 9 26 03 7 53 PM 2 ...

Reviews: