background image

4

Data Size: 

B6L (182 mm x 128 mm)

Book Size: 

B6L (182 mm x 128 mm)

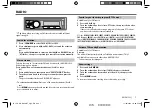
GETTING STARTED

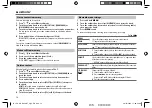
Cancel the demonstration

Press and hold 

MENU

.

Turn the volume knob to select 

[DEMO]

, then press the knob.

Turn the volume knob to select 

[DEMO OFF]

, then press the knob.

Press 

MENU

 to exit.

Set the clock

Press and hold 

MENU

.

Turn the volume knob to select 

[CLOCK]

, then press the knob.

Turn the volume knob to select 

[CLOCK SET]

, then press the knob.

Turn the volume knob to make the settings, then press the knob.

  Day   Hour   Minute

Turn the volume knob to select 

[24H/ 12H]

, then press the knob.

Turn the volume knob to select 

[12 HOUR]

 or 

[24 HOUR]

, then press the 

knob.

Press 

MENU

 to exit.

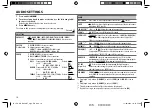
Set the basic settings

Press and hold 

MENU

.

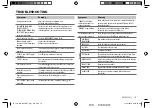
Turn the volume knob to make a selection (see the following table), 
then press the knob.

Press 

MENU

 to exit.

To return to the previous setting item or hierarchy, press 

G

.

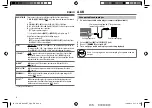
1

2

Default: 

XX

CLOCK

CLOCK ADJ

AUTO

: The clock time is automatically set using the Clock Time (CT) data 

in FM Radio Data System signal. ; 

OFF

: Cancels.

CLOCK DISP

ON

: The clock time is shown on the display even when the unit is turned 

off. ; 

OFF

: Cancels.

SETTINGS

BEEP

ON

: Activates the keypress tone. ; 

OFF

: Deactivates.

SRC SELECT

AM

 *

ON

: Enables AM in source selection. ; 

OFF

: Disables.

SW1

 *

ON

: Enables SW1 in source selection. ; 

OFF

: Disables.

SW2

 *

ON

: Enables SW2 in source selection. ; 

OFF

: Disables.

PANDORA

 *

ON

: Enables PANDORA in source selection. ; 

OFF

: Disables.

AUX

 *

ON

: Enables AUX in source selection. ; 

OFF

: Disables.

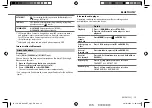
F/W UPDATE

SYSTEM / BLUETOOTH

F/W xxxx

YES

: Starts upgrading the firmware. ; 

NO

: Cancels (upgrading is not 

activated).
For details on how to update the firmware, see: 
<http://www.jvc.net/cs/car/>.

*  Not displayed when the corresponding source is selected.

3

JS_JVC_KD_R856BT_U_02_EN.indd   4

JS_JVC_KD_R856BT_U_02_EN.indd   4

11/28/2013   10:20:48 AM

11/28/2013   10:20:48 AM

Summary of Contents for KD-R856BT

Page 1: ...GET0982 001A U KD R856BT CD RECEIVER INSTRUCTION MANUAL Please read all instructions carefully before operation to obtain the best possible performance from the unit JS_JVC_KD_R856_U_C001A indd 1 JS_JVC_KD_R856_U_C001A indd 1 11 19 2013 9 07 57 AM 11 19 2013 9 07 57 AM ...

Page 2: ...ttery out of reach of children and in its original packaging when not in used Dispose of used batteries promptly If swallowed contact a physician immediately BEFORE USE 2 BASICS 3 GETTING STARTED 4 CD USB iPod 5 RADIO 7 AUX 8 Pandora Applicable for Australia or New Zealand models only 9 BLUETOOTH 10 AUDIO SETTINGS 16 DISPLAY SETTINGS 17 MORE INFORMATION 17 TROUBLESHOOTING 19 SPECIFICATIONS 21 INST...

Page 3: ...E repeatedly Press B SOURCE then turn the volume knob within 2 seconds Press SOURCE repeatedly Change the display information Press DISP repeatedly 18 Press and hold to scroll the current display information not available Attach How to reset Detach Your preset adjustments will also be erased Remote control RM RK52 Faceplate Volume knob turn press Loading slot Detach button Display window ENGLISH H...

Page 4: ...MENU to exit To return to the previous setting item or hierarchy press G 1 2 Default XX CLOCK CLOCK ADJ AUTO The clock time is automatically set using the Clock Time CT data in FM Radio Data System signal OFF Cancels CLOCK DISP ON The clock time is shown on the display even when the unit is turned off OFF Cancels SETTINGS BEEP ON Activates the keypress tone OFF Deactivates SRC SELECT AM ON Enables...

Page 5: ...AV file or JPC JMC file FOLDER RND ALL RND RND OFF iPod SONG RND ALL RND RND OFF 1 Do not leave the cable inside the car when not using 2 You can still play pause file skip fast forward or reverse files from the unit 3 Only for MP3 WMA WAV files This does not work for iPod 4 For iPod Applicable under HEAD MODE only Start playback The source changes automatically and playback starts CD USB iPod iPh...

Page 6: ...a smartphone Mass Storage Class is connected to the USB input terminal you can select its internal memory or external memory such as an SD card to playback the stored songs You can also select the desired drive to playback when a multiple drives device is connected Press 5 iPod MODE repeatedly to select the desired drive or 1 Press and hold MENU 2 Turn the volume knob to select USB IPOD then press...

Page 7: ... to confirm Search for your favorite program PTY Search Available only for FM source 1 Press and hold G 2 Turn the volume knob to select a PTY code then press the knob to start searching If there is a station broadcasting a program of the same PTY code as you have selected that station is tuned in PTY code NEWS AFFAIRS INFO SPORT EDUCATE DRAMA CULTURE SCIENCE VARIED POP M music ROCK M music EASY M...

Page 8: ...ted for AM SW1 SW2 in SRC SELECT after Radio Timer for AM SW1 SW2 is selected 4 SSM SSM 01 06 SSM 07 12 SSM 13 18 Automatically presets up to 18 stations for FM SSM stops flashing when the first 6 stations are stored Select SSM 07 12 SSM 13 18 to store the following 12 stations IF BAND 2 AUTO Increases the tuner selectivity to reduce interference noises from adjacent FM stations Stereo effect may ...

Page 9: ... or press I on RM RK52 Create a new station 1 Press MENU 2 Turn the volume knob to select NEW STATION then press the knob 3 Turn the volume knob to select FROM TRACK or FROM ARTIST then press the knob A new station is created based on the current song or artist Search for a registered station 1 Press MENU 2 Turn the volume knob to make a selection then press the knob BY DATE According to the regis...

Page 10: ... Secure Simple Pairing SSP Some Bluetooth devices may not automatically connect to the unit after pairing Connect the device to the unit manually Refer to the instruction manual of the Bluetooth device for more information 1 Press B SOURCE to turn on the unit 2 Search and select JVC UNIT on the Bluetooth device BT PAIRING flashes on the display For some Bluetooth devices you may need to enter the ...

Page 11: ...s no Bluetooth device connected 1 Press and hold BLUETOOTH CHECK MODE appears SEARCH NOW USING PHONE PIN IS 0000 scrolls on the display 2 Search and select JVC UNIT on the Bluetooth device within 3 minutes 3 Perform A B or C depending on what appears on the display A PAIRING XXXXXX 6 digit passkey Ensure that the same passkey appears on the unit and Bluetooth device then operate the Bluetooth devi...

Page 12: ...U If the phonebook contains many contacts 13 Select a contact by name DIAL NUMBER 1 Turn the volume knob to select a number 0 to 9 or character 2 Press S T to move the entry position Repeat steps 1 and 2 until you finish entering the phone number 3 Press the volume knob to call Improve the sound quality during a call While talking on the phone 1 Press and hold MENU 2 Turn the volume knob to make a...

Page 13: ...ce Recognition 1 Press and hold The connected phone which has been paired the earliest is activated However if priority device is connected pressing and holding activate the priority device 14 PRIORITY 2 Speak the name of the contact you want to call or the voice command to control the phone functions Supported Voice Recognition features vary for each phone Refer to the instruction manual of the c...

Page 14: ...olume knob to confirm BLUETOOTH Store a contact in memory You can store up to 6 contacts 1 Press to enter Bluetooth mode 2 Turn the volume knob to select RECENT CALL PHONEBOOK or DIAL NUMBER then press the knob 3 Turn the volume knob to select a contact or enter a phone number If a contact is selected press the volume knob to show the phone number 4 Press and hold one of the number buttons 1 to 6 ...

Page 15: ... on this unit 1 Open the Pandora application on your device 2 Connect to Bluetooth audio player 10 3 Press B SOURCE to select PANDORA The source switches and broadcast starts automatically You can operate Pandora in the same way as Pandora for iPod iPhone 9 Bluetooth audio player Operations and display indications may differ according to their availability on the connected device To Do this Playba...

Page 16: ...B W REAR Selects whether rear speakers or a subwoofer are connected to the REAR SW line out terminals on the rear panel through an external amplifier 1 Displayed only when L O MODE is set to SUB W and SUB W is set to ON 2 Displayed only when L O MODE is set to SUB W 3 This adjustment will not affect the subwoofer output 4 If you are using a two speaker system set the fader level to 00 1 Press and ...

Page 17: ...ll be blanked DISPLAY SETTINGS About discs and audio files This unit can only play the following CDs This unit can play back multi session discs however unclosed sessions will be skipped during playback Unplayable discs Discs that are not round Discs with coloring on the recording surface or discs that are dirty Recordable ReWritable discs that have not been finalized 8 cm CD Attempting to insert ...

Page 18: ...ng is other than 5 V and exceeds 1 A About iPod iPhone Made for iPod touch 1st 2nd 3rd 4th and 5th generation iPod classic iPod nano 3rd 4th 5th 6th and 7th generation iPhone iPhone 3G 3GS 4 4S 5 It is not possible to browse video files on the Videos menu in HEAD MODE The song order displayed on the selection menu of this unit may differ from that of the iPod iPhone If some operations are not perf...

Page 19: ...apsed playing time is not correct This depends on the recording process earlier NOT SUPPORT appears and track skips Check whether the track is a playable format 17 TROUBLESHOOTING Symptom Remedy CANNOT PLAY flashes and or connected device cannot be detected Check whether the connected device is compatible with this unit and ensure the files are in supported formats 17 Reattach the device READING k...

Page 20: ...er signal reception NOT SUPPORT appears The connected phone does not support Voice Recognition feature ERROR appears Try the operation again If ERROR appears again check if the device supports the function you have tried Symptom Remedy Bluetooth The unit does not respond when you try to copy the phonebook to the unit You may have tried to copy the same entries as stored to the unit Press DISP or G...

Page 21: ...H D 182 mm 53 mm 158 mm Weight 1 26 kg Subject to change without notice TUNER FM Frequency Range 87 5 MHz to 108 0 MHz 50 kHz step Usable Sensitivity S N 26 dB 8 2 dBf 0 71 μV 75 Ω Quieting Sensitivity DIN S N 46 dB 17 2 dBf 2 0 μV 75 Ω Frequency Response 3 dB 30 Hz to 15 kHz Signal to Noise Ratio MONO 64 dB Stereo Separation 1 kHz 40 dB AM Frequency Range Band 1 MW 531 kHz to 1 611 kHz 9 kHz step...

Page 22: ... wiring harness does not have the ignition terminal connect Ignition wire red to the terminal on the vehicle s fuse box which provides 12 V DC power supply and is turned on and off by the ignition key After the unit is installed check whether the brake lamps blinkers wipers etc on the car are working properly If the fuse blows first make sure the wires are not touching car s chassis then replace t...

Page 23: ...wheel remote control adapter Fuse 10 A Antenna terminal Front output Rear subwoofer output JVC Amplifier Factory wiring harness vehicle Vehicle dashboard Black Ground Yellow Battery 12 V White Front speaker left White black Gray Front speaker right Gray black Green Rear speaker left Green black Purple Rear speaker right Purple black Join the same color wires together Red Ignition 12 V Orange white...

Page 24: ...iPod touch are trademarks of Apple Inc registered in the U S and other countries Lightning is a trademark of Apple Inc Pandora the Pandora logo and the Pandora trade dress are trademarks or registered trademarks of Pandora Media Inc used with permission Android is trademark of Google Inc The Bluetooth word mark and logos are registered trademarks owned by Bluetooth SIG Inc and any use of such mark...

Reviews: