E-14
2. Preparation Before Shooting (continued)
1.
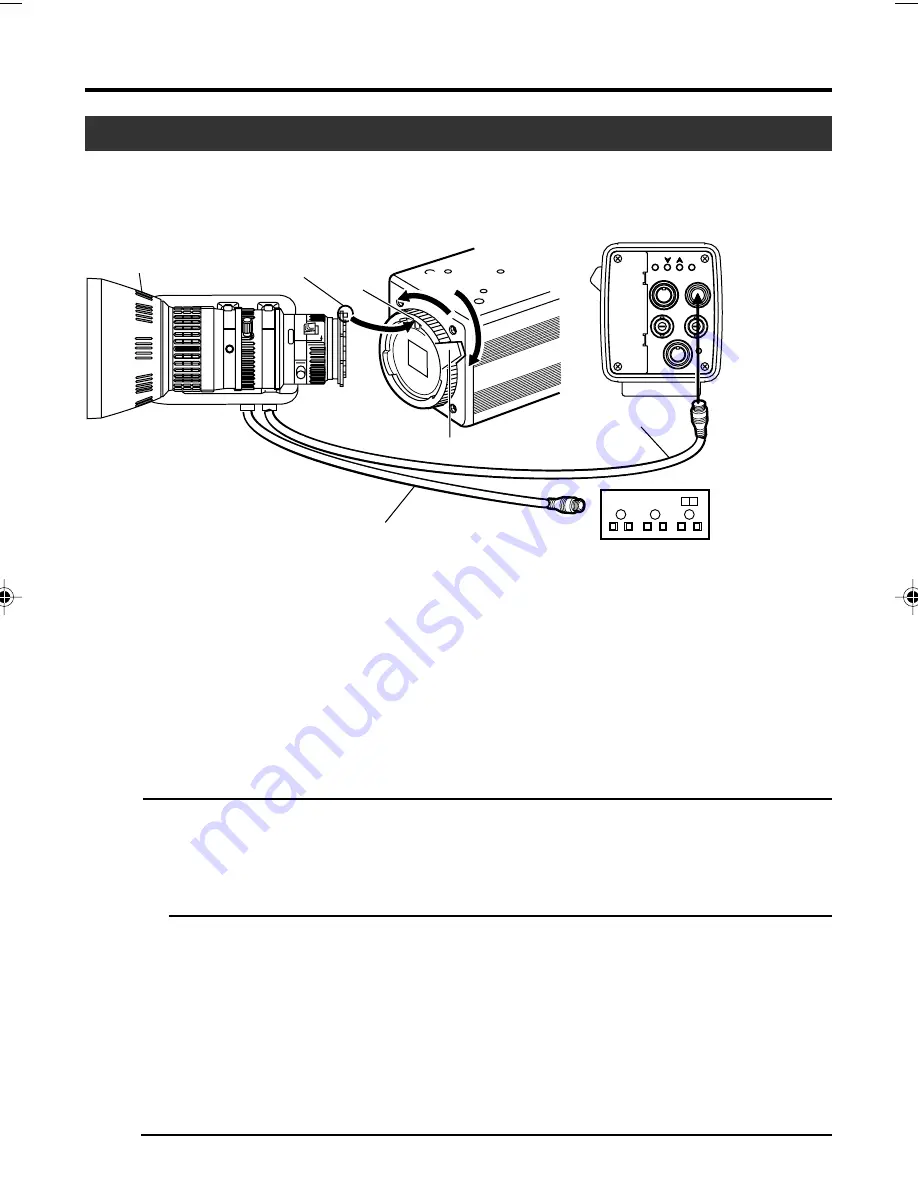
Loosen by turning the lens lock lever in the anti-clockwise direction.
2.
Mount upon ensuring that the pin and mounting hole of the lens are aligned.
3.
Fasten by turning the lens lock lever in the clockwise direction.
4.
Plug the lens cable into the [LENS] terminal at the back of the unit and ensure that it is locked.
5.
When connecting to the lens remote control, connect the cable (female) for controlling the lens to the
remote control.
Note
When connecting the manual iris lens or lens remote control to operate the lens iris manually, set the “IRIS
MODE” item to “MANUAL”.
☞
Page 31 ‘ “IRIS MODE” Item on “EXPOSURE” Screen’
Caution
•
Perform this when the unit is off.
Connecting with the power on may give rise to malfunction of the unit.
•
When removing the lens mount cap, ensure that no foreign substances are inside the mount.
•
Lenses are not supplied with this unit. Make sure to use lenses that are compatible with this unit.
Mounting the Lens
Follow the procedures below when mounting the auto iris lens.
Refer to the ‘instruction manual’ for the lens and lens remote control as well.
MACRO
4.
3.
5.
MENU
AW BARS
SET
LENS
REMOTE
GENLOCK IN
VIDEO OUT
POWER
DC IN
SEE INSTRUCTION MANUAL
2.
1.
Compatible MD Zoom Lens
S16 x 7.3 BMD (Fujinon)
YH16 x 7 BKTS (Canon)
Lens
Pin
Hole
Lever for securing the lens
Control Cable
Lock (Female)
Lens Remote
Control
Lens Cable
Lock (Male)
Compatible Lens
Remote Control
(Fujinon)
RMD-10
RMD-20
(Canon)
TCR-101F


