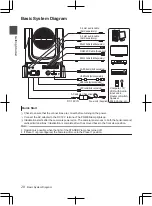
Basic System Diagram
.
DC 12V IN
Computer, TV,
VCR with Audio
Input Jack,
Router or Switch,
Speaker
Microphone, etc.
LAN cable (Sold separately)
HDMI cable (Sold separately)
USB cable (Sold separately)
3G-SDI cable (Sold separately)
Power cord (Supplied)
AC adapter (Supplied)
RS232 Cable (Sold Separately)
RS232C Cable (Supplied)
RS485 Cable (Sold Separately)
3.5 mm audio cable
(Sold separately)
3.5 mm audio cable
(Sold separately)
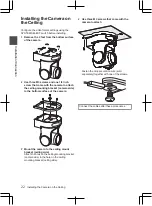
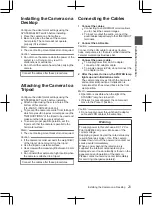
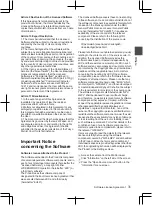
Quick Start
A
Check to ensure that the connections are correct before turning on the power.
B
Connect the AC adapter to the DC 12 V terminal. The POWER lamp lights up.
C
Initialization starts after the camera is powered on. The camera lens moves to both the horizontal and
vertical limit positions. Initialization is complete after it has moved back to the front view position.
Memo :
0
Operation is possible when the light of the STANDBY lamp has turned off.
0
If Preset 1 is preconfigured, the camera will move to the Preset 1 position.
20
Basic System Diagram
Getting Started
Summary of Contents for KY-PZ400NBE
Page 2: ...2 ...
Page 32: ...32 ...
Page 35: ...35 ...
Page 36: ... KY PZ400NWU KY PZ400NBU KY PZ400NWU KY PZ400NBU 2021 JVCKENWOOD Corporation B5A 3984 00 ...

