22
Installation and connection
When mounting the camera to the
electrical box
NOTE:
Before mounting the camera to electrical boxes,
please refer to local building codes for box type to
use for low-voltage wiring.
䡵
Connecting
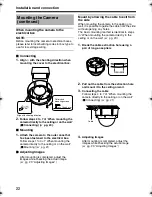
1.
Align
j
with the shooting direction when
mounting the cover to the electrical box.
2.
Follow steps 2 to 7 of
A
When mounting the
camera directly to the ceiling or on the wall
B
(
䡵
Connecting) (
A
pg. 20).
䡵
Mounting
1.
Attach the camera to the outer case that
has been fastened to the electrical box.
Follow steps 1 to 3 of
A
When mounting the
camera directly to the ceiling or on the wall
B
(
䡵
Mounting) (
A
pg. 21)
䡵
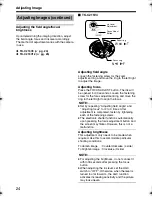
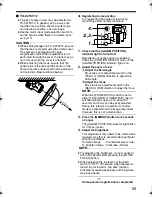
Adjusting Images
After mounting is completed, adjust the
images while checking the actual image.
(
A
pg. 23
A
Adjusting Images
B
)
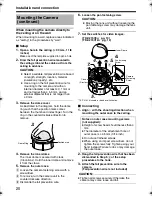
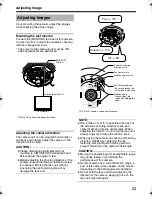
Mount by allowing the cable to exit from
the side
When mounting the camera to the ceiling or a
wall, it is possible to guide the cable from the side
without opening any holes.
The basic mounting method is identical to steps
in
A
When mounting the camera directly to the
ceiling or on the wall
B
(
A
pg. 20).
1.
Break the cable extraction hole using a
pair of long-nose pliers
2.
Pull out the cable from the extraction hole
and mount it to the ceiling or wall
3.
Connecting the cable
Follow steps 4 to 7 of
A
When mounting the
camera directly to the ceiling or on the wall
B
(
䡵
Connecting) (
A
pg. 21)
4.
Adjusting Images
After mounting is completed, adjust the
images while checking the actual image.
(
A
pg. 23
A
Adjusting Images
B
)
Mounting the Camera
(continued)
FR
ON
T
UP
Align with shooting direction
Outer case
mounting screws
Less than 4 mm
Cable
TK-C215V4_V12_EN.book Page 22 Wednesday, August 2, 2006 1:18 PM

