LX-D1010G
EN
–
14
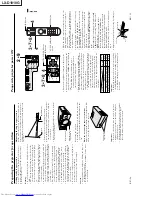
Turning off the projector
7
.
Press the POWER button.
The message
“POWER OFF?
YES : PRESS
AGAIN
”
appears on the screen.
•
T
o
exit from this mode, press any button except
POWER, LASER, mouse pointer, R/L-click,
STILL and and - buttons.
8
.
Press the POWER button again.
The light source lamp will be turned off.
Pressing the POWER button second time will shut
off the light source lamp, but the exhaust fan con-
tinues to operate for 60 seconds to cool down the
light source lamp and LCD panels. In this time, the
lamp indicator will be turned off.
9.
T
urn off the main power switch. When turning off
the main switch, the POWER indicator turns off.
•
In cases where the main power switch is acciden-
tally turned off when either the intake/exhaust
fan or the power source lamp is in operation, allow
the unit to cool down for 10 minutes with the
power turned off. Repeat step 3 when turning on
the power source lamp. If the lamp does not turn
on immediately
, repeat this step two or three
times. Replace the lamp if it should still fail to
turn on.
AUTO POSITION button
When the source is selected to COMPUTER and the
image is not in the right place, set the screen to the
brightest display possible, then press the AUTO
POSITION button on the remote control. If the image
is still not in the right place.
•
Set screen to the brightest display as possible
(e.g., full-screen display of the
“Trash
” window)
before deploying the automatic adjustment func-
tion.
•
If the screen saver is running, turn off the screen
saver before using the automatic adjustment
button.
The sound from the speaker
The sound from the speaker is mono.
•
When inputting mono sound, connect to AUDIO L
terminal.
•
The output sound is selected by changing the
setting of
AUDIO MODE in the FEATURE menu.
See page 16 for details.
The volume from the speaker
Press the or
–
button to change the volume
from the speaker
.
The volume control bar will appear on the screen.
30
•
The volume control bar will disappear about 4
seconds after releasing the volume buttons.
•
The volume buttons do not work when MENU
selection bar or MENU is displayed.
•
The volume from the audio output terminals are not
changed.
AV HIDE
Image and audio are temporarily erased with press-
ing the HIDE button .
T
o
restore the image and audio
to the normal mode, press the HIDE button again.
•
T
o
prevent the damage of the LCD, the image and
audio will be restored automatically to the normal
mode, 10 minutes after setting the
A
V
HIDE
mode.
Caution:
•
When you have finished using this equipment, wait
60 seconds for the exhaust fans to stop. Then turn off
the main switch and unplug the power cable from the
wall outlet, for safety purposes.
•
After the lamp is turned off, the lamp cannot be
switched on again for 60 seconds as a precaution-
ary measure. It will take another 60 seconds before
the lamp indicator goes off. If you wish to turn on
the projector again, wait until the indicator is off
then press the POWER button.
•
The exhaust fan rotates faster when the tempera-
ture around the projector rises.
•
When the temperature around the projector becomes
too high, the sign
“TEMP!!
” blinks red on the screen.
If the temperature stays too high, the lamp will be
shut off automatically .
The
projector
automatically
s
huts
off
when
the
lamp
is
used
up
in
about
2000
hours.
Y
ou
must
replace the lamp.
T
o
operate projector power ON (Continue)
EN
–
15
ENGLISH
Basic operation
Several
settings
can
be
adjusted
using
Menu.
EXAMPLE:
A
u
to
p
o
w
e
r
off
time
setting
1.
Press
the
MENU
button.
2
.
P
ress
the
$
or
%
b
utton
to
select
the
INST
ALLA-
TION menu.
3.
P
ress
the
ENTER
button
(or
}
b
utton).
4.
P
ress
the
{
o
r
}
b
utton
to
select
AUTO
POWER
OFF
.
5.
P
ress
the
$
or
%
b
utton
to
adjust
auto
power
off
time.
6.
Exit
the
menu
s
ystem
by
p
ressing
the
MENU
but-
ton
several
times.
•
If
the
menu
operation
is
not
working,
p
ress
the
RESET
button
on
the
terminal
board
using
the
suit-
able
implement
•
If
the
COMPUTER
or
V
IDEO
button
is
pressed,
the
MENU
selection
b
ar
or
MENU
will
disappear
.
•
The
settings
with
2
m
ark,
you
should
press
the
ENTER
button
after
selecting.
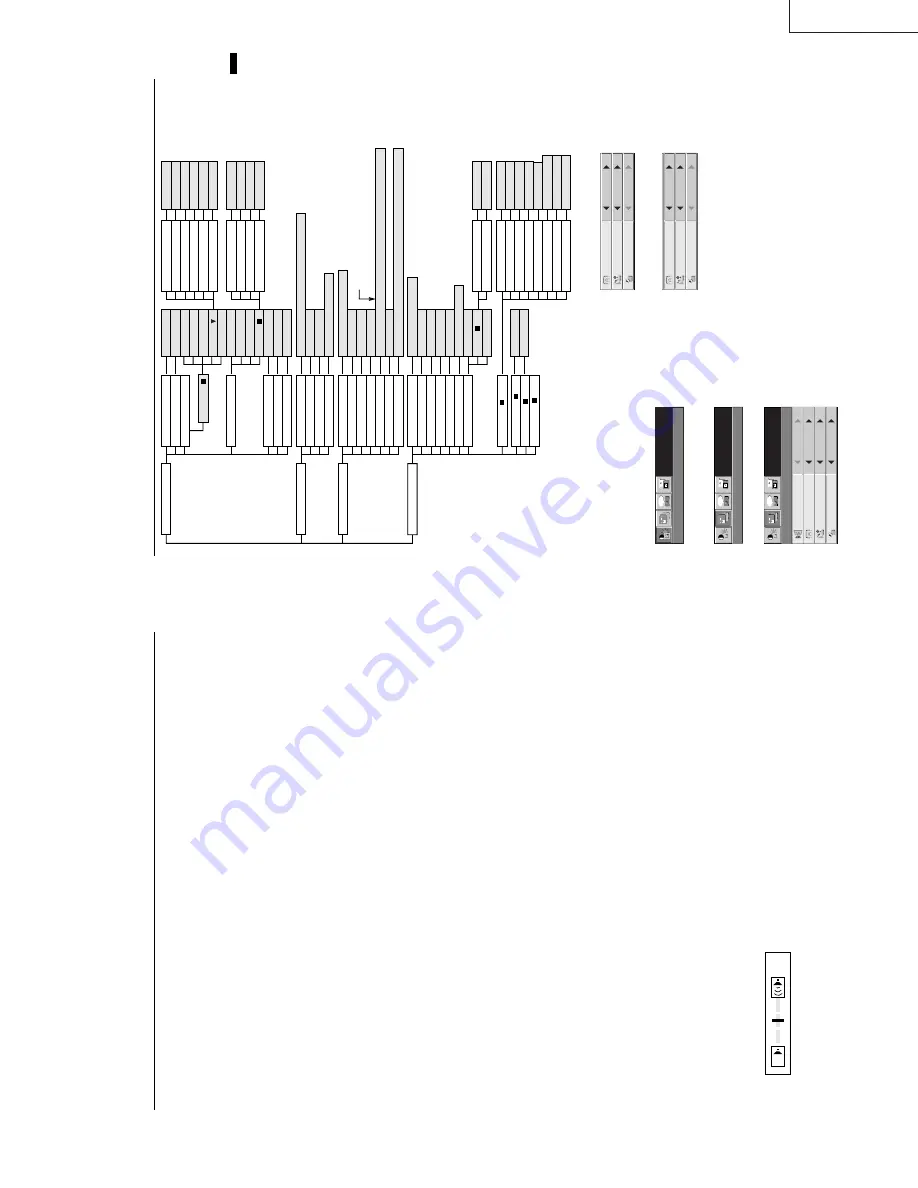
Menu operation
Opt
IMAGE
XGA60
INSTALLATION
Opt
XGA60
IMAGE REVERSE
INSTALLATION
OFF
KEYSTONE
0
˚
AUTO POWER ON
OFF
AUTO POWER OFF
OFF
Opt
XGA60
KEYSTONE
0
˚
AUTO POWER ON
OFF
AUTO POWER OFF
OFF
KEYSTONE
0
˚
AUTO POWER ON
OFF
AUTO POWER OFF
30 min
IMA
GE
CONTRAST
±
30
BRIGHTNESS
±
30
1
COLOR MA
TRIX
SHARPNESS
±
10
TINT
±
10
COLOR
±
10
RED
±
10
YELLO
W
±
10
BLUE
±
10
GREEN
±
10
CY
AN
±
10
MA
GENT
A
(Displa
ys only when the source is selected to
VIDEO)
(Displa
ys only when the source is selected to
VIDEO)
(When the signal from the COMPUTER IN ter
minal
is inputted, the setting is fix
ed to A
U
T
O
.)
±
10
CONTRAST R
±
30
CONTRAST B
±
30
BRIGHTNESS R
±
30
BRIGHTNESS B
±
30
EXP
AND MODE
1 - 4
1=Upper left, 2=Lo
w
er r
ight
FRAME POSITION
1 - 5
INST
ALLA
TION
IMA
GE REVERSE
OFF
, MIRR
OR, INVER
T
, MIRR
OR INVER
T
KEYST
ONE
±
15
˚
A
U
T
O
PO
WER ON
ON, OFF
A
U
T
O
PO
WER OFF
1 - 3
ON, OFF
FEA
TURES
MENU POSITION
OFF
, 5, 10, 15, 30, 60 min
VIDEO SIGNAL
A
UDIO MODE
ANAMORPHIC
A
U
T
O
, NTSC
, P
AL, SECAM, 4.43NTSC
, P
AL-M, P
AL-N, P
AL-60
LANGU
A
G
E
SIGNAL
MEMOR
Y CALL
A
U
T
O
, USER1, USER2
HORIZ.POSITION
0 - 999
VER
T
.POSITION
0 - 999
FINE SYNC
.
0
- 39
TRA
CKING
USER
0 - 9999
CLAMP POSITION
0 - +63
CLAMP
WIDTH
0 - +63
HORIZ.
PIXELS
0 - 9999
VER
T LINES
0 - 9999
PLL
A
U
T
O
, 0 - 7
SHUTTER (L)
0 - 383
SHUTTER (U)
0 - 383
VER
T
. SYNC
A
U
T
O
, ON, OFF
2
3
USER
USER
OFF
ST
AND
ARD
HIGH
LO
W
COLOR TEMP
.
USER
MEMORIZE
*
*
*
HOLD
A
U
T
O
USER1
,
USER2
DELETE
USER1
,
USER2
DEF
A
U
LT
ON
BEGIN
-1 - -99
END
1 - 99
OFF
COMPUTER INPUT
RGB
,
YC
B
C
R
/
YP
B
P
R
*
*
*
*
* : Setting range is different
according to the type of
the signal.
日本語
, English, Espa
ñ
ol, Deutsch, F
ran
ç
ais
, Italiano
,
中文
Summary of Contents for LX-D1010G - Lcd Projector
Page 32: ...LX D1010G 4 10 PA012 Memo ...
Page 36: ...LX D1010G 6 2 PA012 Memo ...
Page 67: ... PA012 15 1 LX D1010G 15 BLOCK DIAGRAMS ...
Page 68: ... PA012 15 2 LX D1010G ...
Page 69: ...LX D1010G PA012 15 3 ...
Page 70: ...LX D1010G PA012 16 1 ...
Page 77: ...LX D1010G PA012 Parts 7 Memo ...
Page 81: ...しろページ ...


