LX-D1010G
(PA012) 4-1
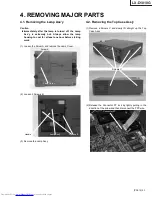
4. REMOVING MAJOR PARTS
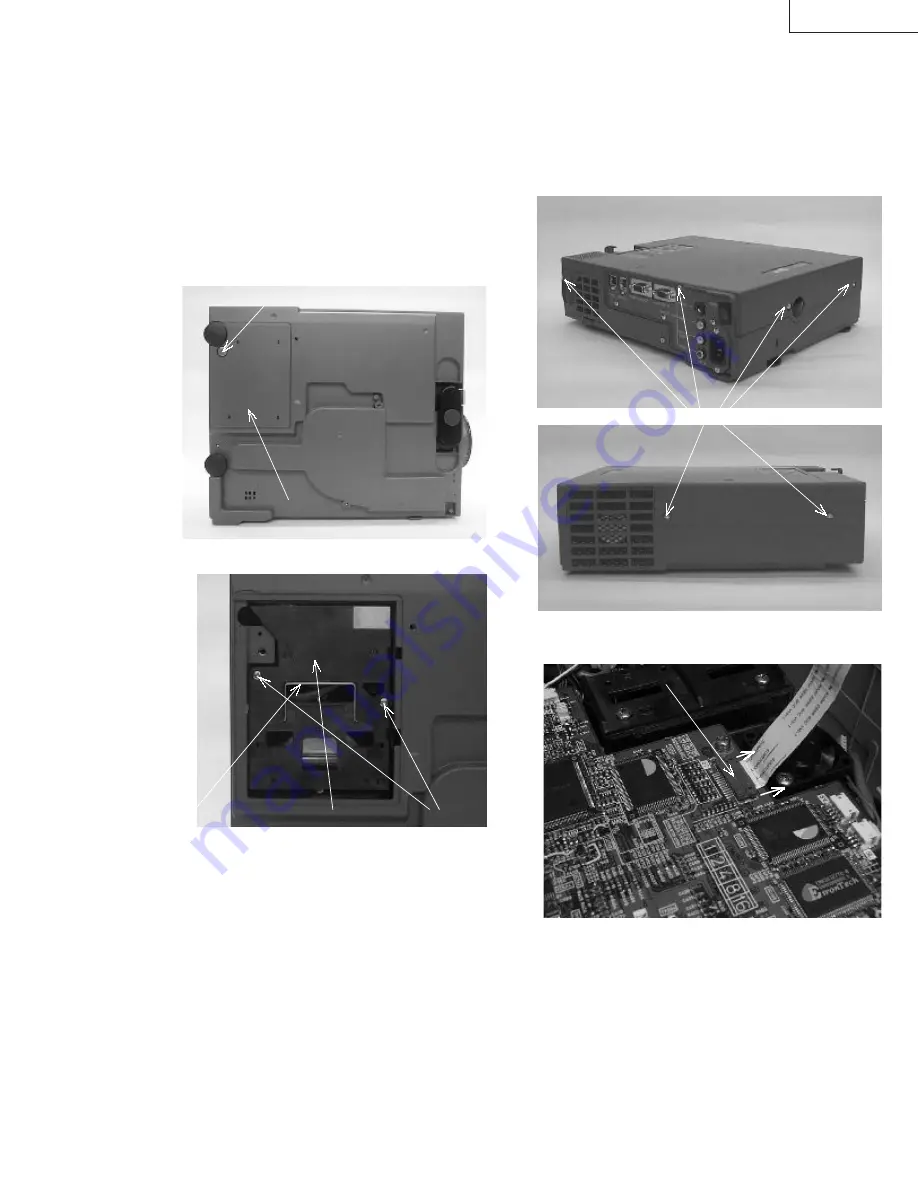
4.1. Removing the Lamp Ass'y
Caution
*
**
*
Immediately after the lamp is turned off, the Lamp
Ass’y is extremely hot. Always allow the lamp
housing to cool for at least one hour before starting
work.
(1) Loosen the Screw A and remove the Lamp Cover.
(2) Loosen 2 Screws B.
(3) Remove the Lamp Ass’y.
4.2. Removing the Top Case Ass'y
(1) Remove 6 Screws C and slowly lift straight up the Top
Case Ass’y.
(2) Release the Connector ST lock by lightly pulling in the
direction of the arrow and then disconnect the FPC wire.
Screw A
Lamp Cover
Handle
Lamp Ass’y
Screws B
Screws C
Connector ST
Summary of Contents for LX-D1010G - Lcd Projector
Page 32: ...LX D1010G 4 10 PA012 Memo ...
Page 36: ...LX D1010G 6 2 PA012 Memo ...
Page 67: ... PA012 15 1 LX D1010G 15 BLOCK DIAGRAMS ...
Page 68: ... PA012 15 2 LX D1010G ...
Page 69: ...LX D1010G PA012 15 3 ...
Page 70: ...LX D1010G PA012 16 1 ...
Page 77: ...LX D1010G PA012 Parts 7 Memo ...
Page 81: ...しろページ ...


