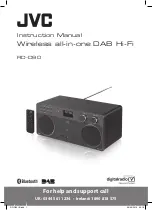
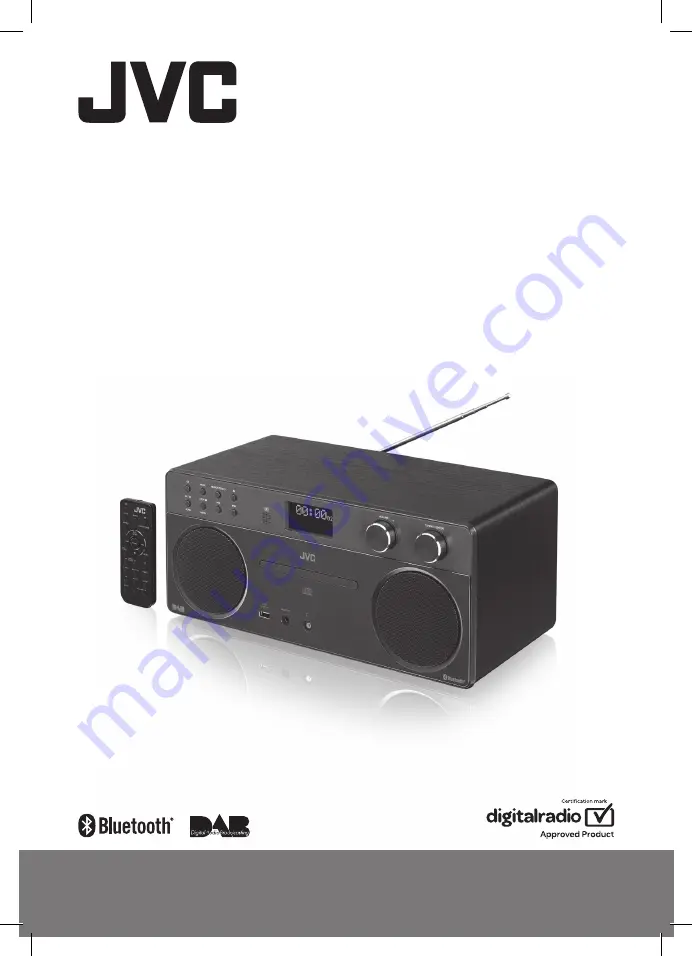
background image

Instruction Manual

Wireless all-in-one DAB Hi-Fi

RD-D90

For help and support call 

UK: 0344 561 1234  •  Ireland: 1890 818 575

RD-D90_IB.indd   1

06/06/2016   09:18

Summary of Contents for RD-D90

Page 1: ...Instruction Manual Wireless all in one DAB Hi Fi RD D90 For help and support call UK 0344 561 1234 Ireland 1890 818 575 RD D90_IB indd 1 06 06 2016 09 18 ...

Page 2: ...RD D90_IB indd 2 06 06 2016 09 18 ...

Page 3: ...ker Volume Levels and Sound Effects 13 Clock Operation 13 Manually Setting the Clock 13 Sleep Timer 13 Daily Timer 14 To Deactivate or Re activate a Daily Timer 14 DAB Radio Operation 15 Scanning for DAB stations 15 Manual Tuning 16 Secondary Services 16 Presetting Stations 16 Recalling a Preset Station 16 DAB Information Display 17 DRC Dynamic Range Compression 18 Pruning Radio Stations 18 Softwa...

Page 4: ...Play Data CD 23 USB Operation 24 Charging From the USB port 24 Repeat Playback 24 AUX Operation 25 Bluetooth Operation 26 System Reset 26 Using Headphones 27 Maintenance 28 Cleaning the Unit 28 Cleaning the Speakers 28 Handling Discs 28 Cleaning Discs 28 Storing Discs 28 Hints and Tips 29 Product Fiche and Specifications 30 Useful Information and Licences 31 RD D90_IB indd 4 06 06 2016 09 18 ...

Page 5: ...is manual Supervision Children should be supervised to ensure that they do not play with the unit and the remote control Read all the instructions carefully before using the unit and keep them for future reference Retain the manual If you pass the unit onto a third party make sure to include this manual Check that the voltage marked on the rating label matches your mains voltage Damage Please insp...

Page 6: ...that may be of sufficient magnitude to constitute a risk of electric shock The exclamation point within an equilateral triangle is intended to alert the user to the presence of important operating and maintenance servicing instructions in the manual accompanying the unit Service To reduce the risk of electric shock do not remove screws The unit does not contain any user serviceable parts Please le...

Page 7: ...s and tips to help you resolve any issues Read all the safety instructions carefully before use and keep this instruction manual for future reference Main Unit AUDIO IN MODE MONO STEREO STOP SCAN MENU TUNING ENTER VOLUME Remote Control battery included INTRO SLEEP MUTE VOLUME INFO MODE EQ REPEAT ENTER MENU SCAN MONO STEREO PRESET MEM PRESET FOLDER DSP CLOCK SHUFFLE TIMER If items are missing or da...

Page 8: ...UDIO IN Socket 13 USB Socket 14 Left Speaker 15 SKIP Button 16 SKIP Button 17 STOP MENU Button 18 SCAN Button 19 DAB FM Aerial 1 2 3 4 5 6 7 8 9 14 10 11 12 13 15 16 17 18 To access menus using the MENU button on the unit press and hold the MENU button The TUNING ENTER dial on the unit can be turned to scroll through menus or radio stations and pressed to select menu items or radio stations Its th...

Page 9: ...rol 1 Standby Button 2 INFO Button 3 REPEAT Button 4 Button 5 MONO STEREO Button 6 PRESET FOLDER Buttons 7 CLOCK Button 8 EQ Button 9 MUTE Button 10 MODE Button 11 OPEN CLOSE Button 12 PRESET MEM Button 13 SCAN Button 14 ENTER Button 15 Button 16 Button 17 MENU Button 18 DSP Button 19 SHUFFLE Button 20 TIMER Button 21 INTRO Button 22 SLEEP Button 23 VOLUME Buttons INTRO SLEEP MUTE VOLUME INFO MODE...

Page 10: ... function Only use the battery type indicated in this manual Do not dispose of the used battery as domestic waste Dispose of it in accordance with the local regulations Small button cell batteries such as the one used in the remote control are easily swallowed by young children and this is dangerous Keep loose button cells away from young children and make sure that the battery holder tray is secu...

Page 11: ...ht sources Connections Connecting to the Main 1 Fully extend the aerial 2 Fully unwind the mains cable 3 Connect the mains plug to the mains socket and switch on at main Remote sensor 4m directly in front of the unit AUDIO IN MODE MONO STEREO STOP SCAN MENU TUNING ENTER VOLUME 30 30 4m max INTRO SLEEP MUTE VOLUME INFO MODE EQ REPEAT ENTER MENU SCAN MONO STEREO PRESET MEM PRESET FOLDER DSP CLOCK SH...

Page 12: ...atically turns to Standby mode after 15 minutes if the unit is idle in BLUETOOTH CD or USB mode or the external unit is disconnected switched off or the volume is too close to mute To switch the unit off completely remove the mains plug from the mains socket To save energy turn the unit off completely when not in use This instruction manual explains the basic instructions for operating this unit U...

Page 13: ...s on the remote control Mute To temporarily mute the sound press the MUTE button Press the MUTE button again or press VOLUME to resume normal listening Preset Equalizer You can choose from 5 preset equalizer settings FLAT ROCK CLASSIC POP JAZZ Press the EQ button on the remote control repeatedly to select the desired setting Clock Operation The clock on this unit can automatically synchronize with...

Page 14: ...essed in 9 seconds the unit exits timer setting mode automatically If CD or USB source is selected and the audio cannot be played because a CD or USB device isn t inserted then the unit will default to FM mode automatically If you select DISC this is CD mode and will play a CD when the timer activates remember to insert a CD into the CD tray before setting the timer If you select USB make sure you...

Page 15: ...e the station that you would like to listen to press the ENTER button the station will play To select a station using the unit turn the TUNING ENTER dial to scroll through the stations then press the TUNING ENTER dial the select the station Scanning for DAB stations You can scan for new stations at any time Before performing a scan make sure your aerial is fully extended 1 Press SCAN or in the men...

Page 16: ...on in the station list For a secondary channel to be found during an auto scan it must be broadcasting when the scan takes place To select a secondary service press MENU when the symbol appears in the display When the secondary service ends the unit will automatically switch back to the primary station Presetting Stations You can store up to 30 stations to the memory allowing access to your favour...

Page 17: ... no signal to 100 full strength signal Programme Type This describes the style or genre of the programme that is being broadcast Ensemble Name A multiplex is a collection of radio stations that are bundled and transmitted on one frequency There are national and local multiplexes Local ones contain stations that are specific to that area DAB unlike normal radio groups together several radio station...

Page 18: ... it in in multiple locations you might fine that it has stored radio stalions that are now weak By selecting PRUNE you can delete all the weak stations 1 Press MENU then press to highlight PRUNE then press ENTER 2 You ll now see the question Prune Yes or No press to highlight YES then press ENTER All weak radio stations will now be deleted Software Version To check your software version press MENU...

Page 19: ...is still poor adjust the position of the aerial or try moving the unit to another location Press the MODE button to select FM RADIO source The words FM RADIO will be briefly be displayed Tuning in a Station Auto Tuning Press SCAN the unit will automatically tune to the next available radio station To scan in the opposite direction press and hold the SCAN button Scan Settings You can set your unit ...

Page 20: ...rogram mode The display will show Save to P 3 Press PRESET FOLDER to select the desired station preset number 4 Press ENTER to store the station Recalling a Preset Station To select a preset station press the PRESET MEM button then the PRESET FOLDER buttons to select the preset station number With the preset station number selected press the ENTER button The unit will automatically change the the ...

Page 21: ...ency This displays the frequency of the present radio station Audio Type This displays if the current station being received in mono Time This displays the current time provided automatically by the broadcaster Date This displays the current date provided automatically by the broadcaster Radio Text Frequency PTY Time Audio Type Date Audio Mode You may find when listening to week FM radio stations ...

Page 22: ...3 AUDIO MP3 AUDIO CD Compact Disc Digital Audio AUDIO Some recorded files may not be able to be played due to the type and format of disc or condition of the recording If you are having trouble playing a certain disc it is recommended to use USB input instead for best MP3 playback Do not insert 8cm CDs into the CD tray they may jam in the unit 8cm CDs are NOT supported If there is no disc or the d...

Page 23: ... P 01 T 01 3 Press to select the desired track number 4 Press MEM PRESET to store 5 Repeat steps 3 4 to programme more tracks 6 Once this is completed press the button to start programme play 7 Press once to stop the programme playing Press twice to clear programme Opening and closing the CD tray will cancel the program and erase the memory REP ONE REP ALL REP OFF Programme Play Data CD You can pr...

Page 24: ... as FAT 32 If your USB device is loaded with MP3s but the display keeps showing NO MUSIC on the display the format of your USB device might not be compatible with the unit The unit can support USB devices with up to 32GB of memory The unit may not be compatible with all USB devices this is not an indication of a problem with the unit Repeat Playback MP3 tracks Press the REPEATbutton repeatedly to ...

Page 25: ...es 3 Press VOLUME to adjust the volume to your desired level 4 hour playback If the unit is in AUX mode more than 4 hours it will automatically switch to standby mode 10 minutes before entering standby AUTO OFF will flash on the display While AUTO OFF is flashing press INTRO to cancel auto off function and continue using your unit After cancelling AUTO OFF if no other buttons are pressed the unit ...

Page 26: ...t in DAB mode and the CD tray open press and hold the MONO STEREO button The unit will now reset itself Once it has reset it will automatically start to scan for DAB radio stations Bluetooth Operation Pair the unit with a Bluetooth device to listen to music 1 Press the MODE button to select the Bluetooth mode The words BT LINK will flash on the display 2 Activate your Bluetooth device and select s...

Page 27: ...to obtain the desired volume level 3 When the headphones are connected the sound to the speaker will be muted AUDIO IN MODE MONO STEREO STOP SCAN MENU TUNING ENTER VOLUME Long term exposure to loud music may cause hearing damage It is best to avoid extreme volume when using headphones especially for extended periods RD D90_IB indd 27 06 06 2016 09 18 ...

Page 28: ...st on the disc cause picture and sound deterioration Wipe the disc from the centre outwards with a soft cloth Always keep the disc clean Playback side If you cannot wipe off the dust with a soft cloth wipe the disc lightly with a slightly moistened soft cloth and finish with a dry cloth Do not use any type of solvent such as thinner benzine commercially available cleaners or antistatic spray They ...

Page 29: ... the unit is not muted Press the or the VOLUME on the remote control or turn the VOLUME dial on the unit to resume normal listening Press on the unit or on the remote control to switch the unit to standby mode Then press the button again to switch the unit on Unplug the unit from the mains socket then plug in again Switch on the unit The unit does not respond when pressing any buttons The unit may...

Page 30: ... the Bluetooth function is activated on your Bluetooth device Ensure you have paired your unit with the Bluetooth device If any functional abnormality is encountered unplug the unit from the mains socket and reconnect it again Product Fiche and Specifications Brand JVC Model RD D90 System Section Power Supply 100V 240V 50 60Hz Power Consumption 60W Speaker Output Power 20W x 2 Unit Dimension 401 W...

Page 31: ...ur waste equipment at the time of disposal will help conserve natural resources and ensure that it is recycled in a manner that protects human health and the environment For more information about where you can drop off your waste for recycling please contact your local authority or where you purchased your product Notes for Battery Disposal The batteries used with this product contain chemicals t...

Page 32: ...ntative of the manufacturer is DSG Retail Ltd co no 504877 1 Portal Way London W3 6RS UK For Help and Support Call 0344 561 1234 The product is distributed and warranted exclusive by DSG Retail Ltd JVC is the trademark of JVC KENWOOD Corporation used by DSG Retail Ltd under license IB RD D90 160606V1 RD D90_IB indd 32 06 06 2016 09 18 ...

Reviews: