1-4
1.3.3
Hardware Check Mode
Startup method
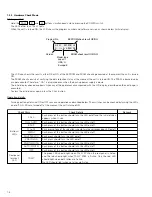
Hold the CALL , F1 and F2 buttons simultaneously while pressing the POWER switch.
The LEDs other than TALLY lights.
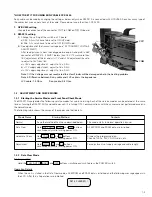
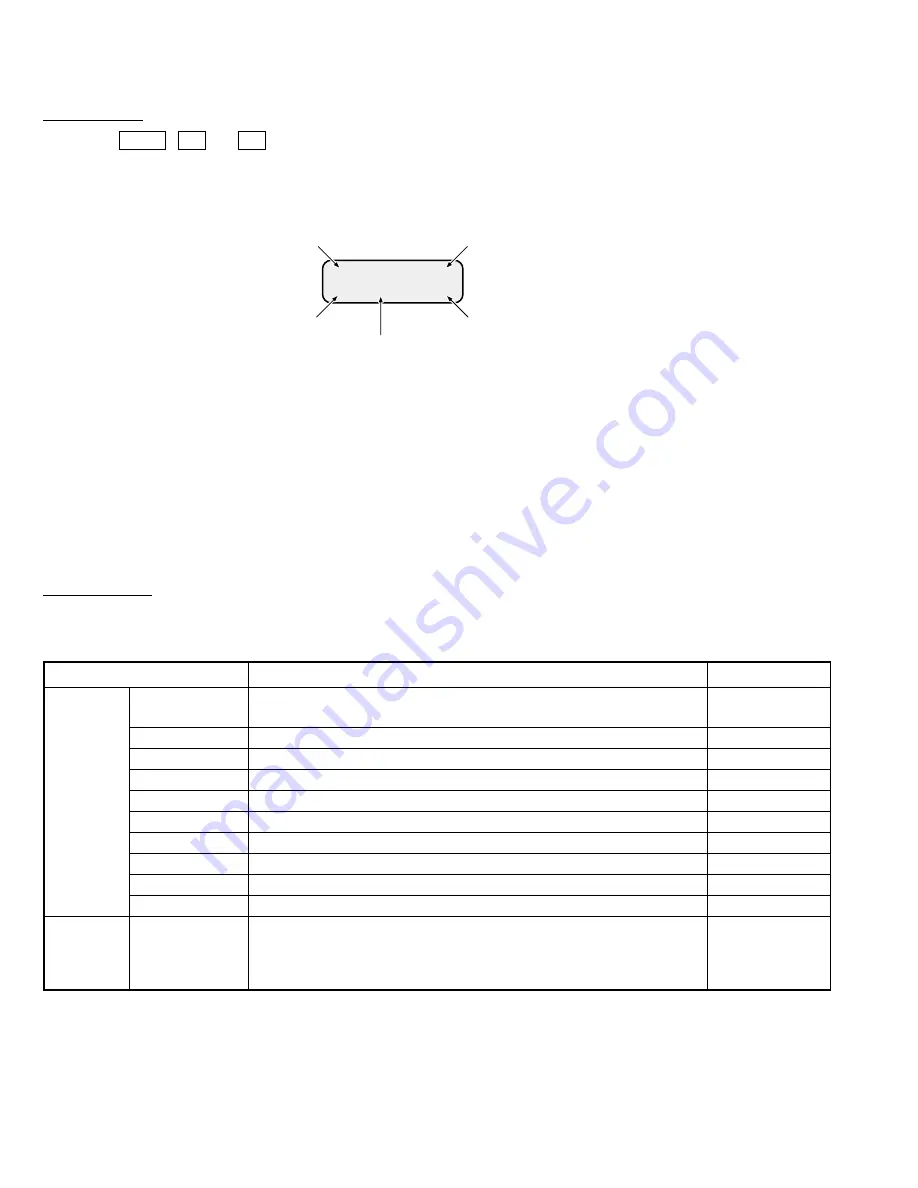
When the unit is turned ON, the LCD shows the program number and software version as shown below (initial display).
The LCD also shows the results, either OK or NG, of the EEPROM and SRAM checking executed at the moment the unit is turned
ON.
The SRAM check consists of verifying the data retention status at the moment the unit is turned ON. The SRAM is backed up by
a super-capacitor. Therefore, “NG” is displayed even when the back-up power supply is down.
The initial display above disappears when any of the operations accompanied with the LCD display, described on the next page, is
executed.
To view the initial display again, press the CALL button.
Operation details
Turning a button or terminal ON or OFF causes an operation as described below. The switches can be checked by turning the LEDs
on or off. All LEDs are turned off at the moment the unit is turned ON
C
V
1
∗
3
.
5
∗
9
∗
< U
E
>
E P
S
R
R
O
A
M
M
O
O
K
K
Program No.
EEPROM check result OK/NG
Version
Model type
Japan: I
USA: U
Europe: E
SRAM check result OK/NG
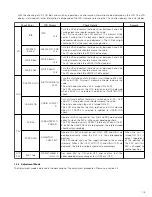
Each press of this button should turn the LED on/off and the initial display
appears when it is on.
The green LED should light when TALLY PVW on the rear panel is Active
and the red should light when TALLY PGM is Active. Only the red LED
should light when both tallies are Active.
No LED should light when no tallies are Active.
Buttons/
LEDs
CALL
TALLY
Rear-panel
terminal/
LED
Check Point
Check Details
Remark
FULL AUTO
BARS
F1 to F4
MENU
SHUTTER JOG
V.GAIN JOG
PAINT (WHITE)
AUTO (WHITE)
IRIS
Each press of this button should turn the LED on/off.
Each press of this button should turn the LED on/off.
Each press of one of these buttons should turn the corresponding LED on/off.
Each press of this button should turn the LED on/off.
Each press should turn the LED on/off.
Each press should turn the LED on/off.
Each press of this button should turn the LED on/off.
Each press of this button should turn the LED on/off.
Each press of this button should turn the LED on/off.


