For Customer Use:
Enter below the Model No. and Serial
No. which are located either on the rear,
bottom or side of the cabinet. Retain this
information for future reference.
Model No.
Serial No.
LVT0858-001A
[B]
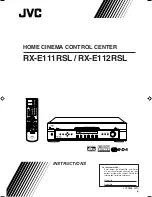
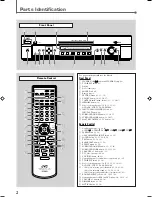
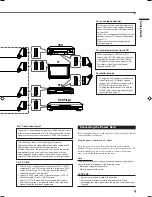
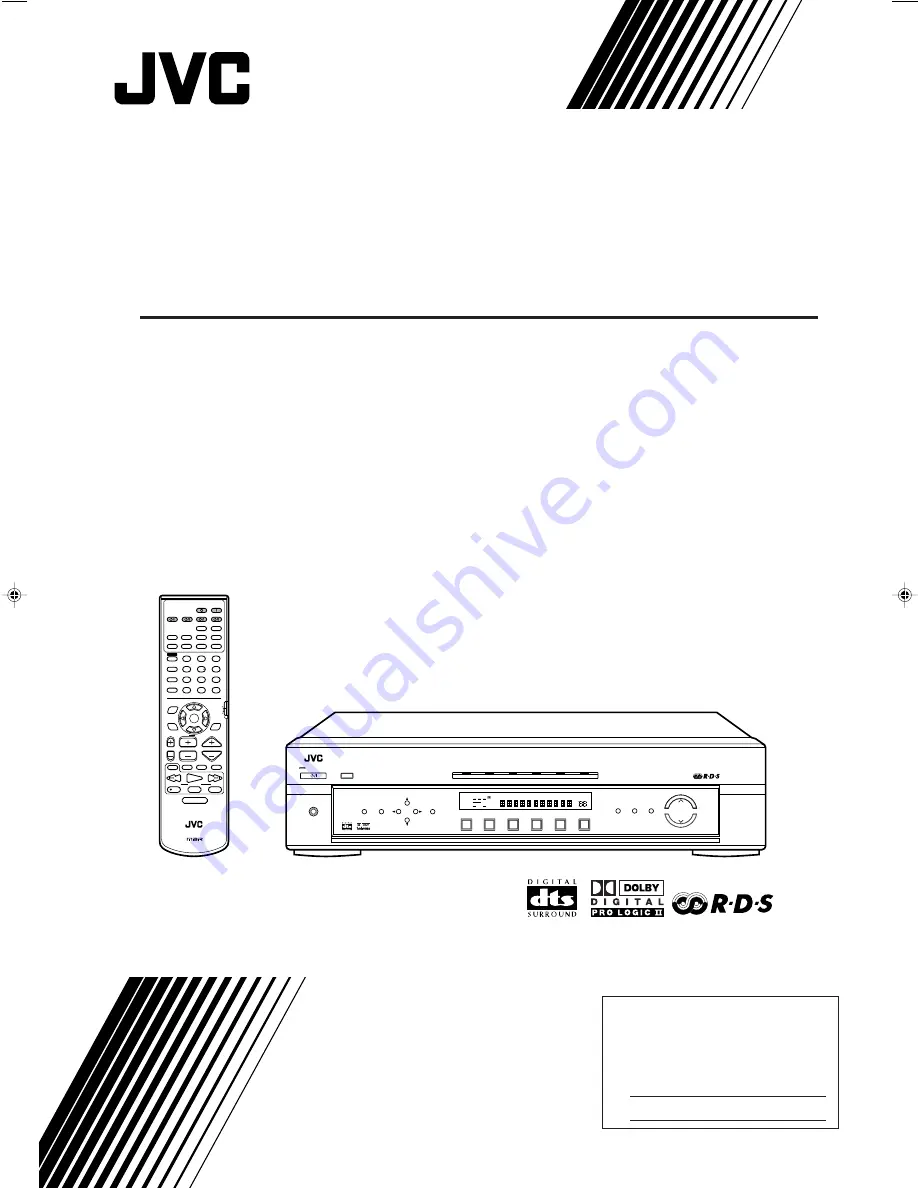
HOME CINEMA CONTROL CENTER
RX-E111RSL / RX-E112RSL
RM-SRXE111R
REMOTE CONTROL
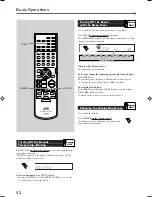
HOME CINEMA CONTROL CENTER
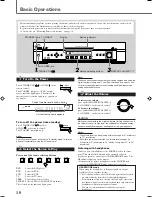
CONTROL
CHANNEL
VOLUME
TV VOL
TUNING
STOP
PAUSE
FF/
/REW
DIMMER
TV/VIDEO
VCR
MUTING
REC
PLAY
DOWN
UP
DVD
SLEEP
TV DIRECT
DVD
STB
VCR
TV
ANALOG/DIGITAL
TAPE
FM
BASS
+
CENTER
TEST
BASS
–
REAR-L
BASS BOOST
TREBLE
+
REAR-R
EFFECT
TREBLE
–
SUBWOOFER
RETURN
FM MODE
ENTER
DISPLAY MODE
RDS
MODE
ON/OFF
AM
1
2
3
4
5
6
7
8
9
10
0
+10
+100
DVD
MENU
VCR
TV
STB
INPUT
SURROUND
TA/NEWS/INFO
PTY SEARCH
PTY
(
PTY
9
AUDIO
DVD MENU
SURROUND
SOUND
+
–
+
–
+
–
+
–
DVD
STB
VCR
TV
TAPE
FM/AM
DVD
STB
VCR
TV
TAPE
FM/AM
HOME CINEMA CONTROL CENTER
TV DIRECT
MEMORY
CONTROL
ADJUST
SETTING
STANDBY
INPUT
ANALOG/DIGITAL
INPUT ATT
MASTER VOLUME
SURROUND
ON/OFF
SURROUND
MODE
STANDBY/ON
PHONES
ANALOG
PL
ΙΙ
SUBWFR LFE
SLEEP
MODE
TA
ST
TUNED
INFO
NEWS
AUTO MUTING
MH
Z
KH
Z
VOL
AUTO
AUTO SR
INPUT ATT
DSP HP
L
C
R
LS
S
RS
LPCM
DOLBY D
DTS
RDS
INSTRUCTIONS
RX-E111/112R[B]COVER_f
02.1.11, 4:54 PM
1


