(No.MB338)1-23
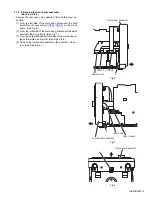
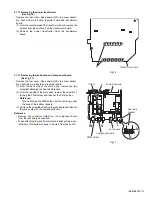
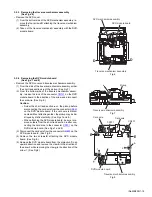
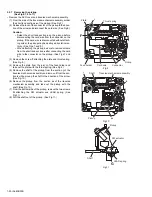
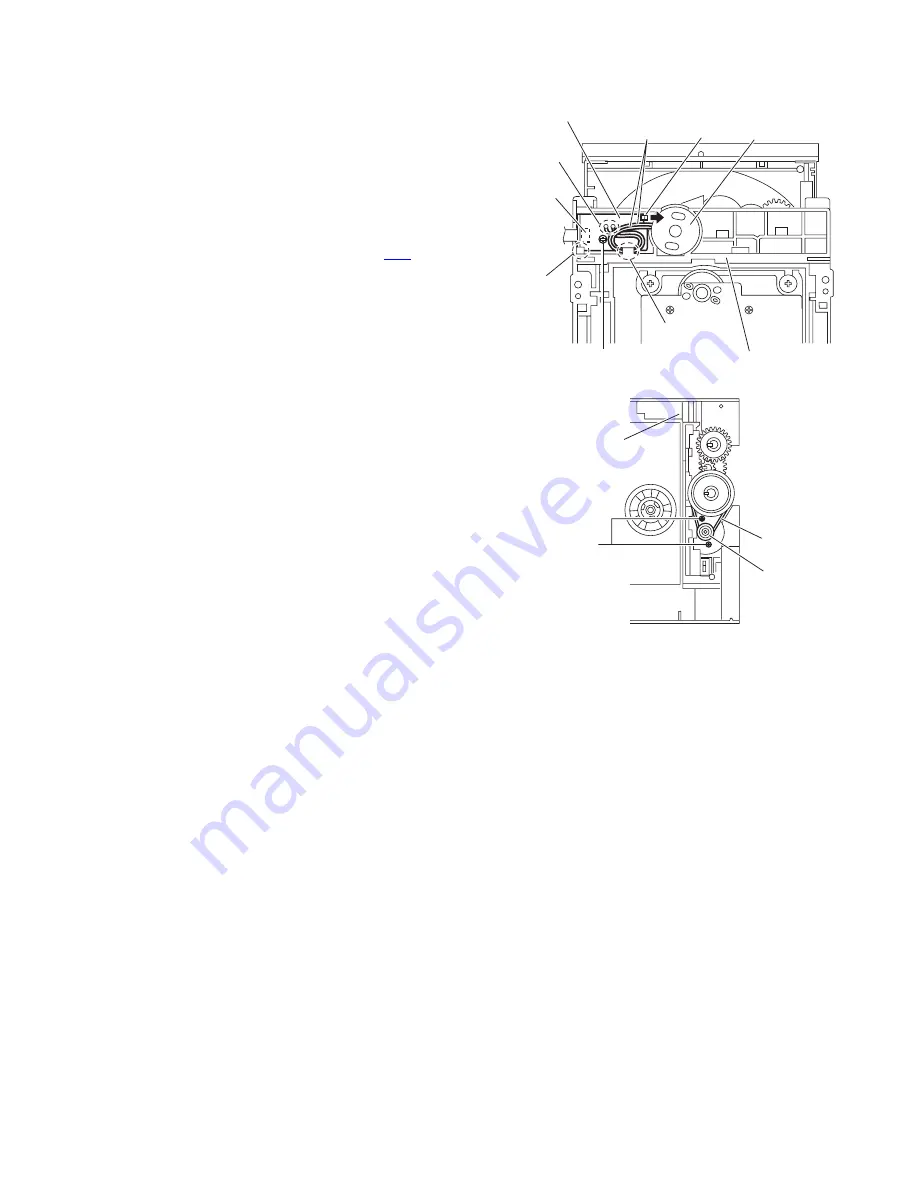
3.2.11 Removing the DVD loading switch board
(See Fig.17)
(1) From the bottom side of the DVD mechanism assembly, re-
move the screw
M
attaching the DVD loading switch board.
(2) Remove the wires from the soldered sections
r
on the DVD
loading switch board.
(3) Lift the DVD loading switch board while pressing the claw
s
of the DVD mechanism assembly in the direction of the
arrow and remove the DVD loading switch board from the
section
t
.
(4) From the forward side of the DVD loading switch board,
disconnect the card wire from the connector
CN1
.
Reference:
• Put the wires on the section
u
after attaching the DVD load-
ing switch board to the DVD mechanism assembly.
• Fix the claw
t
on the DVD mechanism assembly with bonds
after attaching the DVD loading switch board.
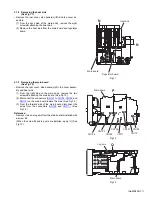
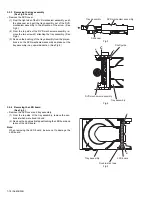
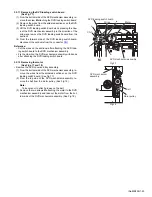
3.2.12 Removing the motor
(See Figs.17 and 18)
• Remove the DVD cover and tray assembly.
(1) From the bottom side of the DVD mechanism assembly, re-
move the wires from the soldered sections
r
on the DVD
loading switch board. (See Fig.17.)
(2) From the top side of the DVD mechanism assembly, re-
move the belt from the motor pulley. (See Fig.18.)
Note:
Take care not to attach grease on the belt.
(3) Remove the two screws
N
attaching the motor to the DVD
mechanism assembly and take out the motor from the bot-
tom side of the DVD mechanism assembly. (See Fig.18.)
Fig.17
Fig.18
DVD loading switch board
Wires
r
s
t
u
DVD mechanism assembly
Motor
CN1
M
DVD mechanism
assembly
N
Belt
Motor pulley
Summary of Contents for SP-UXQD9S
Page 32: ...1 32 No MB338 SECTION 5 TROUBLESHOOTING This service manual does not describe TROUBLESHOOTING ...
Page 33: ... No MB338 1 33 ...
Page 41: ...2 5 SHEET 4 ...
Page 71: ...3 21 MEMO ...

