1-2
1.4 HOW TO REMOVE THE MAJOR PARTS <COM section>
1.4.1
Disassembly flow chart
This flowchart shows the disassembly procedure for the ex-
terior parts and electrical parts.
Basically, reverse this procedure when assembling them.
[1]
Top cover, Bracket
[2]
Front panel assembly
SW/Display board assembly, Power SW board assembly,
[3]
Jog board assembly
[4]
SW REG board assembly
[5] Foot assembly, Foot(center), Foot(rear), Bottom cover
<Note 2a>
• When attaching the FPC, be sure to connect it in the cor-
rect orientation.
• When attaching the FPC take care that it is not caught.
• When removing or attaching the WIRE/FPC, refer to "1.7
CONNECTION"(page 1-8) at same time.
<Note 2b>
When attaching the Front panel assembly, make sure that
the door openers of both decks (DV, VHS) are in the down
position.
<Note 2c>
When attaching the Front panel assembly, be careful not
to damage the DV terminals.
<Note 2d>
When attaching (WR2a) and (WR2b), insert supporting
long side to connector in the Main board assembly.
<Note 3a>
When attaching Jog board assembly, attach it before SW/
Display board assembly.
<Note 5a>
When removing Bottom cover, remove it after VHS sec-
tion parts and DV section parts.
1.4.2
Disassembly/assembly method <COM section>
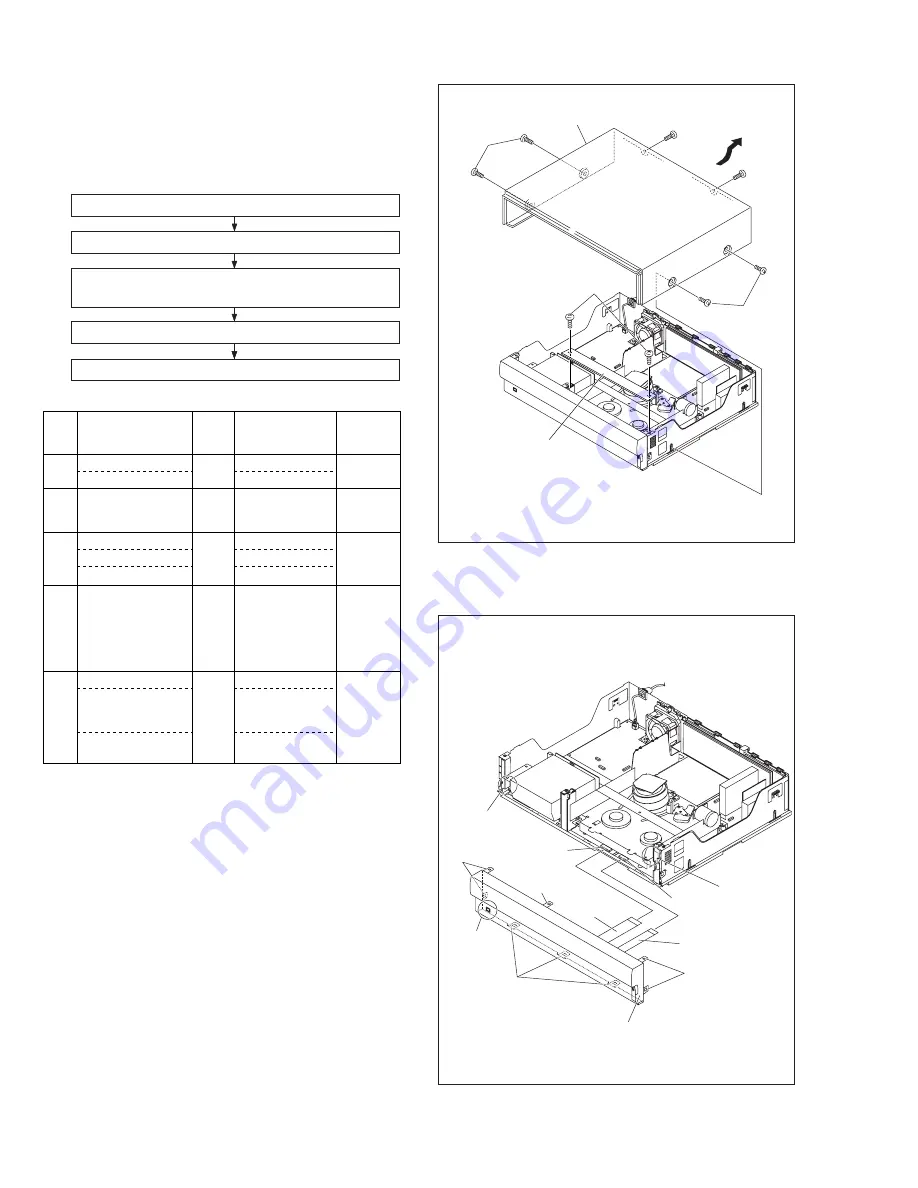
Fig. COM1
Fig. COM2
Step/
Loc No.
Fig. No.
Point
Note
Part name
Top cover
Bracket
COM1
4(S1a), 2(S1b)
2(S1c)
[1]
—
—
Front panel
assembly
COM2 8(L2a),
CN7510(WR2a),
CN3011(WR2b)
<Note 2a,
2b, 2c,2d>
<Note 2a>
<Note 5a>
[2]
SW REG board
assembly
[4]
COM3 8(S3a)
2(S3b)
2(S3c),Knob(Jog)
[3]
COM4 4(S4a),
CN5322(WR4a),
CN5321(WR4b),
CN5325(WR4c),
CN5324(WR4d),
CN5323(WR4e)
[5]
COM5
Lug wire
Foot assembly
Foot(center)
Foot(rear)
Bottom cover
(S5a)
5(L5a)
4(L5b), 9(L5c),
2(L5d)
SW/Display board assembly
Power SW board assembly
Jog board assembly
(S1a)
(S1a)
(S1b)
(S1b)
(S1c)
[1] Top cover
[1] Bracket
(L2a)
(L2a)
(L2a)
(L2a)
(WR2a)
<Note 2a, 2d>
(WR2b)
<Note 2a, 2b>
CN7510
CN3011
<Note 2b>
VHS SIDE
<Note 2b>
DV SIDE
DV terminals
<Note 2c>
[2] Front panel assembly


