background image

15

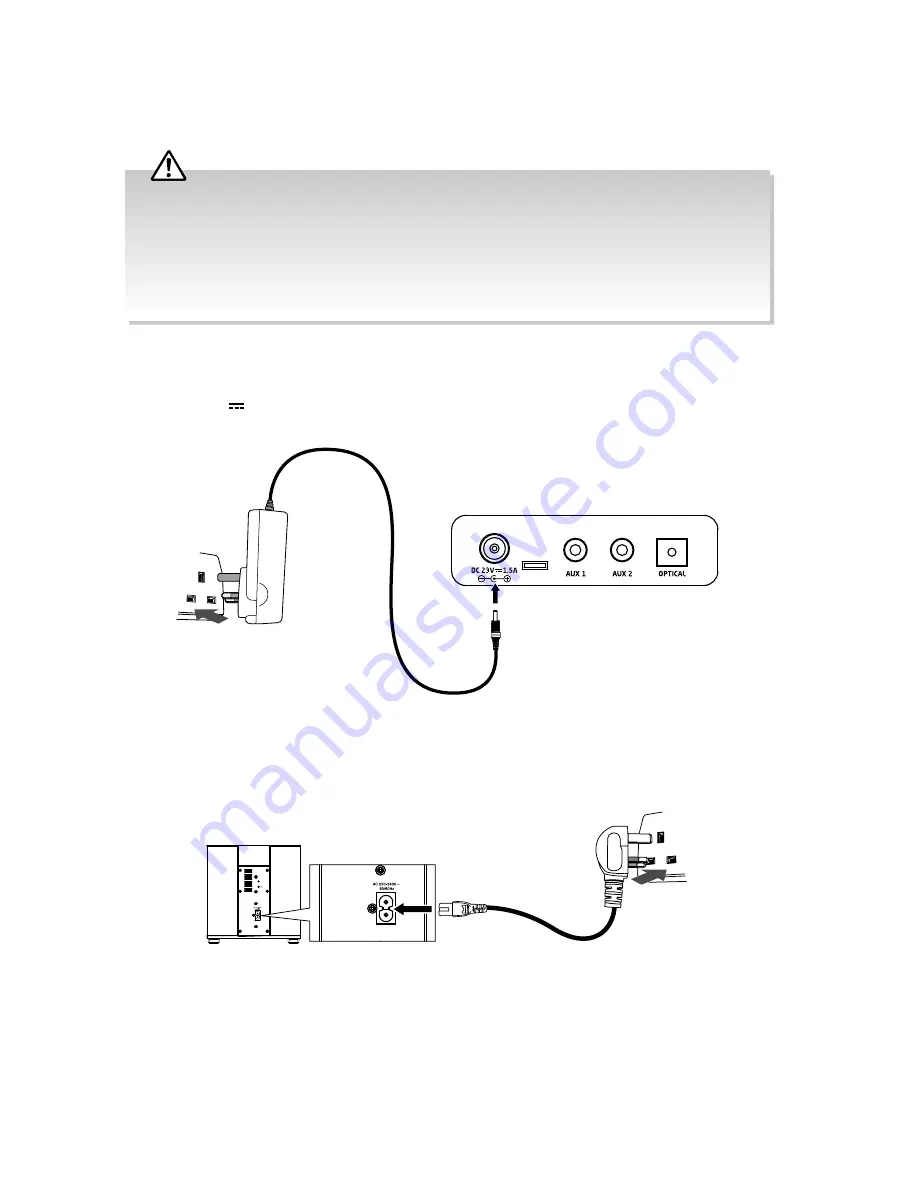
Connecting to the Mains Supply

The soundbar and subwoofer are designed to operate with the supplied mains adapter and 

mains cables.

Soundbar

Unwind the mains adapter cable to its full length. Connect the other end of the mains cable 

to the DC 23V   1.5A socket at the rear of the soundbar then connect the mains plug to 

the mains socket.

To the mains 

socket

Rear View of the Soundbar

•  The mains adapter and mains cable are designed for this JVC soundbar only. DO NOT use the mains 

adapter and mains cable for other purposes. Connecting the unit to any other power source may 

damage the unit.

•  Ensure all audio connections of the unit are connected before connecting to the mains power socket.
•  Make sure the mains plug is fi rmly inserted into the mains socket.
•  To switch the unit off  completely, remove the mains plug from the mains socket.
•  Please turn the unit off  completely to save energy when not in use.

Subwoofer

Connect the other end of the mains cable to the AC~ socket at the side of the subwoofer 

then connect the mains plug to the mains socket.

To the mains 

socket

Side View of the Subwoofer

Summary of Contents for TH-WL311B

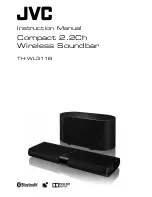
Page 1: ...Instruction Manual Compact 2 2Ch Wireless Soundbar TH WL311B ...

Page 2: ...2 ...

Page 3: ...g 12 Connections 13 Connecting to the TV 13 Connecting an External Audio Device 14 Connecting to the Mains Supply 15 Pairing the Wireless Subwoofer with the Soundbar 16 Basic Operating 17 Standby ON 17 Automatic Power Off Function 17 Selecting Modes 17 Adjust the Speaker Level Settings and Effects 18 AUX Optical Operation 18 Bluetooth Operation 18 NFC Near Field Communication Operation 19 Maintena...

Page 4: ...he guidance in this manual Supervision Children should be supervised to ensure that they do not play with the unit and the remote control Read all the instructions carefully before using the unit and keep them for future reference Retain the manual If you pass the unit onto a third party make sure to include this manual Check that the voltage marked on the rating label matches your mains voltage D...

Page 5: ...servicing instructions in the manual accompanying the unit Service To reduce the risk of electric shock do not remove screws The unit does not contain any user serviceable parts Please leave all maintenance work to qualified personnel Do not open any fixed covers as this may expose dangerous voltages Maintenance Ensure to unplug the unit from the mains socket before cleaning Do not use any type of...

Page 6: ... understand all the operational features it offers You will also find some hints and tips to help you resolve any issues Read all the safety instructions carefully before use and keep this instruction manual for future reference To get the most from this product you may need to buy an Optical cable If items are missing or damaged please contact Partmaster UK only Tel 0344 800 3456 for assistance I...

Page 7: ...Speakers 2 NFC Near Field Communication Sensor 3 Remote Control Sensor 4 Button Switch the unit between ON and Standby modes 5 SOURCE Button Select the Input source 6 VOL Buttons Adjust the volume level 7 Status Indicator 1 2 1 1 1 4 6 7 5 3 ...

Page 8: ...8 Side View of Subwoofer 1 DC 23V 1 5A Socket 2 AUX 1 AUX 2 Sockets 3 OPTICAL Socket 1 Pair Indicator 2 Pair Switch Pairs with the main unit 3 AC Power Socket Rear View and Sockets 1 2 3 1 2 3 ...

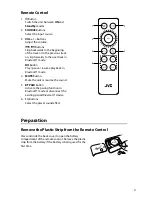
Page 9: ...k in Bluetooth mode 4 MUTE Button Mute the unit or resume the sound 5 BT PAIR Button Activate the pairing function in Bluetooth mode or disconnect the existing paired Bluetooth device 6 EQ Buttons Select the preset sound effect Remote Control Preparation Remove the Plastic Strip from the Remote Control Press and slide the back cover to open the battery compartment of the remote control Remove the ...

Page 10: ...een swallowed Handling the Remote Control Take care of your fingernails when you slide and pull the battery release tab Do not drop the remote control Do not allow anything to impact the remote control Do not spill water or any liquid on the remote control Do not place the remote control on a wet object Do not place the remote control under direct sunlight or near sources of excessive heat Remove ...

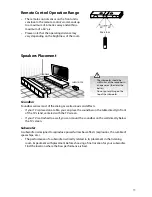
Page 11: ...s most of the dialog as well as music and effects If your TV is placed on a table you can place the soundbar on the table directly in front of the TV stand centered with the TV screen If your TV is attached to a wall you can mount the soundbar on the wall directly below the TV screen Subwoofer A subwoofer is designed to reproduce powerful low bass effects explosions the rumble of spaceships etc Th...

Page 12: ...red for the installation Do not overtighten screws Keep this instruction manual for future reference Use an electronic stud finder to check the wall type before drilling and mounting 1 Drill 2 parallel holes Ø 3 8 mm each according to wall type in the wall The distance between the holes should be 400 mm 400 mm Wall Front view Dowel Solid wall i e Solid brick Solid concrete Solid wood Solid wooden ...

Page 13: ...ive cap of the OPTICAL socket Connect an optical cable not included to the OPTICAL socket on your soundbar and TV Touch on the unit or press on the remote control and then press SOURCE repeatedly to select Optical If there is no sound output ensure the audio setting of the input source e g TV games console DVD player etc is set to PCM or Dolby Digital Signal with optical input HEADPHONE L WHITE R ...

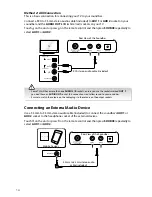
Page 14: ...TV to your soundbar Connect a RCA to 3 5mm stereo audio cable included to AUX 1 or AUX 2 socket on your soundbar and the AUDIO OUT L R white red sockets on your TV Touch on the unit or press on the remote control and then press SOURCE repeatedly to select AUX 1 or AUX 2 Connecting an External Audio Device Use a 3 5mm to 3 5mm stereo audio cable included to connect the soundbar s AUX 1 or AUX 2 soc...

Page 15: ...oundbar only DO NOT use the mains adapter and mains cable for other purposes Connecting the unit to any other power source may damage the unit Ensure all audio connections of the unit are connected before connecting to the mains power socket Make sure the mains plug is firmly inserted into the mains socket To switch the unit off completely remove the mains plug from the mains socket Please turn th...

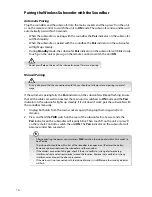
Page 16: ...e is a conflict or strong interference e g interference from an electronic device around the location Remove these conflicts or strong interferences and repeat the above procedures If the main unit is not connected with the subwoofer and it is in ON mode the standby indicator will flash Manual Pairing Do not press Pair on the rear of the subwoofer except for manual pairing It is very abnormal that...

Page 17: ...indicator will light up steadily Automatic Power Off Function The unit automatically turns to Standby mode after 15 minutes if the TV or the external unit is disconnected or switched off in Optical mode or the volume is too close to mute in AUX Bluetooth mode Selecting Modes Press SOURCE repeatedly to switch between Bluetooth Optical AUX 1 and AUX 2 modes The selected mode indicator will light up W...

Page 18: ...or will flash rapidly and you will hear Pairing from the unit 3 Activate your Bluetooth device and select the search mode TH WL311B will appear on your Bluetooth device list 4 Select TH WL311B and enter 0000 for the password if necessary The unit will voice Paired and the Bluetooth indicator will light up steadily 5 To disconnect the Bluetooth function you can Switch to another function on the uni...

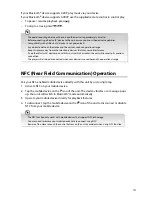
Page 19: ... technology You may need to remove your mobile device case to connect using NFC Beware of too close to touch the control buttons on the unit by accident when using NFC function NFC Near Field Communication Operation Pair your NFC enabled mobile device directly with this unit by just a single tap 1 Activate NFC on your mobile device 2 Tap the mobile device on the icon of the unit The device vibrate...

Page 20: ...eplace the battery in the remote control with a new one Remove any obstacles between the remote control and the unit No sound from the subwoofer Please try either one of the solutions below Make sure that the unit is not muted Press the MUTE or VOL button to resume normal listening Touch on the unit or press on the remote control to switch the soundbar to standby mode Then press the button again t...

Page 21: ...rom between the soundbar and Subwoofer Bluetooth Problem Solution I cannot find TH WL311B on my Bluetooth device Ensure the Bluetooth function is activated on your Bluetooth device Ensure you have paired your unit with the Bluetooth device Some NFC enabled mobile devices cannot pair directly with the unit Download and install NFC reader apps into your NFC enabled mobile device Please refer to your...

Page 22: ... Power 0 5 W Output Power 15 Wrms x 2 200Hz 20kHz 30 Wrms 50Hz 180Hz Bluetooth Bluetooth 3 0 A2DP Net Weight 1 3 kg Dimension 43 cm W x 4 9 cm H x 14 5 cm D Subwoofer Power Supply AC 220 240V 50 60Hz Power Consumption 30 W ECO Standby Power 0 5 W Output Power 60 Wrms 35Hz 120Hz Net Weight 4 4 kg Dimension 20 cm W x 20 cm H x 42 cm D Features and specifications are subject to change without prior n...

Page 23: ...ate collection and recycling of your waste equipment at the time of disposal will help conserve natural resources and ensure that it is recycled in a manner that protects human health and the environment For more information about where you can drop off your waste for recycling please contact your local authority or where you purchased your product Notes for Battery Disposal The batteries used wit...

Page 24: ...under license IB TH WL311B 150313V1 Dear Customer This apparatus is in conformance with the valid European directives compatibility and electrical safety European representative of the manufacturer is DSG Retail Ltd co no 504877 Maylands Avenue Hemel Hempstead Herts HP2 7TG UK For Help and Support Call UK 0344 561 1234 Ireland 1890 818 575 ...

Reviews: