background image

- 16 -

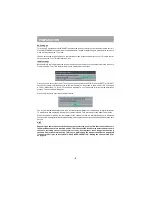
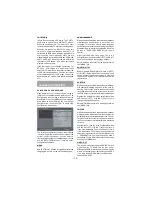
Press the [GUIDE] key to display the EPG screen
and press [RIGHT] to display the next programme
details in the text window and highlight the name of
the next programme in the list of channels. Press
[OK] when a programm e you want to watch is
highlighted and the reminder icon is displayed
against that programme's name.

You can exit the EPG screen in the normal way -
pressing [GUIDE], [MENU]. Later, shortly before the
programme is due to start, the receiver will display
a reminder on the screen over the picture of the
channel being viewed.

Use the [LEFT] or [RIGHT] keys to highlight the YES
or NO buttons as appropriate and press [OK]. If you
select the YES button, the receiver switches over
to the reminder channel.

Note:

 Reminder events are ignored if any timer

event is active at that time.
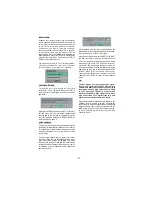
EVENT TIMER

You can also set a timer to switch the receiver to
any channel without your intervention. T his is
i n t e n d e d   f o r   m a ki n g   vi d e o   r e c o r d i n g s   o f
p r o gr a m m e s  w h e n   yo u   a r e  o u t .   If   a   s in g l e
programme is to be recorded, the receiver can be
left switched to the required channel and the timer
s e t   o n   t h e   V C R .   H o w e ve r ,   i f   t w o   o r   m o r e
programm es on different channels are to be
recorded then the receiver's own timer is set as well,
to select the required channel when it is needed.

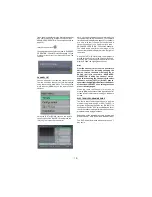
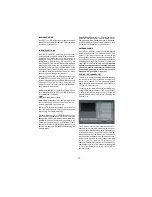
Display the Main Menu by pressing the [MENU] key
and highlight and select the Timers line to display
the Timer menu screen. Up to five separate timer
events can be set and each is displayed in the Timer
screen, showing the event number, the channel to
be selected, the start time, end time, date and the
mode - whether that event is active (and will be acted
on) or not.

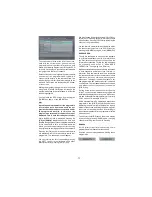
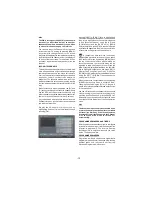
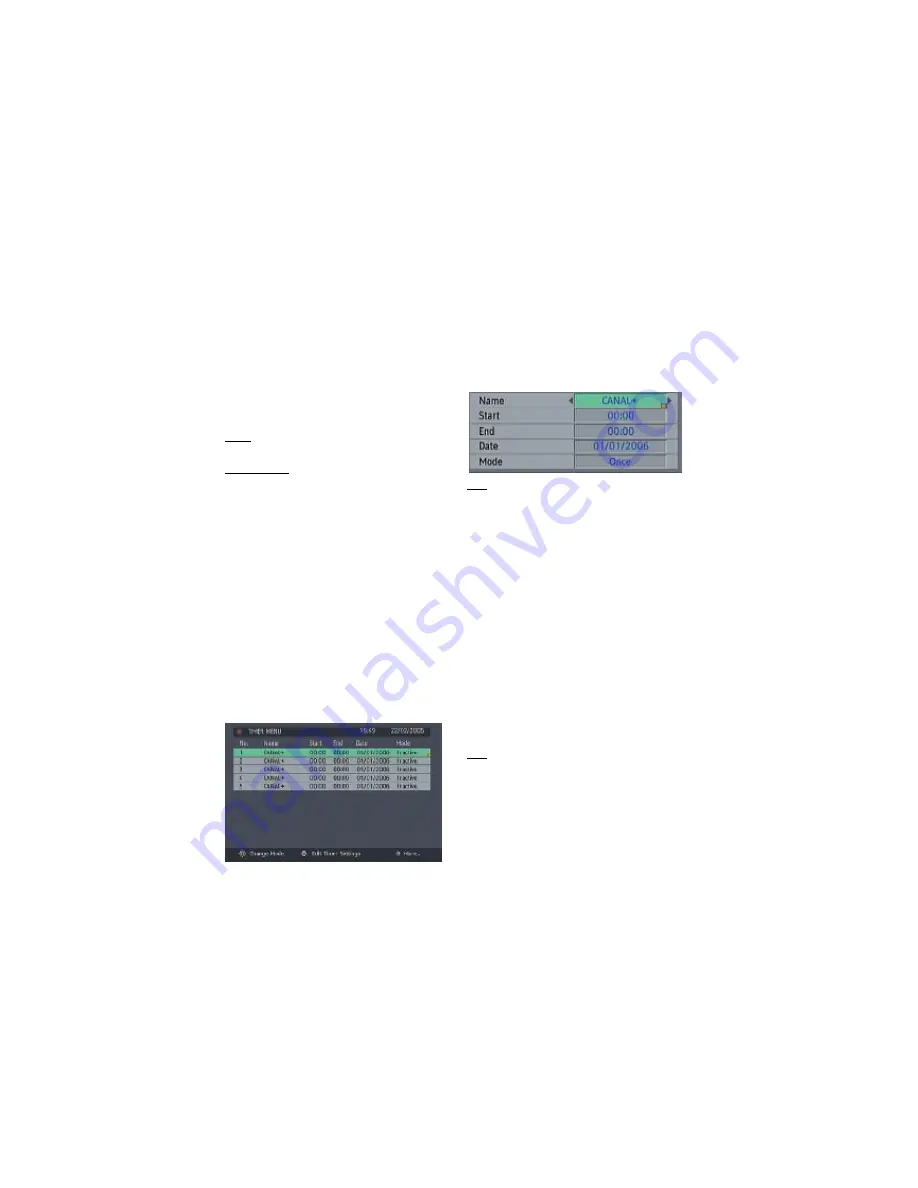
To set an event, highlight its mode button using the
[UP] or [DOWN] keys and press [OK] to display the
timer entry window. Here the five settings of channel
name, start time, end time, date and frequency
mode can be set. You can move freely between
each setting using the [UP] and [DOWN] keys. The
channel name is set using the [LEFT] or [RIGHT]
keys to display the channel which broadcasts the
programme to be recorded. The start time, end time
and date are each set with the number keys on the
remote control in 24-hour format. The frequency
mode determines how often the receiver operates
this event and is set with the [LEFT] or [RIGHT] keys
to be either Once, Daily, or Weekly.

Hint

If an invalid number for the start or end times
or the date is entered, the highest valid number
is  aut oma tic ally  en tere d i n it s p lac e. So,
entering 28:30 as the time will automatically
change to 23:30, and a date of 15:14:2002 will
change to 15:12:2002.

Pressing [MENU] or [OK] returns to the Timer screen
with the settings in place in the timer event list. The
event mode is automatically set to Active and you
can now return to normal viewing (press the [MENU]
keys) and at the appointed time the receiver will
switch over to the required channel and at the end
of the event, switch the receiver to standby.

When the Timer screen is displayed, any event can
be set to be Inactive (so it will not occur) or the
channel, times and frequency mode altered by
highlighting the event's Mode button and pressing
[OK] as before.You can exit the Timer screen and
return to normal TV viewing by pressing [MENU].

Hint

If you are watching digital terrestrial TV at the
time the timer event starts, a message is flashed
onto the screen announcing that the receiver is
'Switching to timer channel' so you understand
what is happening.

Summary of Contents for TU-DB1SFR

Page 1: ...DIGITAL TERRESTRIAL SET TOP BOX INSTRUCTIONS TU DB1SFR ENGLISH Trade Mark of the DVB Digital Video Broadcasting Project 1991 to 1996 Number 4022 ...

Page 2: ... 2 IN THE BOX 3 RECEIVER BUTTONS 4 REMOTE CONTROL BUTTONS 5 REMOTE CONTROL BUTTONS 6 PREPARATION 7 PREPARATION 8 EVERYDAY OPERATION 9 ADVANCED OPERATION 12 SPECIFICATION 18 CONNECTING THE EXTERNAL DEVICES 19 TROUBLESHOOTING GUIDE 20 ...

Page 3: ...LATION Slots and openings in the STB cover are for ventilation Do not cover or block them as this could lead to overheating CLEANING Unplug the STB before it is cleaned Use a lightly dampened cloth only Do not use liquid or aerosol cleaners HEATAND FLAMES The receiver should not be placed near to naked flames or sources of intense heat such as an electric fire Ensure that no naked flames sources s...

Page 4: ...restrial Set Top Box Inside your package you should have Degital Terrestrial Set Top Box STB receiver AC adaptor x1 Remote control unit RM C1890S Dry battery for the remote control unit AA R06 x2 Instruction book Warranty Card Aerial cable x1 Scart cable x1 ...

Page 5: ...ONS Front Standby button Program down up buttons Back ANTENNA ANTENNA OUT IN VCR DVR RS 232C TV DC IN 6V DIGITAL AUDIO OUT CO AXIA L RS 232 ANTENNA OUT ANTENNA IN TV SCART VCR SCART SPDIF DIGITAL AUDIO OUT POWER SUPPLY ...

Page 6: ...tons P P buttons MENU button Mute GUIDE button Standby TV DTV button OK button Number buttons Volume Up Down buttons WIDE button Information button Slide Switch AV button Colour buttons Up Down Right Left buttons SUBTITLE button PAGE UP DOWN buttons VCR DVD control buttons ...

Page 7: ...ition Pressing a button that looks the same as the device s original remote control button has the same effect as the original remote control Note Even you operating a JVC brand TV or VCR some buttons may not work To operate a JVC brand DVD player Set the Slide Switch to the DVD position Pressing a button that looks the same as the device s original remote control button has the same effect as the...

Page 8: ...le SCART socket on your television There may be more than one SCART socket on your television and if unsure which to use you should refer to its manual for guidance RS 232C TV TV Aerial In TV Aerial TV Scart In ANTENNA IN VCR DVR TV DC IN 6V DIGITAL AUDIO OUT CO AXIAL ANTENNA OUT Not use If you have a VCR or other equipment connected to your television please connect the receiver as described here...

Page 9: ...ave a standard TV set Then press OK to start the installation process The next menu will appear Press the OK key to start the automatic search The receiver will automatically tune to the UHF transmission channels 21 to 68 looking for digital terrestrial TV broadcasts and displaying the names of channels found This process will take about five minutes When the search is finished the first channel o...

Page 10: ...oose the channel by using the P buttons or the number buttons W hen using the number buttons enter the programme number as follows Example PR6 press 6 PR12 press 12 PR123 press 1 2 and 3 Hint The channel list numbers are assigned by the broadcasters Because not all channels are broadcast free to air and stored by the receiver th e c han ne l l ist nu mbe rs do no t r un continuously The fifteenth ...

Page 11: ... top right of the screen Using the UP or DOWN keys the highlight is moved through the list to the channel required Pressing OK now changes the quarter screen display to show the highlighted channel Hint From the Channel List screen it is possible to edit the channel list including changing the name of stored channels or deleting them Editing the list is covered in ADVANCED OPERATION Editing The Ch...

Page 12: ...LLOW or BLUE keys Pressing BLUE will display events of the next day Pressing YELLOW will display the events of the previous day You can return to normal television viewing to watch the channel last selected in the EPG screen by pressing the GUIDE key again or the MENU key WIDESCREEN TV sets are available with screens of the standard 4 3 format and widescreen 16 9 format When you first installed yo...

Page 13: ...anguage soundtrack you will hear when switching to a channel broadcasting with multiple soundtracks See also Section 2 EVERYDAY OPERATION Audio Control Hi ghl ight the Audio Language l ine i n the Configuration menu and use the LEFT or RIGHT keys to cycle through the language options Return No Menu to normal TV viewing by pressing the MENU key DOLBY DIGITAL Enable disable Dolby Digital by means of...

Page 14: ...he password is changed It is updated after exiting the Parental Menu Enter PIN CODE use UP or DOWN buttons to go to Enter PIN code option Use OK button to enter new password New Password Menu is displayed Use NUMBER buttons to enter new password New Password is asked twice for confirmation ANTENNAPOWER Use UP or DOWN buttons to go to Antenna Power Supply Setting The setting will be OFF as default ...

Page 15: ...the name change and return to the previous name You can now perform further editing on the channel list or return to normal broadcast viewing by pressing the MENU key Using the other two functions of the Channel List menu screen LOCK and FAVOURITES is dealt with in the next sections Hint You can also enter a channel name using the number keys on the remote control Each key represents several lette...

Page 16: ...WN keys and press OK A channel selected as a favourite appears in the main channel list with a favourites icon against the channel name A channel can have this icon removed by repeating this procedure to remove the icon Leave the Channel List menu by pressing MENU Once the required channels have been marked as favourite channels the favourite mode can be activated to allow easy access to them Pres...

Page 17: ...e and will be acted on or not To set an event highlight its mode button using the UP or DOWN keys and press OK to display the timer entrywindow Here the five settings of channel name start time end time date and frequency mode can be set You can move freely between each setting using the UP and DOWN keys The channel name is set using the LEFT or RIGHT keys to display the channel which broadcasts t...

Page 18: ...keys and press OK A warning message is displayed This starts the automatic tuning process and searchesthrough all the available broadcast frequencies for free to air channels Previous channels will be replaced on automatic search If alternatively from the search options menu the Manual Search line is highlighted and OK pressed the manual search screen is displayed Highlight the YES button with the...

Page 19: ...II 32 44 1 48kHz Power requirements DC 6V AC adapter 100 240V 50 60 Hz Terminals U V Input PAL type U V Output PAL type SCART 1 TV RGB Y C Video output and Audio output are available SCART 2 Aux RGB Y C Video output Audio output and Video input are available Digital Audio Output Coaxial RS 232C for sevice use only Dimensions WxHxD mm 280x41x175 mm Weight kg 0 7 Kg ...

Page 20: ...e TV SCART socket on the rear of the receiver to the SCART 1 socket on the rear of the TV Connect a scart lead from the VCR SCART to the SCART 1 on the VCR and connect a scart lead from the SCART 2 on the VCR to the SCART 2 on the rear of the TV R TV Aerial Hi Fi VCR Scart 1 Scart 2 TV TV Aerial Aerial Out Aerial In ANTENNA IN VCR DVR RS 232C TV DC IN 6V DIGITALAUDIO OUT COAXIAL ANTENNA OUT Not us...

Page 21: ... TROUBLESHOOTING GUIDE If you experience problems with the receiver or its installation in the first instance please read carefully the relevant sections of this User Guide and this Troubleshooting section ...

Page 22: ... waste handling of this product For more information about collection point and recycling of this product please contact your local municipal office your household waste disposal service or the shop where you purchased the product Penalties may be applicable for incorrect disposal of this waste in accordance with national legislation Business users If you wish to dispose of this product please vis...

Reviews: