background image

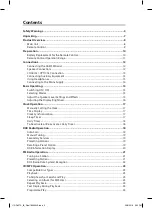
Using the USB .................................................................................................................... 25
AUX / OPTICAL / COAXIAL Operation .............................................................................. 25
Bluetooth
® Operation ....................................................................................................... 26
Maintenance .......................................................................................................................27

Cleaning the Unit ...................................................................................................................................... 27

Removing, Installation the Grill and Cleaning the Speakers .................................................... 27

Handling Discs ........................................................................................................................................... 27

Cleaning Discs ............................................................................................................................................ 27

Storing Discs ............................................................................................................................................... 28

Hints and Tips .................................................................................................................... 28
Product Fiche and Specifications .................................................................................... 30
Useful Information and Licences ......................................................................................31

UX-D427S_IB_FInal180625V3.indd   4

26/6/2018   5:30 PM

Summary of Contents for UX-D427S

Page 1: ...Instruction Manual Wireless DAB Hi Fi with Valve Amp technology UX D427S UX D427S_IB_FInal180625V3 indd 1 26 6 2018 5 30 PM ...

Page 2: ...UX D427S_IB_FInal180625V3 indd 2 26 6 2018 5 30 PM ...

Page 3: ...isplay Brightness 16 Clock Operation 17 Manually Setting the Clock 17 Time Display 17 Clock Synchronization 17 Sleep Timer 17 Daily Timer 18 To Deactivate or Re activate a Daily Timer 18 DAB Radio Operation 18 Auto Scan 19 Manual Tuning 19 Secondary Services 19 Presetting Stations 19 Recalling a Preset Station 19 DAB Information Display 20 FM Radio Operation 21 Tuning in a Station 21 Presetting St...

Page 4: ...ance 27 Cleaning the Unit 27 Removing Installation the Grill and Cleaning the Speakers 27 Handling Discs 27 Cleaning Discs 27 Storing Discs 28 Hints and Tips 28 Product Fiche and Specifications 30 Useful Information and Licences 31 UX D427S_IB_FInal180625V3 indd 4 26 6 2018 5 30 PM ...

Page 5: ...is dangerous Keep loose batteries away from young children and make sure that the battery holder tray is secure in the remote control Seek medical advice if you believe a cell has been swallowed Read all the instructions carefully before using the unit and keep them for future reference Retain the manual If you pass the unit onto a third party make sure to include this manual Check that the voltag...

Page 6: ...the user to the presence of uninsulated dangerous voltage within the unit s enclosure that may be of sufficient magnitude to constitute a risk of electric shock The exclamation point within an equilateral triangle is intended to alert the user to the presence of important operating and maintenance servicing instructions in the manual accompanying the unit Service To reduce the risk of electric sho...

Page 7: ...any issues Read all the safety instructions carefully before use and keep this instruction manual for future reference Speakers x 2 Main Unit Instruction Manual DAB FM Aerial Quick Start Guide Mains Cable RCA to 3 5 mm Stereo Audio Cable Speaker Cable x 2 Remote Control AAA Batteries x 2 Quick Start Guide If items are missing or damaged please contact Partmaster UK only Tel 0344 800 3456 for assis...

Page 8: ...SB 5V 1A Socket 9 REP SHUF Button 10 Button 11 Play Pause Button 12 Button 13 VOLUME Dial 14 BASS Dial 15 TREBLE Dial 16 Headphones Socket 17 OPTICAL Socket 18 COAXIAL Socket 19 DAB FM Aerial Socket 20 AUX IN L R Sockets 21 SPEAKER OUT L R Sockets 22 AC Socket 1 2 3 4 5 6 7 8 9 10 18 17 19 20 21 22 11 12 13 14 15 16 UX D427S_IB_FInal180625V3 indd 8 26 6 2018 5 30 PM ...

Page 9: ...on 8 BASS Buttons 9 TREB Buttons 10 INFO Button 11 EQ Button 12 ALBUM PRESET Button 13 ENTER Button 14 Button 15 Button 16 ALBUM PRESET Button 17 CLEAR Button 18 Button 19 PAIR Button 20 Button 21 Buttons 22 VOL Buttons 23 Number 0 9 Pad 24 DIMMER Button 25 PROG Button 1 3 4 5 10 8 2 18 22 25 6 15 7 11 9 12 14 16 17 21 19 20 13 23 24 UX D427S_IB_FInal180625V3 indd 9 26 6 2018 5 30 PM ...

Page 10: ...tteries as domestic waste Dispose of them in accordance with local regulations Do not expose the batteries to excessive heat such as sunshine fire or the like Handling the Remote Control Do not drop the remote control Do not allow anything to impact the remote control Do not spill water or any liquid on the remote control Do not place the remote control on a wet object Do not place the remote cont...

Page 11: ...the infrared remote sensor to direct sunlight or other strong light such as inverter fluorescent light Remote sensor 30 30 Max 6 m Remote Control Operation Range The remote control sensor on the front unit is sensitive to the remote control s commands up to a maximum of 6 metres away and within a maximum of a 60 arc Please note that the operating distance may vary depending on the brightness of th...

Page 12: ...rminal cap counterclockwise to loosen it Insert the wire into the terminal fully Turn the terminal cap clockwise to securely connect it For the speaker terminals press and hold down the terminals while inserting the wires Release the terminal cap when the wires are inserted Do not overtighten this could damage the aerial To avoid noise keep aerial away from the unit the connecting cables and the m...

Page 13: ...et to the OPTICAL OUT COAXIAL OUT socket of the external device Front View of the Main Unit Mobile Device RCA to 3 5 mm stereo audio cable included Rear View of the Main Unit External Device Optical cable not included Rear View of the Main Unit Coaxial cable not included Using Headphones Turn down the volume before connecting headphones not included Slowly raise the volume with the headphones on u...

Page 14: ...cting to the mains power socket Make sure the mains plug is firmly inserted into the mains socket To switch the unit off completely remove the mains plug from the mains socket Please turn the unit off completely to save energy when not in use Use the mains cable as the disconnect device The disconnect device shall remain readily operable To the mains socket Rear View of the Main Unit UX D427S_IB_F...

Page 15: ...le in CD USB BT Bluetooth COAXIAL OPTICAL or AUX mode The unit will save memory of the last selected sound level from 6 16 For any level selected outside this range the unit will then fix on the default level of either 6 or 16 Selecting Modes Press the SOURCE button on the unit or the corresponding mode buttons on the remote control to switch between CD USB BT Bluetooth COAXIAL OPTICAL FM DAB or A...

Page 16: ...DEFAULT POP CLASSIC ROCK JAZZ Adjusting the Bass Turn the BASS dial on the unit to adjust the intensity of the bass output sound Or press the BASS button on the remote control If bass is adjusted preset equalizer function is not available Adjusting the Treble Turn the TREBLE dial on the unit to adjust the intensity of the treble output sound Or press the TREB button on the remote control If treble...

Page 17: ...he remaining time before switch off 4 To cancel the sleep timer press TIMER SLEEP repeatedly until SLEEPOFF shows on the display Clock Operation In DAB RDS station the unit can synchronize with time transmitted by DAB RDS station with CT information automatically Manually Setting the Clock Manual setting the clock can only be done in Standby mode 1 In Standby mode press the CLOCK button to show th...

Page 18: ...to wake to your DISC music b FM sets alarm to wake to select FM Radio Station c DAB sets alarm to wake to select DAB Radio Station d USB sets alarm to wake to USB music 5 Press the TIMER SLEEP button to confirm then use to adjust the alarm volume 6 Press TIMER SLEEP to confirm The display will show TMR ON TMR OFF 7 Press to select TMR ON or TMR OFF and press TIMER SLEEP to confirm To Deactivate or...

Page 19: ...ted press the ENTER button to confirm display will now show TUNING The unit will start to scan Secondary Services You may see a symbol after the name of the station this indicates that there are secondary services available to that station These secondary services contain extra services that are related to the primary station e g a sports station may want to add extra commentaries The secondary se...

Page 20: ...vided automatically by the broadcaster Date This displays the current date provided automatically by the broadcaster DLS Dynamic Label Segment Dynamic label segment is a scrolling message that the broadcaster may include with their transmissions The message usually includes information such as programme details etc Programme Type This describes the style or genre of the programme that is being bro...

Page 21: ... hold CLEAR button to clear the previously tuned stations before running an auto scan The display will show CLEAR All the tuned stations in both DAB and FM will be cleared Presetting Stations You can store up to 20 of your favourite stations to the memory This will enable you to access your favourite stations quickly and easily Automatically Press the INTRO SCAN button on the remote control to act...

Page 22: ...ude a message that displays information about the current programme Programme Type This describes the Style or Genre of music that is being broadcast e g Rock or Classical Stereo Mono The display will show if the station being received is in mono or stereo Clock The RDS CLOCK system may not properly operate in areas where RDS CLOCK service is not available Once RDS CLOCK service is available the R...

Page 23: ...ecordable Audio MP3 AUDIO MP3 CD RW CD Rewritable Audio MP3 AUDIO MP3 AUDIO CD Compact Disc Digital Audio AUDIO Some recorded files may not be able to be played due to the type and format of disc or condition of the recording If you are having trouble playing a certain disc it is recommended to use USB input instead for best MP3 playback If there is no disc or the disc can t be read NO DISC will s...

Page 24: ... file name will scroll on the screen automatically Repeatedly press INFO to show the current track number and single remain time total elapsed time total remain time If the track playing has no ID3 information press INFO to show the current track and track of time Programme Play You can programme up to 20 tracks to play in any desired order 1 Make sure the disc is inserted and the unit is in STOP ...

Page 25: ...USB device might not be compatible with the unit The unit can support USB devices with up to 64GB of memory The unit may not be compatible with all USB devices this is not an indication of a problem with the unit AUX OPTICAL COAXIAL Operation 1 While in ON mode press the SOURCE button on the unit or press AUX OPTICAL COAXIAL on the remote control to select the AUX OPTICAL COAXIAL source The corres...

Page 26: ...tooth mode The display will show BT READY 2 Activate your Bluetooth device and select the search mode UX D427S will appear on your Bluetooth device list 3 If you cannot find the unit press and hold the button on the unit or PAIR button on the remote to enter PAIRING MODE The unit display will show PAIR and the voice prompt PAIRING will be heard 4 Select UX D427S and enter 0000 for the password if ...

Page 27: ...ning fluids containing alcohol ammonia or abrasives Do not spray aerosol at or near the unit Removing Installation the Grill and Cleaning the Speakers The grill is held by pins To remove the grill pull gently around the edge away from the speaker slowly working your way from one end of the speaker to the other To re install align the grill pins with the cups in the speaker and push into place Use ...

Page 28: ...e control with a new one Remove any obstacles between the remote control and the unit No sound from the unit Please try either one of the solutions below Make sure that the unit is not muted Press the or the VOL on the remote control or turn the VOLUME dial on the unit to resume normal listening Press on the unit or on the remote control to switch the unit to standby mode Then press the button aga...

Page 29: ...aerial DAB No DAB coverage in your area or poor reception Adjust the position of the aerial Perform a system reset and then a DAB full scan Bluetooth Problem Solution I cannot find UX D427S on my Bluetooth device Ensure the Bluetooth function is activated on your Bluetooth device Ensure you have paired your unit with the Bluetooth device If any functional abnormality is encountered unplug the unit...

Page 30: ... W 294 D 139 H mm Speakers Section Impedance 3 Ω Output Power 2 80 Watts RMS Speaker Box Dimension 175 W 249 D 262 H mm Radio Section Frequency Range DAB 174 928 239 200 MHz Band III FM 87 5 108 MHz Compact Disc Section Optical Pickup 3 Beam Laser Frequency Response 45 Hz 20 kHz USB Section USB Memory Stick Memory Size Up to 64 GB Features and specifications are subject to change without prior not...

Page 31: ...recycled in a manner that protects human health and the environment For more information about where you can drop off your waste for recycling please contact your local authority or where you purchased your product Notes for Battery Disposal The batteries used with this product contain chemicals that are harmful to the environment To preserve our environment dispose of used batteries according to ...

Page 32: ... UX D427S 180625V3 Dear Customer This apparatus is in conformance with the valid European directives compatibility and electrical safety European representative of the manufacturer is DSG Retail Ltd co no 504877 1 Portal Way London W3 6RS UK For Help and Support Call UK 0344 561 1234 Ireland 1890 818 575 UX D427S_IB_FInal180625V3 indd 32 26 6 2018 5 30 PM ...

Reviews: