UX-M3R
1-12
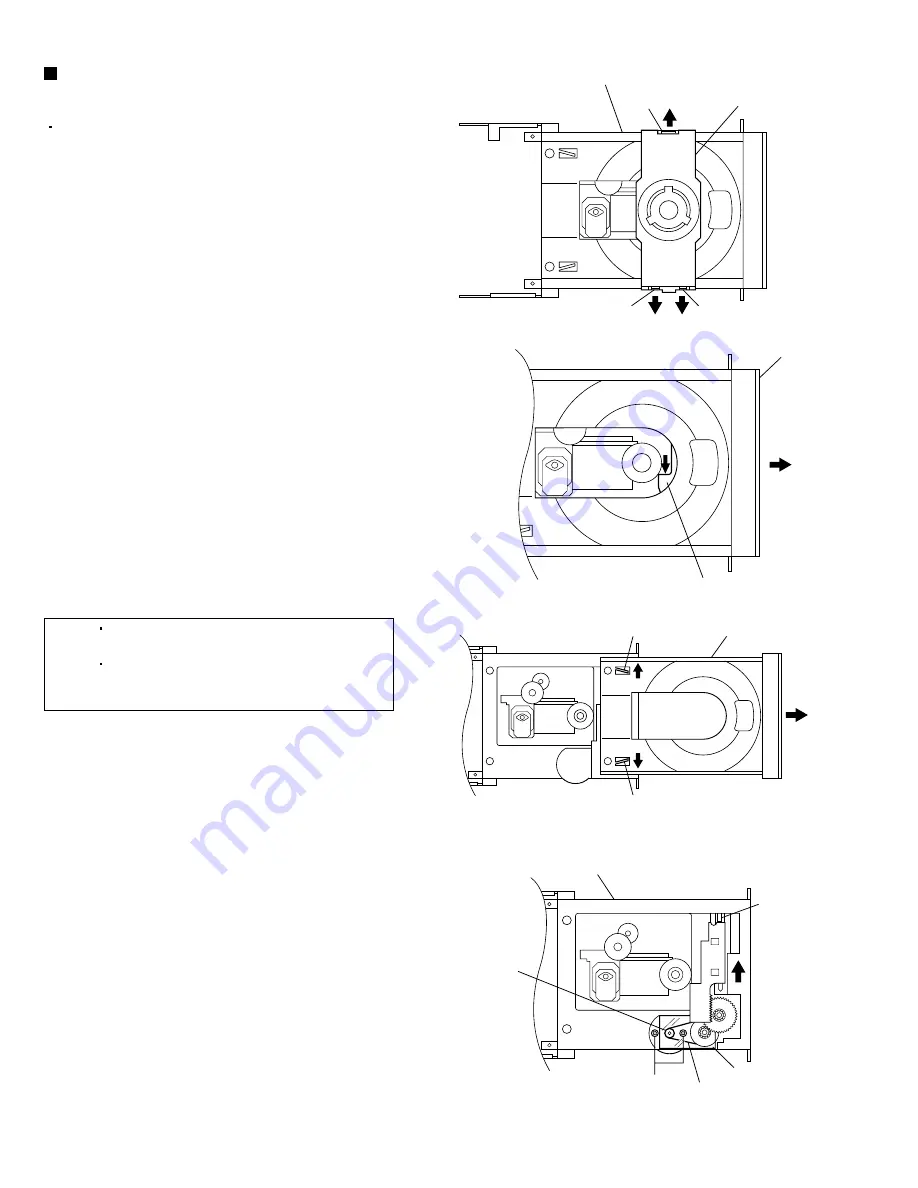
Fig.26
Fig.27
Fig.28
Fig.29
X
CD mechanism assembly
Clamper assembly
Claw
p
Claw
q
CD mechanism assembly
Tray motor pulley
Claw
q
r
section
Tray
Tray
Claw
s
Claw
s
Claw
t
Belt
Transparent
cover
Removing the tray motor
(See Figs. 26 to 29.)
1.
2.
3.
4.
5.
6.
7.
8.
Remove the CD & MCU board.
On the top of the CD mechanism assembly, open
up the claws
p
and
q
at the left and right of the
clamper assembly and lift the assembly to remove
it.
On the top of the CD mechanism assembly, push
the section
r
of the elevator in the direction of the
arrow and lower the CD pickup assembly.
Pull out the tray.
While opening up the claws
s
at the left and right of
the tray in the directions of the arrows, remove the
tray.
While pushing the claw
t
on the CD mechanism
assembly downwards, slide the elevator fully in the
direction of the arrow.
Remove the transparent cover.
Remove the belt from the tray motor pulley.
Remove the two screws
X
retaining the tray motor
and remove it.
[Note] Take care not to attach grease on the
belt.
After attaching the tray motor in the
assembly, apply a locking agent to the
screws X.


