

19
2
6
PROGRAM
C D
2
PROGRAM
PROGRAM
2
PROGRAM
2
6
PROGRAM
2
6
12
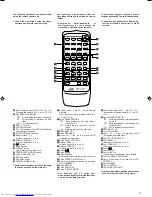
1
2
3
4
5
6
C D
+10
●
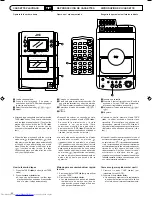
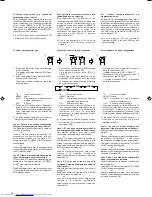
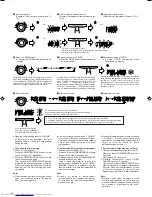
Per designare il numero 11 o un numero
maggiore, premere il tasto +10 per il
numero di volte necessario e quindi un
tasto numerico. (Esempio: Per indicare il
20° brano, premere una volta il tasto +10
e quindi il tasto di numero di brano 10.)
* Tasto +10:
Ogni volta che questo tasto viene premuto,
il numero aumenta di 10. Premere questo
tasto per impostare le decine e quindi
premere un tasto numerico per impostare
le unità.
●
Para designar el número de pista 11 o
superior, presione el botón +10 el número
necesario de veces, y luego un botón de
número de pista. (Ejemplo: Para designar
la pista 20, presione el botón +10 una vez,
y luego presione el botón 10 de número
de pista.)
* Botón +10:
Cada vez que presiona este botón el
número se incrementa en 10. Primero
presione este botón para ingresar las
decenas, luego presione el botón de
número de pista para ingresar las
unidades.
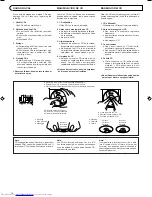
●
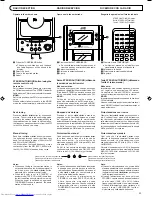
To skip to another track during play
When the required track number button is
pressed, the display shows the designated
track number and play starts from the
beginning of the designated track.
●
Para saltar a otra pista durante la
reproducción
Cuando presiona el número de pista
deseada, la indicación muestra el número de
la pista y se inicia la reproducción desde el
principio de la pista designada.
●
Per saltare ad un altro brano durante la
riproduzione
Quando il tasto del numero di brano
desiderato viene premuto, il display indica il
numero di brano designato e la riproduzione
inizia da tale brano.
●
To designate track number 11 or higher,
press the +10 button the required number
of times, then a track number button.
(Example: To designate the 20th track,
press the +10 button once, then press track
number button 10.)
* +10 button:
Each time this button is pressed, the
number increases by 10. First press this
button to set the 10's digit, then press the
track number button to set the 1's digit.
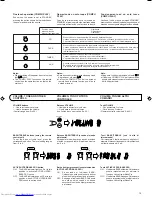
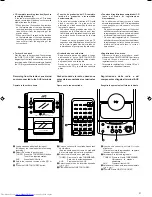
Reproducción programada (utilizando
la unidad de control remoto)
●
Es posible programar un máximo de 20 pistas
para reproducción en el orden deseado.
La unidad indicará el tiempo total de
reproducción de las pistas programadas
(máximo de 99 minutos, 59 segundos).
(Ejemplo: Cuando programa la 2ª pista para
que sea reproducida primero y la 6ª para ser
reproducida a continuación, y luego la pista
12ª, etc.)
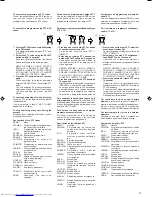
Riproduzione programmata (utilizzando
l'unità di telecomando)
●
Fino a 20 brani possono essere programmati
per essere riprodotti in qualsiasi ordine
desiderato.
Il tempo totale di riproduzione dei brani
programmati viene visualizzato (fino a 99
minuti e 59 secondi).
(Esempio: Quando si programma per
riprodurre per primo il brano numero 2, per
secondo il brano numero 6, per terzo il brano
numero 12, ecc.)
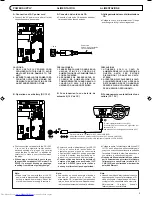
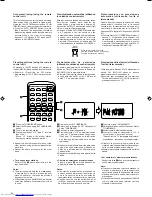
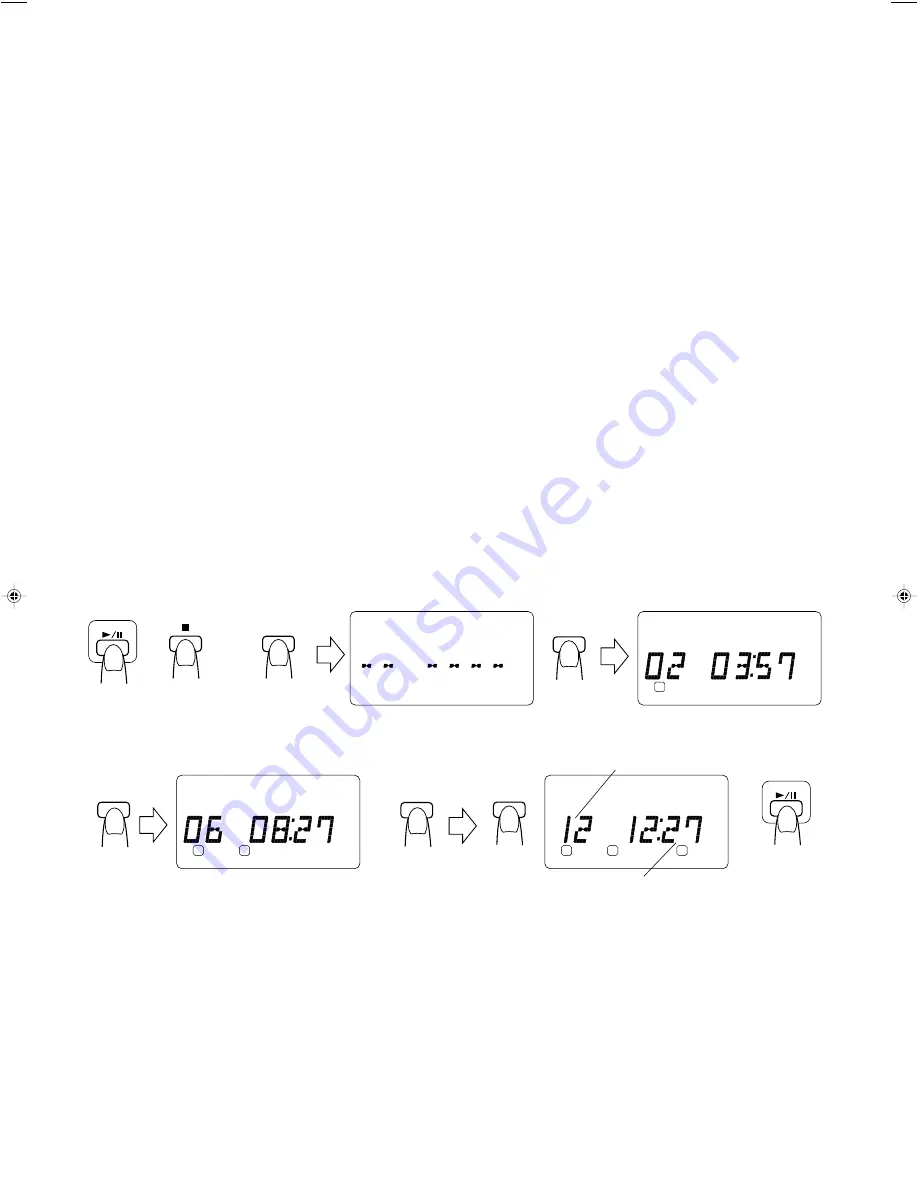
Programmed play (using the remote
control unit)
●
Up to 20 tracks can be programmed to be
played in any required order.
The total playing time of programmed tracks
is displayed (up to 99 minutes, 59 seconds).
(Example: When programming the 2nd track
to be played first, and the 6th track next, then
the 12th track, etc.)
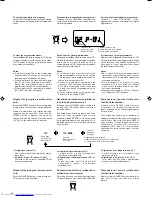
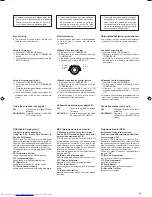
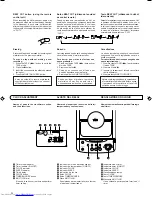
The total playback time of programmed tracks is displayed.
Se visualiza el tiempo de reproducción total de las pistas programadas.
Il tempo di riproduzione totale dei brani programmati viene visualizzato.
The 12th track
La 12ª pista
Il brano numero 12
To designate the 12th track.
Para seleccionar la 12ª pista.
Per designare il brano numero 12.
To designate the 2nd track.
Para seleccionar la 2ª pista.
Per designare il brano numero 2.
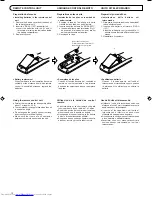
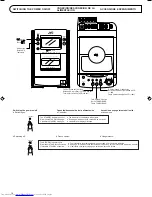
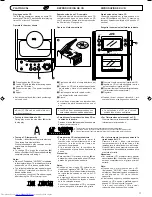
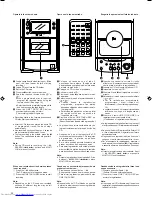
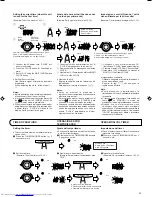
1
Para activar el mode CD, presione el botón
CD
4
/
6
.
2
Presione el botón
5
.
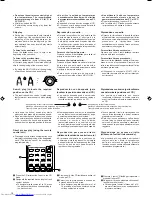
3
Para activar el modo de programación,
presione el botón PROGRAM.
4
Presione para seleccionar el número
deseado de pista.
5
Designe las pistas restantes presionando los
botones de número de pista.
6
Cuando termine la programación presione
el botón
4
/
6
. Se inicia la reproducción
programada.
1
Premiere il tasto CD
4
/
6
del timer per
impostare il modo del lettore CD.
2
Premere il tasto
5
.
3
Premere il tasto PROGRAM del timer per
impostare il modo di programmazione.
4
Designare il numero di brano desiderato con
i tasti numerici.
5
Designare gli altri brani con i tasti numerici.
6
Premere il tasto
4
/
6
quando la
programmazione è terminata. La
riproduzione programmata si avvia.
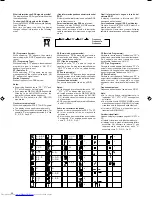
1
Press the CD
4
/
6
button to set to the CD
mode.
2
Press the
5
button.
3
Press the PROGRAM button to set to the
programming mode.
4
Press to designate the required track
number.
5
Designate the remaining tracks by pressing
the track number buttons.
6
Press the
4
/
6
button when programming
is completed. Programmed play starts.
UX-T77R E,LVT0280-002A
99.3.30, 8:36 PM
19


