Preparation
E-20
Initial Setup
When the VR-N900U is started up for the first time, you can
select the on-screen language and set automatic camera
registration.
CAUTION
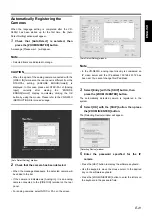
• The DHCP setting is required for the IP camera
beforehand. Start up the VR-N900U first, then switch the
camera on after confirming that the [Auto Detect Setting]
window is displayed.
• Refer to the user manual supplied with the camera for
instructions on how to specify the IP camera settings.
• By default, Time zone is set to GMT. Specify a Time zone
according to the region used. Refer to the
INSTRUCTIONS on how to specify a Time zone settings.
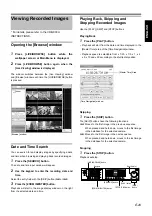
Starting Up the VR-N900U
1
Turn the power switch on the rear panel to ON.
The VR-N900U will start up.
Selecting a Language
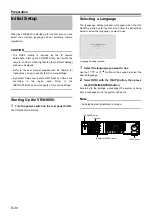
The [Language Setting] window will appear when the VR-
N900U is started up for the first time. Follow the instructions
below to select the language you want to use.
1
Select the language you want to use.
Use the [
] or [
] button on the keypad to select the
desired language.
2
Select [OK] with the [SKIP] button, then press
the [ZOOM IN/ENTER] button.
According to the settings, a message [The system is being
set up.] will appear and the system will reboot.
Note
• Selected items are indicated in orange.
[Language Setting] window
[OPERATE] button
Keypad
[ZOOM IN/ENTER] button
[SKIP] button
Summary of Contents for VR-N900U
Page 28: ......
Page 50: ......
Page 72: ......
Page 94: ......
Page 116: ...LST0577 001A 2007 Victor Company of Japan Limited NETWORK VIDEO RECORDER VR N900U ...


