


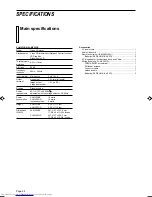


Page 13
English
XL-MV33BK/XL-MV55GD
LET0080-001A
Programming during VIDEO INTRO
Operation
1. Stop play.
2. Press the PROGRAM button so that PROGRAM is lit in the
display.
3. Press the disc button you want to play, and enter 1 on the
number keys.
4. Press the
3
3
3
3
3
SELECT button and then, after the disc has started
to play, press the VIDEO INTRO button.
5. The Player starts to display in sequence the first five (5)
seconds and track numbers of all tracks on the disc. Select the
numbers you want to program. You can program nine (9)
tracks.
6. Press the
3
3
3
3
3
SELECT button to play.
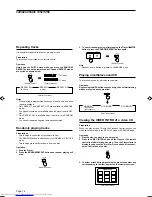
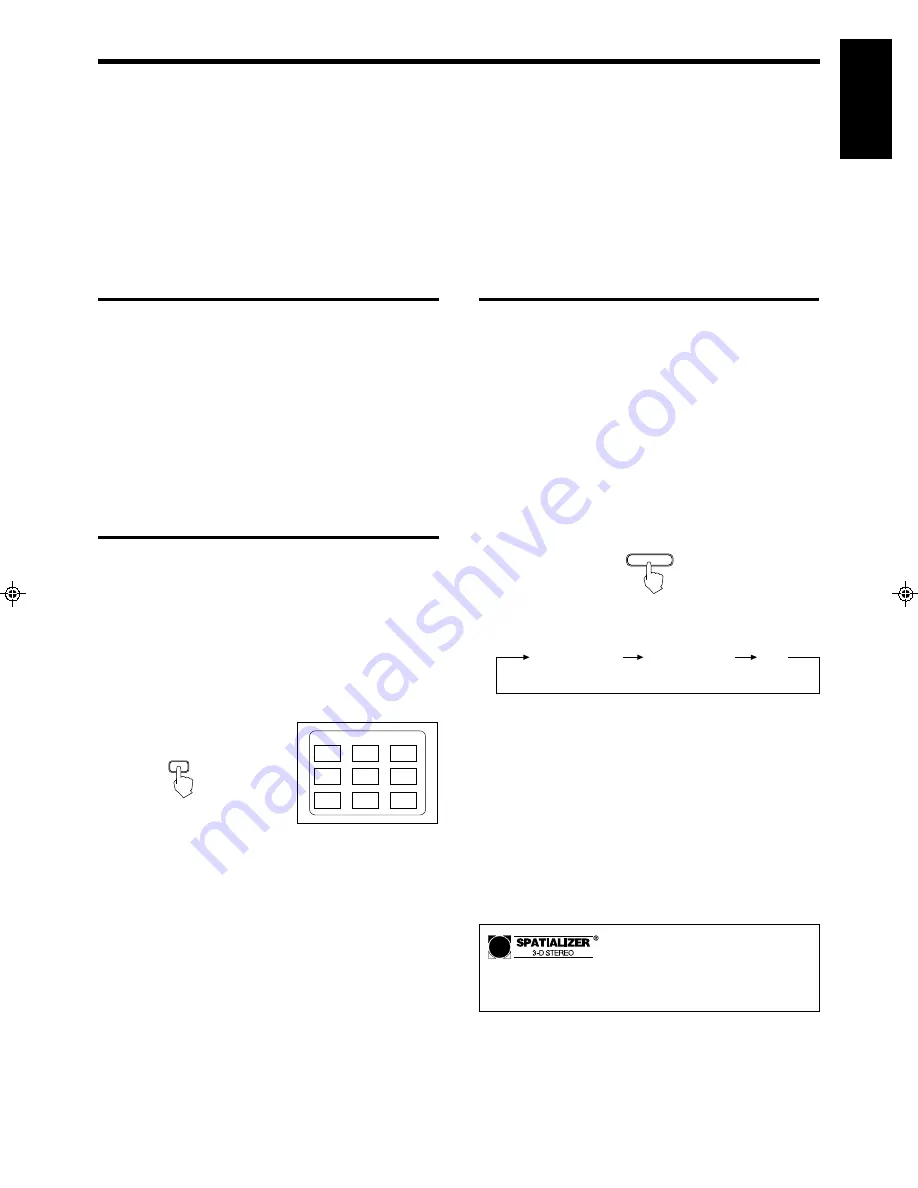
Selecting the SPATIALIZER mode
You can change the sound ambiance and enjoy a different sound using
the Spatializer function.
Operation
1. Choose one of the following two sound modes to change the
sound ambiance.
SPATIALIZER H :
For movies and television programs
SPATIALIZER L :
For music clips
2. To select the Spatializer mode, push the SPATIALIZER button
one or more times.
When one of the Spatializer modes is selected, the
SPATIALIZER indicator on the front panel is illuminated.
VARIOUS UNIQUE FUNCTIONS
Each time you press the button, you toggle the mode as
follows:
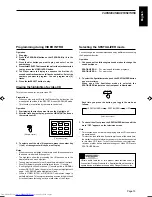
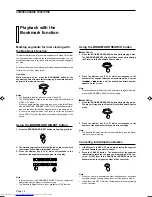
Viewing the highlights of a video CD
This function is used for a movie video CD.
Preparations
•
When you play a video CD with the Playback Control function, the
mode switch should be in the PBC OFF mode or KARAOKE mode.
•
This function is controlled by the remote control unit.
Operation
1. Start playing the track you want to see the highlights of.
2. After the track begins to play, press the HIGHLIGHT button on
the remote control.
3. To select one of the nine (9) segments, press the number key
(1 to 9) of the segment which you want to play.
Notes
•
When you choose a highlight it will start from five (5) seconds before
the shown time below each segment.
•
The highlights show the proceeding five (5) seconds up to the
displayed time on each highlight.
•
The segments are each of nine (9) equal-time divisions of the track.
•
Nine (9) different highlights are displayed for one (1) minute.
•
If no highlight is chosen in the one (1) minute period in NORMAL
mode or PBC OFF mode, the next nine (9) segment highlights will
begin. In KARAOKE mode highlights will stop.
•
While in VIDEO INTRO or HIGHLIGHT, sometimes image is
partially distorted. This symptom is caused by noise in the disc itself
or incorrect manufacturing, not by a malfunction of the Player.
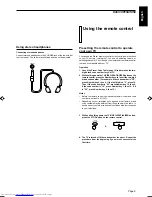
(Remote control)
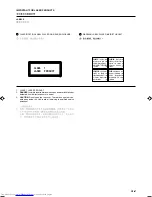
HIGHLIGHT
(Television screen)
3. To cancel the effect, press the SPATIALIZER button until the
word “OFF” appears on the television screen.
Note
•
This function does not work when playing a video CD recorded in
monaural sound.
•
This function is not effective if you attempt to use, at the same time,
the similar function of a television, receiver or other device connected
to this Video CD Player. Turn off the function on your television,
receiver, or other device before selecting your Video CD Player’s
SPATIALIZER mode.
SPATIALIZER
SPATIALIZER H
SPATIALIZER L
OFF
1
2
3
HIGH LIGHT
4
5
6
7
8
9
(Television screen)
Certain audio features of this product manufactured under a
license from Desper Products, Inc., Spatializer® and the circle-in-
square device are trademarks owned by Desper Products, Inc.
XL-MV33BK/XL-MV55GD
LET0080-001A
XL-MV33BK/55GD Body-1
97.5.27, 11:34 AM
13


