2
XL-PR10BK / LVT0992-002A / J
ng
J]
Cautions
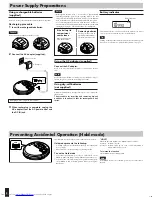
Power Supply Preparations
Using rechargeable batteries
(supplied)
Be sure to recharge the rechargeable batteries before using them.
Recharging procedure
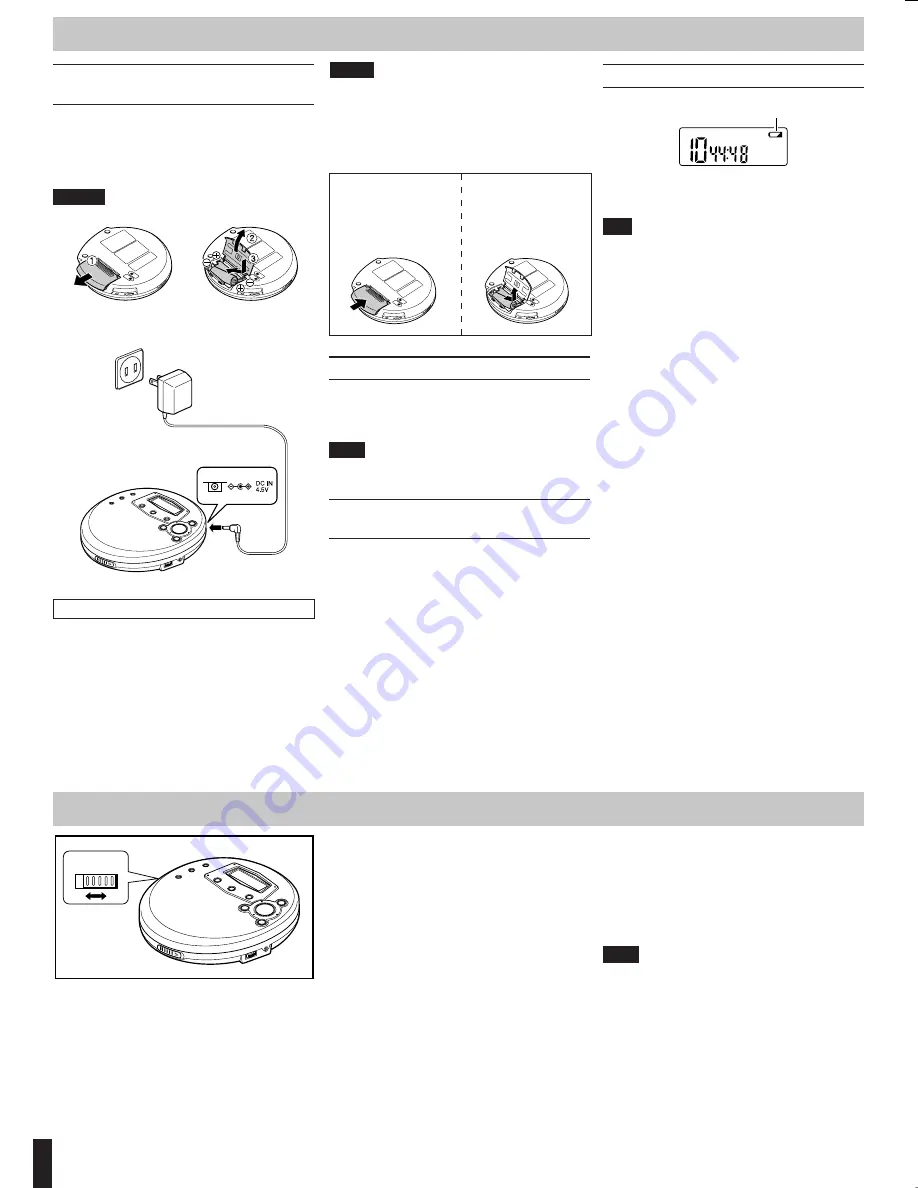
1
Insert the rechargeable batteries.
Caution:
Do not forcibly open the battery lid too wide.
2
Connect the AC adaptor (supplied).
Recharging will be completed after 10 hours.
3
When recharging is complete, unplug the
AC adaptor from the AC power outlet and
the DC IN jack.
Battery indicator
Using the AC adaptor (supplied)
Connect the AC adaptor.
Refer to “Using rechargeable batteries” for connection instruc-
tions.
Note:
Even if the unit is turned off, small power is consumed as long as
the AC adaptor is connected to the AC power outlet.
Using dry-cell batteries
(not supplied)
After disconnecting the AC adaptor, insert two “AA” (LR6) alka-
line batteries.
The procedure for inserting and removing dry-cell
batteries is identical to that for rechargeable bat-
teries.
AC adaptor
Battery indicator
This indicator flashes on and off when the batteries are almost
out of power. Power will be cut off a short while later.
Tip:
Turning off the Anti-Shock Protection will save the battery power
more or less. For details, see “Anti-shock Protection” on page 6.
Notes:
• Rechargeable batteries have a service life of approximately
300 charge-discharge cycles. If the operating time on one full
charge becomes noticeably shorter than it used to be, the batteries
have reached the end of their service life and should be replaced.
• You can recharge the batteries only when the unit is turned off.
• The AC adaptor and rechargeable batteries may become warm while
recharging is in progress. This is normal and is not a malfunction.
If the battery lid
compartment
comes loose
Slide the lid back into
place horizontally.
Removing batteries
Push up on the battery in
the direction indicated by
the arrow. Then lift it out.
AC power outlet
“HOLD”
When the unit is in Hold mode, “HOLD” lights as follows.
Power on : “HOLD” stays lit.
Power off : “HOLD” lights up for a few seconds when
6
or
FM/AM button is pressed.
To release the function
Set the HOLD switch to OFF position.
Note:
If the HOLD switch is set to the ON position, you cannot turn on
the unit.
This function causes the unit to ignore accidental button presses.
Hold mode prevents the following:
• Powering on the unit accidentally (which can cause the batter-
ies to go dead).
• Play or broadcast reception being cut off unexpectedly.
To use the Hold mode
• To prevent the unit from powering on accidentally, set the
HOLD switch to the ON position, while the unit is turned off.
• To prevent the unit from unexpected operation during play,
set the HOLD switch to the ON position after you starts play-
ing the disc.
Preventing Accidental Operation (Hold mode)
OFF
ON
HOLD


