For Customer Use:
Enter below the Model No. and Serial
No. which are located either on the rear,
bottom or side of the cabinet. Retain this
information for future reference.
Model No.
Serial No.
LVT0009-001B
[J]
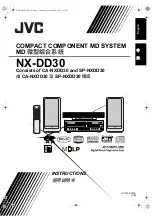
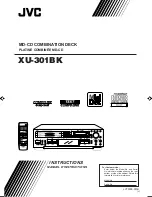
INSTRUCTIONS
MANUEL D’INSTRUCTIONS
MD-CD COMBINATION DECK
PLATINE COMBINÉE MD-CD
XU-301BK
XU-301 MD-CD COMBINATION DECK
REC
PAUSE
REC
START
REC
DIGITAL
CD
REC SOURCE SELECTOR
LINE
MIC
STOP
MIXING
CANCEL
CD
MD
MIC
MAX
MIN
PHONES
MIX BALANCE
REC LEVEL
CD
LINE
LINE
MIC
PLAY MODE
/CHARA
DISPLAY
TITLE
EDIT
32kHz
44.1kHz
DIGITAL INPUT
48kHz
LISTENING
SKIP
1st TRACK
REC
TIMER
/CLOCK
STANDBY
CD REC
SET
2
CD
CD
3
1
CD
PLAY & EXCHANGE
3
-
CD
NORMAL SPEED
CD PITCH CONTROL
POWER
EDIT
SAMPLING RATE CONVERTER
01/cover (E)
4/1/98, 4:33 PM
1