


31
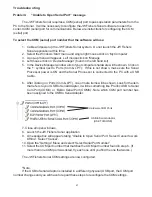
When you run the SCAN-650 software for the first time it will be necessary to configure the
SCAN-650 software to open the correct COM (serial) port for communications. To select the
COM (serial)port number that the software will use:
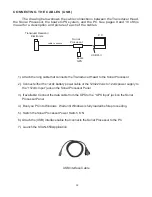
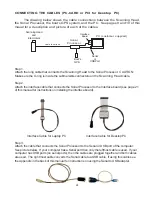
1. Follow the instruction on the Sonar Processor Box cover to cable and power up the
SCAN-650 system. Do not launch the SCAN-650 Application at this time.
2. Select the windows ‘Start’ menu and single right mouse click on ‘(My )Computer’.
3. A pop-up menu will appear. Left mouse click on ‘Manage’
4. Left mouse click on ‘Device Manager’ (found in the left hand list).
5. In the Device Manager window a list of your computers hardware will be shown.
Click on ‘Ports (Com & LPT)’. If this is not shown, make sure the Sonar Processor power
is ON and the Sonar Processor is connected to the PC with a USB Cable.
6. After clicking on ‘Ports (Com & LPT), one or more items will be shown. Look for the item
that refers to your USB to Serial Adapter, it will be something like ‘Prolific USB to Serial
Com Port (COM4)’ or ‘Belkin Serial Port (COM6)’. Note which COM port number has
been assigned to the USB to Serial Adapter.
7. Close all open windows.
8. Launch the SCAN-650 application
9. A message box will appear stating “Unable to Open Serial Port. Select Cancel to work
Offline”. Select “Cancel”.
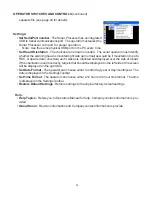
10. Open the “Settings” Menu and select “Select Serial Port Number”
11. Select the COM port number that matches the COM port number assigned to the USB
to Serial Adaptor
The SCAN-650 COM settings are now configured.
*Note:
If the USB to Serial Adaptor is installed in a different (physical) USB port, the COM port
number changes and you will have to repeat these steps to reconfigure the COM settings.
INSTALLING HARDWARE AND SOFTWARE (continued)
The hardware and software installation is now complete.
Summary of Contents for SCAN-650
Page 10: ...10 LEFT BLANK...


