FM RADIO
RADIO SET MENU
COMMENTS
Record (cont’d)
more Memory. Lower bit rates use less memory, but
offer lower quality. Highlight the desired bit rate, and
press the
button to enter the recording function.
To record:
1. Press the
button momentarily. The STOP symbol
[
] in the lower left of the display will become a [
]
recording symbol.
2. Your recording can be paused, if necessary, by
momentarily pressing the
record button. Pausing the
recording will produce the Pause [
] symbol in the
lower left corner of the display.
3. An elapsed time counter (hh:mm:ss) is located in the
lower right of the display, and will blink whenever the
recording is paused.
To stop the recording:
Press and hold the
button until the
SAVING…
appears
in the display. Your recording will be saved in the
RECORD folder and assigned a number and file name.
Consult the Replay function (see page 51) for information.
Delete
Allows the removal of any stored FM radio station. To use the
Delete
function:
1. Tune to the station you wish to delete (you may have to
exit the
RADIO SET
menu to return to the FM radio
function).
2. If necessary, press the
button to return to the
RADIO
SET
menu, and select
Delete.
The selected station
wi
l
l
be
r
emoved
f
r
om
t
he
syst
em’
s
memor
y
.
Delete all
Allows the removal of ALL stored FM radio stations. If used
accidentally, you will have to run the Auto Search function to
restore the unintentionally deleted stations.
-48-
JX-MP256FM Digital Audio Player
Voice Record Mode
Your JX-MP256FM is equipped with a built-in microphone (see page 3) and can record
personal dictations up to the capacity permitted by its unused available memory. In
typical use, voice recordings may span anywhere from a few seconds to several minutes,
and
may
deal
wi
t
h
anyt
hi
ng
f
r
om
per
sonal
r
emi
nder
s,
i
deas,
“
t
o
do”
l
i
st
s,
or
even
t
he
contents of a dictated letter. When used as a voice recorder, the unit is intended as a
personal device and not designed to record conversations or classroom lectures. Once a
recording is complete, the unit assigns it a numeric designation (e.g. REC001.WAV),
whi
ch
i
s
st
or
ed
as
an
audi
o
(
.
WAV)
“
f
i
l
e”
t
he
\ROOT\RECORD\VOICE folder, which is
automatically created when you record your first .WAV file.
Turn ON the JX-MP256FM:
1.If not already ON, turn on the JX-MP256FM by pressing and holding the
button,
until the unit begins to operate.
Display the Main Menu
2.Once ON, the unit will resume its operation by returning to the most recently used
function. If the Main Menu (below) is NOT displayed, press and hold the
button
until it appears.
Use the
or
button to highlight the RECord icon (shown at the left)
and then press the
button.
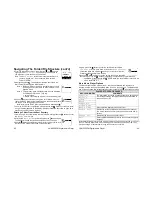
3.The RECORD function opens with the display on the right. Note
the location of the file name, the date, the type of file (WAV), the
bit rate (64K), and the record timer (00:00:00). Note, too the
STOP [
] symbol in the lower left.
4.Before doing any recording, press the
button to enter the
Record Set
menu.
The functions of this menu are covered in the table on the next page.
JX-MP256FM Digital Audio Player
-49-

