


10
rev.A
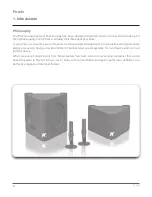
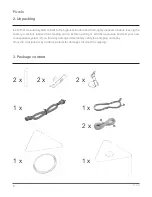
Piccolo
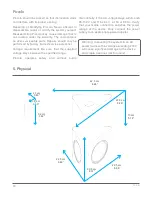
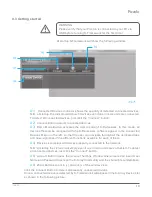
Piccolo should be placed so that its location does
not interfere with its proper cooling.
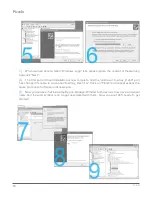
Repairing or Modifying Piccolo. Never attempt to
disassemble, repair or modify the system yourself.
Disassembling Piccolo may cause damage that is
not covered under the warranty. The unit contains
no user-serviceable parts. Repairs should only be
performed by factory trained service personnel.
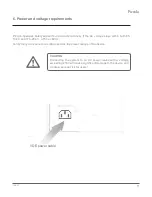
Voltage requirement. Be sure that the supplied
voltage stays between the specified range.
Piccolo operates safely and without audio
discontinuity if the AC voltage stays within both
85-132 V and 170-264 V , at 50 or 60 Hz. Verify
that your mains connection satisfies the power
ratings of the device. Only connect the power
supply to an appropriate power adapter.
Warning: connecting the system to an AC
power mains with a voltage exceeding 270V
will cause significant damage to the device
and create a serious risk for users!
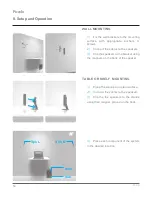
2.1 cm
0.83”
9.2 cm
3.62”
1.6 cm
0.63”
22.5 cm
8.86”
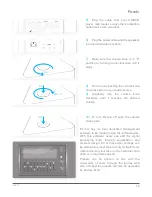
22.5 cm
8.86”
13 cm
5.12”
22.5 cm
8.86”
20.5 cm
8.07”
22.5 cm
8.86”
5. Physical


