3
CAUTION
The sanding paper must be precisely installed on the
pad, ensuring that there is ample tension (leaving no
slack). Loosely installed sanding paper could result
in unevenly sanded surfaces and/or damage to the
sanding paper itself.
5. Attaching and Removing the Dust Bag
(1) Attaching the Dust Bag
As shown in Fig. 4, hold the dust gate and push it in
the direction of Arrow A to attach it to the dust outlet.
(2) Removing the Dust Bag
As shown in Fig. 4, hold the dust gate and pull it in
the direction of Arrow B to remove it from the dust
outlet.
CAUTION
Prior to the sanding operation, make sure the material
of surface you are going to sand.
If the surface under sanding operation is expected to
generate harmful / toxic dusts such as lead painted
surface, make sure the dust bag or appropriate dust
extraction system is connected with dust outlet tightly.
Wear the dust mask additionally, if available.
Do not inhale or touch the harmful / toxic dusts
generated in sanding operation, the dust can
endanger the health of yourself and bystanders.
PRACTICAL OPERATING PROCEDURES
CAUTION
Never apply water or grinding fluid when sanding.
This could result in electrical shock.
1. Switching the sander ON and OFF
The power can be turned on by setting the lever to
ON (1) and turned off by setting the lever to OFF (0).
CAUTION
Never turn the power switch ON when the sander is
contacting the surface to be sanded. This is necessary
to preclude damage to the material. The same applies
when switching the power OFF.
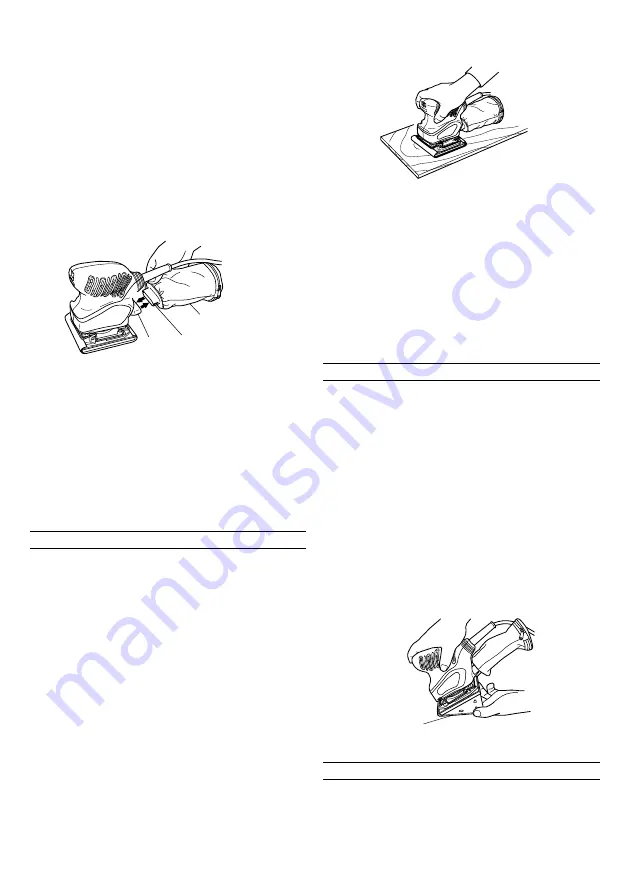
2. How to hold the orbital sander
While gripping the housing, lightly press the sander
against the surface to be sanded so that the sanding
paper uniformly contacts the surface, as shown in
Fig. 5. DO NOT apply excessive pressure to the sander
while sanding. Excessive-pressure may cause
overload of the motor, reduced service life of the
sanding paper, and lowered sanding or polishing
efficiency.
3. How to move the orbital sander
For optimum operating efficiency, alternately move
the sander forward and backward at a constant speed
and balance.
4. After installing new sanding paper
Movement of the sander may tend to become
unsteady after new sanding paper has been installed,
because of the new, coarse grain of the paper. This
can be avoided by slightly tilting the sander forward
or backward during sanding or polishing. Sander
movement will become steady as the sanding paper
surface becomes properly abraded.
MOUNTING THE OPTIONAL ACCESSORIES
1. Attaching a Sponge Pad (Velcro type) or a Stick-on
pad
Loosen the M4
×
10 screws (4) and remove the
attached pad. Next, attach a sponge pad (Velcro type)
or a stick-on pad.
CAUTION
Replace the pad only. Use the other parts without
removing them.
2. Attaching Velcro Type Sanding Paper or Stick-on
Type sanding Paper
Match the sanding paper’s hole with the pad’s hole
and strongly push the sanding paper with the palm
of your hand to fasten it securely in place.
3. Making a Hole in the Sanding Paper with the Punch
Plate (Fig. 6)
When using sanding paper without holes in it, punch
holes in it with the punch plate to improve dust
collecting capacity.
MAINTENANCE AND INSPECTION
1. Empting and cleaning the Dust Bag
If the dust bag contains too much saw dust, dust
collection will be affected. Empty the dust bag when
it gets full.
Remove the dust bag, open the fastener, and dispose
of the contents.
Fig. 4
Dust outlet
Dust gate
Dust bag
Fig. 5
Fig. 6
Punch plate
B
A
Summary of Contents for ESP110
Page 7: ...6 ...


