27
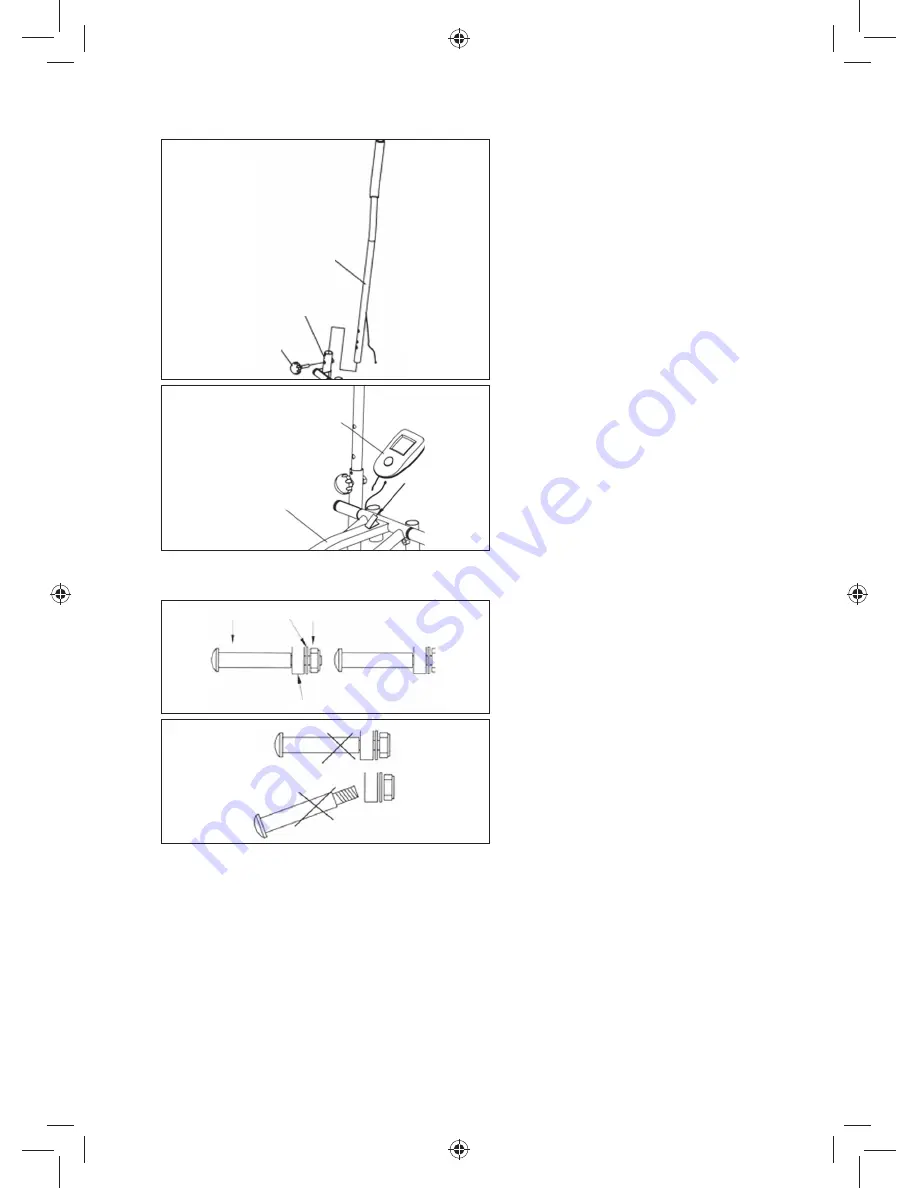
7. Insert the handle bars (7L, 7R) in the
connecting pipes (4, 5) and set them
to a comfortable height for the user
of the
fi
tness machine. Make sure
that both handlebars are mounted
at the same height. Tighten the han-
dlebar with the set screws (17).
8. Connect the computer cable with
the sensor cable and mount the
computer (50) on the bracket of the
primary frame.
IMPORTANT!
To guarantee the stability and long lifecycle of the machine and before
using it for the
fi
rst time, please observe the following mounting notes after assembly:
1. Make sure that the pedal bolts have
been securely mounted on the pedal
crank with the screw nut.
2. Be absolutely sure to keep the joint
pin straight when inserting it in the
pedal support pipes and when
screwing it into the pedal crank.
Screwing the joint pin into the pedal
crank in a crooked position may re-
sult in the bolt and crank being dam-
aged when the
fi
tness machine is
used.
17
5
7 L
50
1
62
27
51
48
06592_DE-GB-FR-NL_V3.indb 27
06592_DE-GB-FR-NL_V3.indb 27
16.09.2014 11:40:04
16.09.2014 11:40:04


