background image

(P/N) 541.1212 Rev B 07/15 • © copyright 2012-2015 


Kaba Mas LLC


Page 4 of 12

INTRODUCTION
The combination door unit can be added to the X-10 lock to form the CDX-10. This 
adaptation allows you to have access control on any door.

CDX-10 OPERATING INSTRUCTIONS
NOTE: 
Read all instructions carefully before attempting to INSTALL and operate your 
CDX-10 Lock Assembly.

The specific instructions for operating the X-10 Combination Lock itself are found in 
the “Operating Instructions” booklet for the X-10 Type 1F Lock (P/N 539.0512) which 
is enclosed in this Operating/Installation Instruction Kit. 

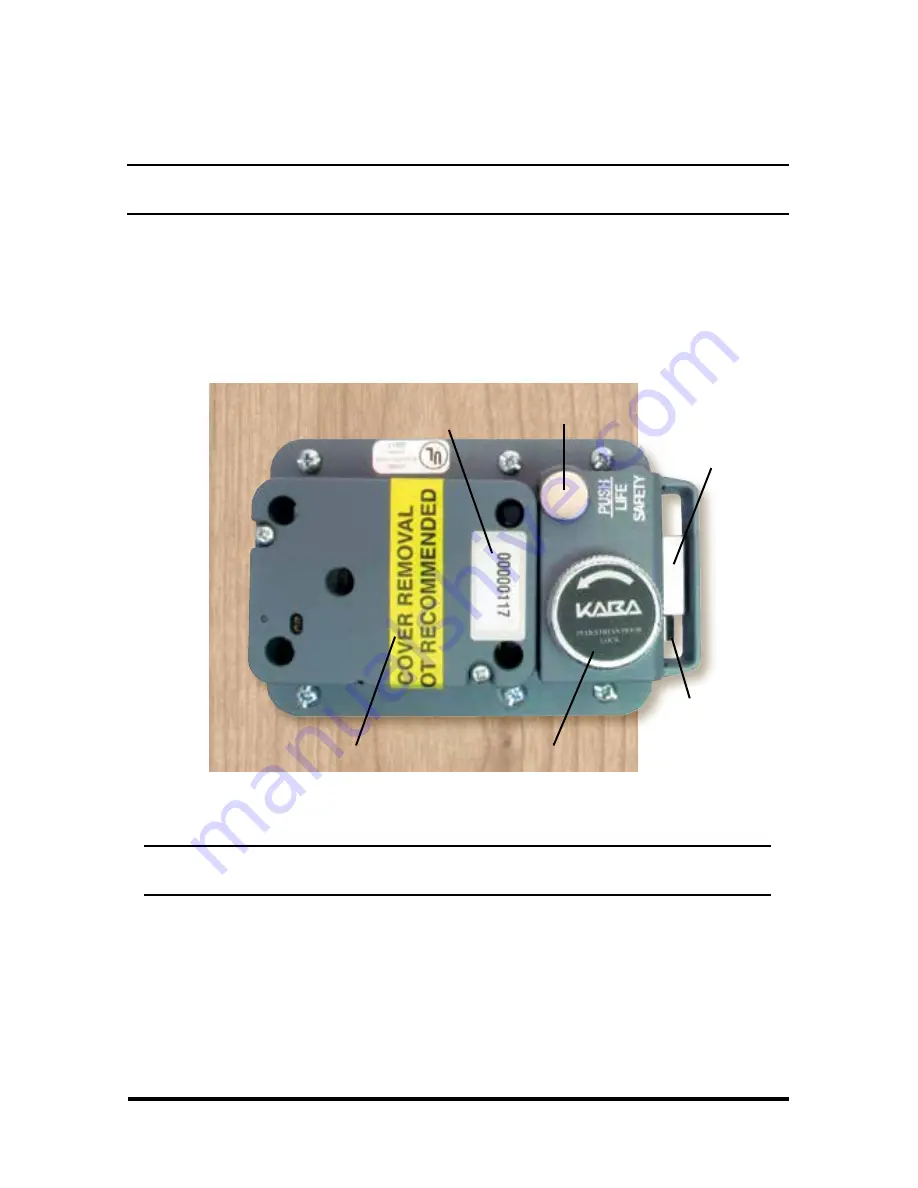
Please refer also to the Model CDX-10 Lock System drawing (P/N 524.021) for lock 
nomenclature which is also included in this kit. 

OPENING THE CDX-10

NOTE: When closing the CDX-10, the dead bolt will not extend until the release 
bolt hits the door strike as the door closes.

TO OPEN THE CDX-10 FROM THE OUTSIDE
1. Dial the combination per the instructions in the X-10 “Operating 
  Instructions” booklet.
2. Turn the dial to the right (clockwise) to withdraw the lock bolt and pull the dead 
  bolt (Extension Bolt) with it.

Life Safety Switch

Serial Number Label

Lock Seal

Release Knob

Dead Bolt

Release Bolt

Summary of Contents for CDX-10

Page 1: ...CDX 10 Please read all instructions carefully before putting your CDX 10 into operation INSTALLATION OPERATING INSTRUCTIONS...

Page 2: ......

Page 3: ...FROM OUTSIDE 4 TO OPEN FROM INSIDE 5 LIFE SAFETY OPERATION 5 CDX 10 INSTALLATION 6 BASIC TOOLS NEEDED 6 INSTALLATION KIT CONTENTS 7 CDX 10 PARTS FOR INSTALLATION 8 STRIKE INSTALLATION 9 TEMPLATE 9 DE...

Page 4: ...X 10 Type 1F Lock P N 539 0512 which is enclosed in this Operating Installation Instruction Kit Please refer also to the Model CDX 10 Lock System drawing P N 524 021 for lock nomenclature which is al...

Page 5: ...lso the dead bolt Extension Bolt NOTE The life safety switch can only be depressed while the lock bolt is withdrawn 2 Depress the life safety switch located by the LIFE SAFETY label on the dead bolt u...

Page 6: ...stallation BASIC TOOLS NEEDED 1 Medium Phillip s screwdriver 1 2 2 Standard hacksaw 32 teeth inch 3 Small flat file 4 Small vise or a Port A Vise Harbor Freight P4742 5 Drill bits No 25 11 32 1 2 6 El...

Page 7: ...sing 10 Lubricant Lubriplate 11 Dial Hub Locating Gauge 12 Hex Key 5 64 13 Spindle Screw The Zebra Connector and Zebra Connector Housing are assembled at the factory but may come apart during shipment...

Page 8: ...PARTS FOR INSTALLATION 1 CDX 10 Dead bolt lock assembly 2 CDX 10 Base hardplate 3 Dial hub assembly 4 Strike Kit 1 of 4 Types 1 2 3 or 9 Strike 9 is shown in photo with screws 5 Spindle 6 Dial ring as...

Page 9: ...e the template to the door 3 Center punch all hole positions onto the door 4 Drill the 1 2 diameter spindle hole through the door 5 Drill the two 2 CDX 10 attaching screw holes nearest the strike open...

Page 10: ...LECTRONIC LOCK booklet for additional dial ring installation instructions CUSTOM CUTTING TUBES AND SPINDLE 1 Refer to the sections for cutting tubes and for cutting the spindle in the INSTALLATION INS...

Page 11: ......

Page 12: ...not be liable for technical errors or omissions contained herein nor for incidental or consequential damages resulting from the furnishing performance or use of this material 2012 2015 Kaba Mas X 10...

Reviews: