4
Install Handle
Swing Door
1. Attach the G-152 handle to the hub where the old handle was removed, using the pin included in
the kit. Insert the pin from the front side of the locking bar.
2. Gain access to the rear of the pin. Insert washer and rivet included in the kit. Secure the rivet in
position using the pop rivet gun.
Note:
If installing on a door with double vertical locking bars, install on the locking bar closest
to the hinges.
Roll-Up Door
1. With the door closed, align the door handle assembly "J" hook with the center pin/plate of the latch
box. Operate handle (open/close) to ensure correct position within the latch box.
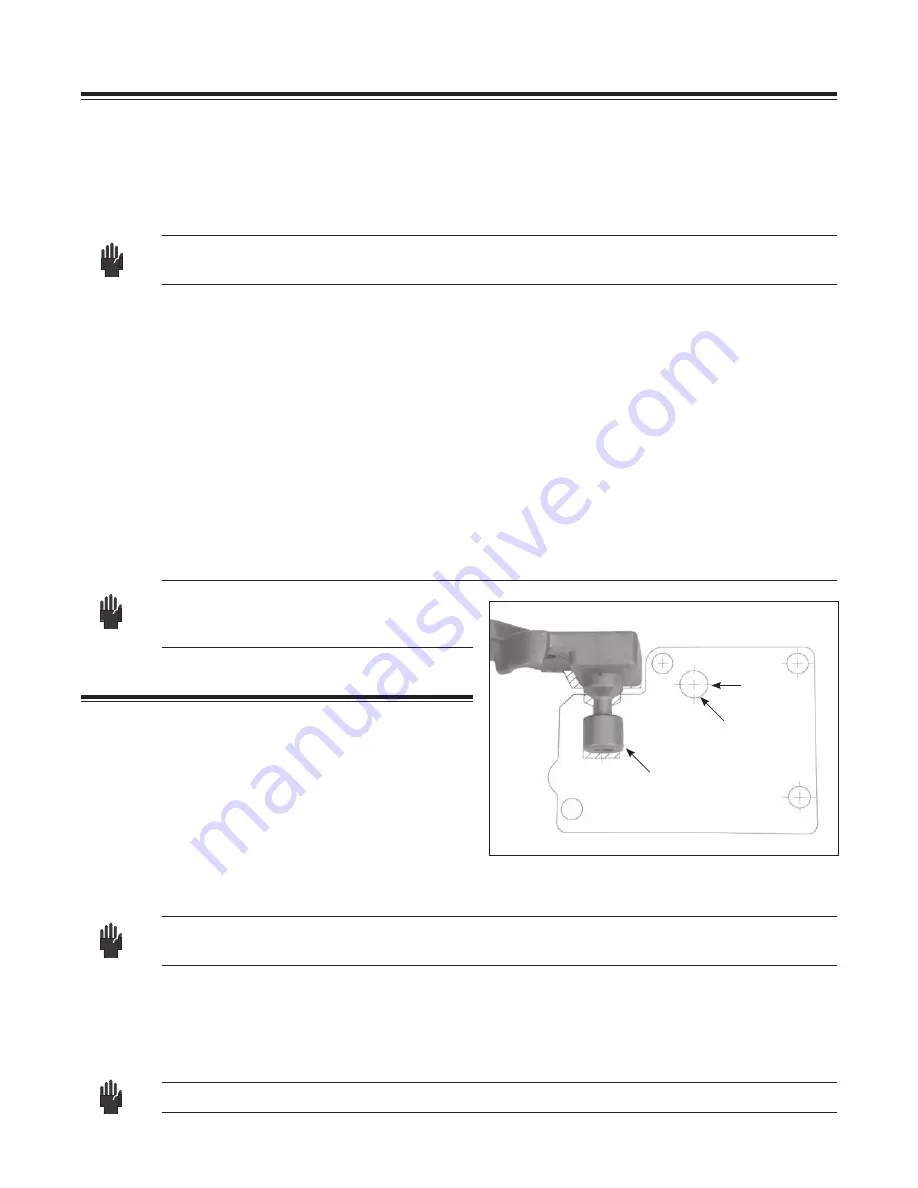
2. Ensure the handle is level. Use the flat end of the handle. (See figure 8.)
3. Using the handle assembly mounting bracket as a template, mark (center punch) the location of
the mounting holes.
4. Drill the handle assembly mounting holes using an 8mm (5/16") drill bit.
5. Insert and seat carriage bolts into supplied handle assembly. Seat carriage bolts by using a hammer
to drive the bolts into the mounting plate.
6. Mount handle assembly to door and secure from the inside with washer/lock washer/nuts
provided.
Note:
If necessary, use a hacksaw to remove
excess bolt length and grind any
resulting sharp edges.
Prep Door for Lock Body
1. Using the new handle, close the door(s) fully,
ensuring correct shutting for closed position.
2. Align template relative to the locking pin on
the handle. (See Figure 8.)
3. Use tape to secure the template to the door.
4. Place the lock body over the coordinating
location on the template and rotate the handle
to ensure that it clears the lock body. If not, readjust the template.
Note:
If the handle becomes locked in position, connect the cable from the input unit to the lock
body and perform the Operational Check (p.7) to unlock and lift the handle.
5. Center punch all four mounting holes and cable routing hole.
6. Remove the template.
8. Drill the four outside lock case mounting holes using a 10mm (3/8") drill bit.
9. Drill the cable routing hole using a 16mm (5/8") drill bit.
Note:
Ensure that the drill is kept straight when drilling the holes.
Fig. 8 - Align Template to Handle
Flat on Handle
Locking PIN
Electronic
Lock Only
Cable
Routing Hole


