5
I
NSTALLATION
PRELIMINARY LOCK INSTALLATION
WARNING:
The electronics in the X-09 are susceptible to damage from
Electro Static Discharge (ESD). Make sure you are properly grounded before
removing the lock cover and be careful to avoid touching the connectors on
the card.
1. Remove the two screws from the lock back cover assembly. Hold the case and
pull the cover straight out from the lock case so as not to bend any of the
motor pins on the card assembly
.
Caution:
The drive cam assembly is
only retained by the lock back cover
assembly. Be careful that it does not fall
out when the cover is removed.
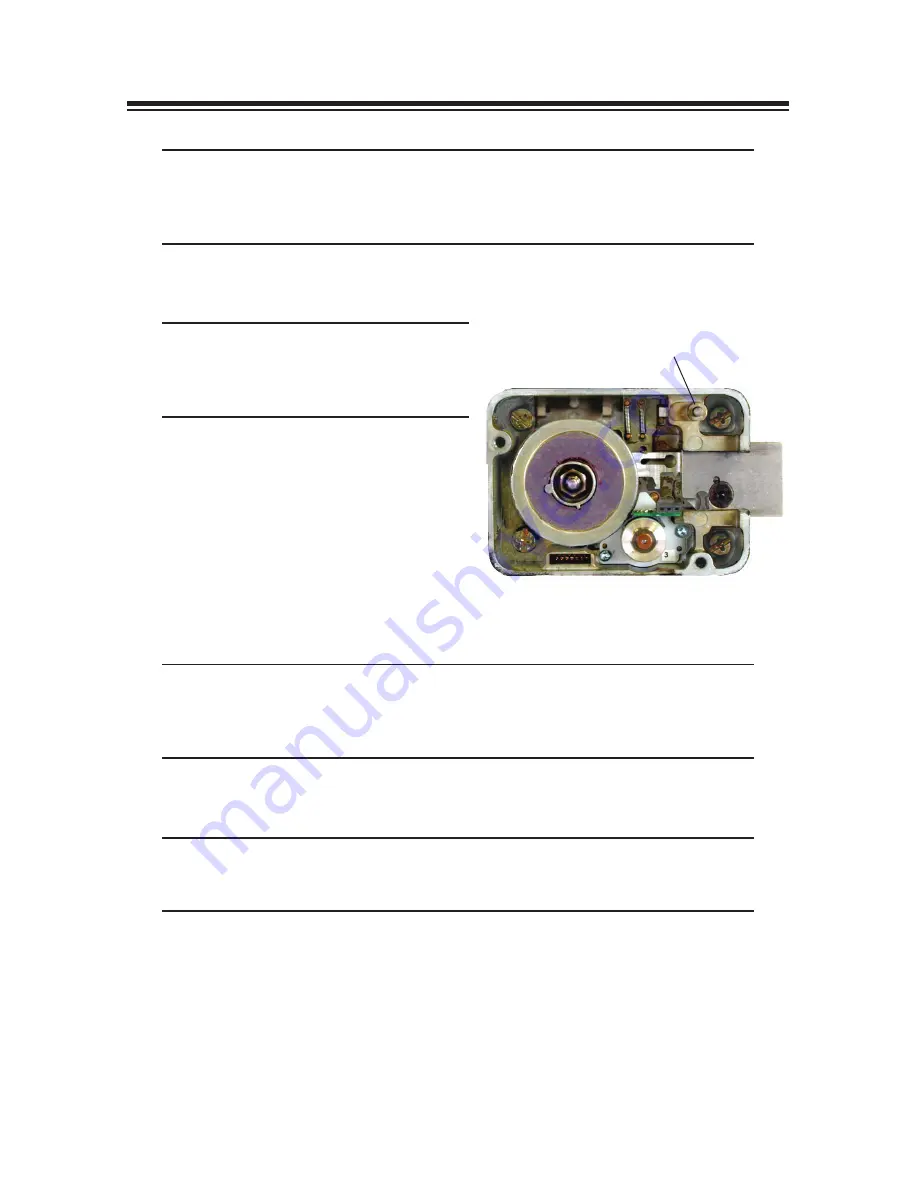
2. Remove the drive cam assembly from
the lock case assembly. (See
Figure 5.)
3. Feed the cables through the outer,
larger, tube starting from the fl ared
end of the tube. Seat the tube into
position on the tube retainer on the
back of the lock case assembly.
(See Figure 4 ) Be careful to keep the
cables pulled taut while seating the
tube to avoid pinching damage to them.
Alternate Method:
Depending on the width of the door, it may be easier
to insert the non-fl ared end of the outer tube through the spindle hole from
the inside of the container and feed the cables through the tube. Then seat
the fl ared end of the tube on the tube retainer.
4. Carefully guide the outer tube (keeping it in place on the tube retainer) through
the container wall so that the outer tube and the cables are easily accessible at
the outside wall of the container.
Helpful Hint:
If available, another inner tube inserted from the dial ring side,
with the cables carefully fed through it, can be very helpful as a guide in feeding
the cables through the container wall.
On some containers the only way to complete this step is to retract the bolt.
Contact Technical Support for detailed instruction on completing this activity.
Drive Cam
Assembly
Thermal
Relocker
Actuator
Figure 5 - Inside Lock Case Assembly


