7
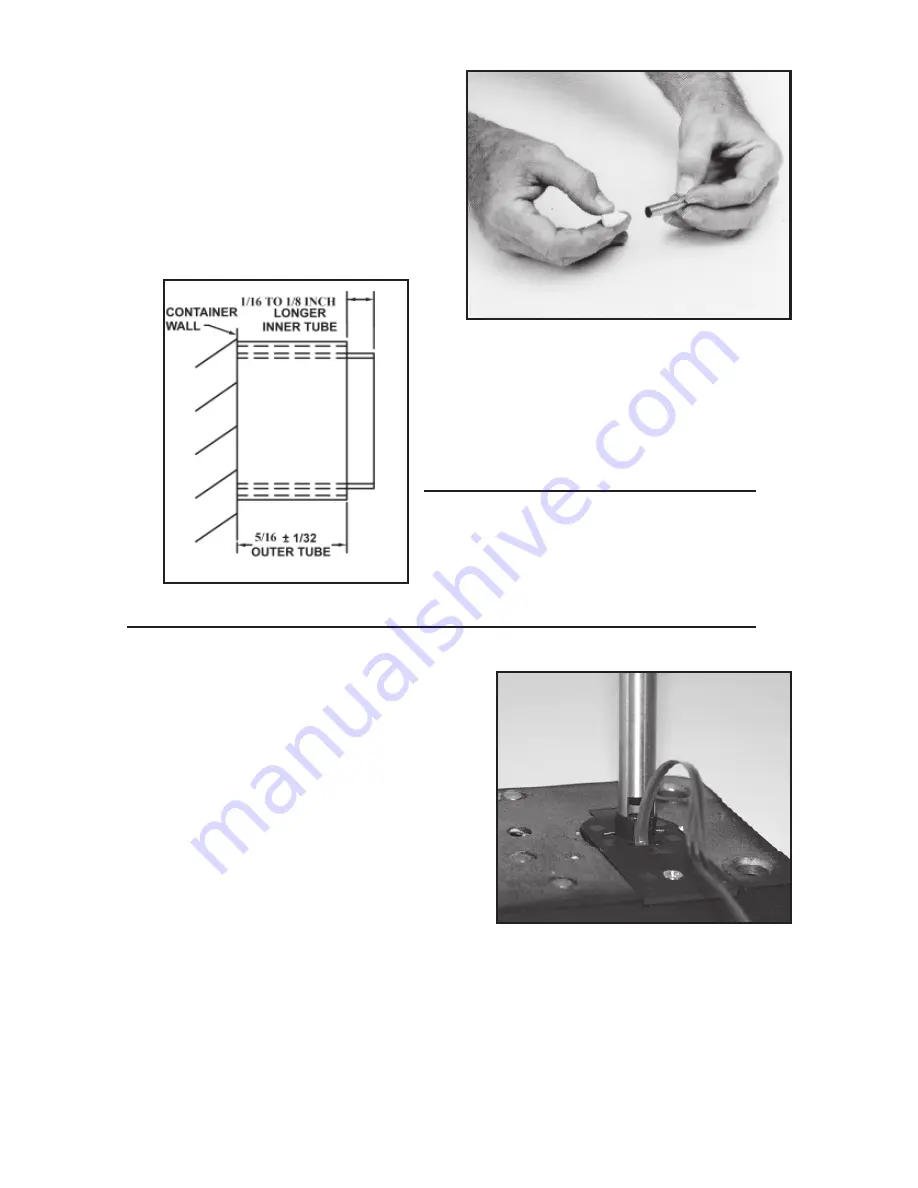
6. The inside and outside of the tubes
must be deburred after cutting. Use
the stone which is provided for this
purpose. Make sure there are no
sharp edges on either tube inside
and outside so as not to damage the
cables. (See Figure 9.)
7. Install the inner tube on the lock case. Feed
the cables through the outer tube and install
the outer tube on the lock case. Measure and
mark the inner tube to be 1/16 to 1/8 inch
longer than the outer tube. (See Figure 10.)
Remove the inner tube and cut by the same
method as described in Step 5.
Warning:
The end of the outer tube that
is to be discarded must be from the plain
(unfl ared) end of the tube. The end of the
inner tube that is to be discarded must
also be from the plain (unnotched) end of
the tube.
INSTALLATION OF THE LOCK
1. Place the inner tube into the lock case
tube retainer. Make sure that the cutout
in the tube aligns with the cables and
allows the tube to seat completely in the
tube retainer. (See Figure 11.)
2. Feed the cables through the outer tube
from the fl ared end. Seat the tube into
position on the tube retainer on the back
of the lock case assembly. (See Figure
4 on page 4.) Be careful to keep the
cables pulled taut while seating the tube
to avoid pinching and damaging them.
3. Carefully guide the outer tube (keeping it in place on the tube retainer) through
the container wall so that the outer tube and the cables are easily accessible at
the outside wall of the container, retracting the bolt if necessary.
4. Loosely attach the lock case assembly to the container wall using the lock case
mounting screws.
5. Tighten the lock case mounting screws to the specifi ed torque. (See Figure 6.)
Figure 10 - Inner and
Outer
Tubes
Figure 9 - Deburr
Tubes
Figure 11 - Seat Inner Tube in Retainer


