background image

3

CHECKLIST

Use this checklist to make sure that

everything has been included.

A—

Outside unit

B—

Inside unit

C—

Gaskets (2)

D—

Universal trim plate (2)

E—

Spindles (3 lengths)

F—

Latch

G—

Strike plate

H—

Latch and strike screws (4)

J—

Tweezers

K—

Mounting screws (8) (4 lengths)

L—

Spare tumblers – coded (2), uncoded (2)

M—

Code card

N—

Hex wrench

A

B

C

D

G

J

L

M

N

E

F

H

K

OPERATIONAL NOTE:

Prior to beginning installation, please check that all parts are working

correctly. Press the “C” button 3-5 times. Enter the code from the factory

supplied code card. Rotate the outside lever down and release. The lever

should return easily under spring pressure. If you intend to change the code,

you should do it before installing the lock (See Code Change Instructions).

Make sure that the inside lever moves freely.

Check that the latch bolt moves freely by pressing the bolthead at the end,

and also by turning the flat spindle in the latch cam.

For technical assistance please call

1-800-849-TECH (8324) or 336-725-1331

Summary of Contents for SIMPLEX LD470

Page 1: ...Pushbutton Lock Installation Instructions LD470 ...

Page 2: ...ng the Lock 6 F Installing the Strike Plate 7 G Changing the Code 8 H Using the Passage Function 9 I Removing the Passage Function 9 J Trouble Shooting 10 Warnings and Cautions Important Carefully inspect windows doorframe door lights etc to ensure that the recommended procedures will not cause damage Kaba Access Control s warranty does not cover damages caused by installation Caution Wear safety ...

Page 3: ...llation please check that all parts are working correctly Press the C button 3 5 times Enter the code from the factory supplied code card Rotate the outside lever down and release The lever should return easily under spring pressure If you intend to change the code you should do it before installing the lock See Code Change Instructions Make sure that the inside lever moves freely Check that the l...

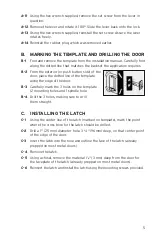
Page 4: ...he hex wrench supplied remove the set screw from the lever in question A 3 Remove the lever and rotate it 180º Slide the lever back onto the lock A 4 Using the hex wrench supplied reinstall the set screw Assure the lever rotates freely A 5 Reinstall the rubber plug which was removed earlier A 6 For the inside unit assembly turn the unit over so the back side is facing up A 7 Remove the 4 screws se...

Page 5: ...d line of the template along the edge of the door B 3 Carefully mark the 3 holes on the template 2 mounting holes and 1 spindle hole B 4 Drill the 3 holes making sure to drill them straight C INSTALLING THE LATCH C 1 Using the center line of the latch marked on template mark the point where the cross bore for the latch should be drilled C 2 Drill a 1 25 mm diameter hole 3 3 4 96mm deep on that cen...

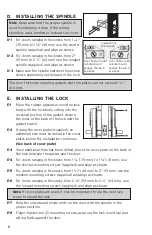
Page 6: ...or E 4 For doors ranging in thickness from 1 3 8 35 mm to 1 5 8 41 mm use the shorter mounting screws supplied and align as shown E 5 For doors ranging in thickness from 1 3 4 44 mm to 2 51 mm use the medium mounting screws supplied and align as shown E 6 For doors ranging in thickness from 2 1 8 54 mm to 2 1 2 64 mm use the longest mounting screws supplied and align as shown Note If cover plates ...

Page 7: ...outside profile of the strike Also trace the latch hole in the strike F 4 Using a chisel carefully remove approximately 1 16 1 mm deep worth of material from the traced area already prepped on most metal doors The latch face plate should sit flush with the edge of the door F 5 Drill or cut a recess in the door frame for the latch bolt in the center of the strike latch hole traced earlier F 6 Place...

Page 8: ...ore reinserting them into the lock body There is a difference in shape between the coded and un coded tumblers as illustrated When refitting the tumblers into the lock body they must be fitted facing the correct way as show in the illustration G 7 After you have refitted the tumblers and made a note of the new code replace the metal cover plate with the 4 screws Square cut out push button Square c...

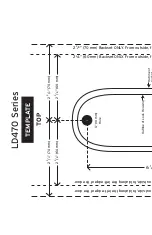
Page 9: ... 2 3 4 70 mm LD470 Series 3 8 10 mm Hole 6 1 outside fold along the left edge of the door outside fold along the left edge of the door Outline of Lock Housing Outline of 2 3 4 70 mm Backset ONLY From outside fo 2 3 8 60 mm Backset ONLY From outside f ...

Page 10: ...tch TEMPLATE 1 1 8 30 mm Hole 4 159 mm Hole 2 3 4 70 mm Backset ONLY From 2 3 8 60 mm Backset ONLY Fro 3 8 10 mm Hole Gasket old along the right edge of the door old along the right edge of the door 1 25 mm 7 8 21 5 mm ...

Page 11: ...S CONTROL 2941 INDIANA AVENUE WINSTON SALEM NC 27199 3770 NO POSTAGE NECESSARY IF MAILED IN THE UNITED STATES BUSINESS REPLY MAIL FIRST CLASS MAIL PERMIT NO 1563 POSTAGE WILL BE PAID BY ADDRESSEE WINSTON SALEM NC ...

Page 12: ...r Exercise Room This lock is New Installation Replacing a conventional keyed lock Replacing a Kaba Mechanical Pushbutton Lock Replacing a Kaba Electronic Access Control Replacing a Keyless Lock other than Kaba How did you learn about Kaba Access Control Pushbutton Locks Advertisement Previous Use Internet Web Another Use Locksmith Maintenance Training Class Other please specify What was your reaso...

Page 13: ... PASSAGE FUNCTION If the passage function is not needed it can be easily removed I 1 Remove the 4 red screws located on the back of the outside unit assembly Pull the tumbler cover plate off along with the springs and set aside I 2 Depress the C button and hold depressed I 3 With the C still depressed use the tweezers provided and remove the F tumbler I 4 This tumbler hole can be left empty or rep...

Page 14: ...ontally and parallel to the door surface Check the spindle length It may be trapped between the front and back plate if the spindle is too long The outside lever turns after entering a correct code but does not retract the latch The spindle is too short for the door thickness If the spindle is too short then it will not engage with both the outside lever and the inside lever at the same time It ma...

Page 15: ...ituted with a foreign part If the lock is used with a wall bumper the warranty is null and void If a doorstop is required we recommend the use of a floor secured stop The environment and conditions of use determine the life of finishes on Kaba Access Control products Finishes on Kaba Access Control products are subject to change due to wear and environmental corrosion Kaba Access Control can not b...

Page 16: ...Kaba Access Control 2941 Indiana Avenue Winston Salem NC 27105 USA Tel 800 849 8324 336 725 1331 Fax 800 346 9640 336 725 3269 www kabaaccess com LD470 1207 ...

Reviews: