7
1.3 Quick Start
Before continuing: Please read the entire “Quick Start Guide”
1.3.1 Setup
1) Install two AA batteries into the Transmitter.
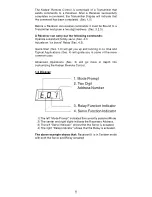
The display will show that the System is OFF.
2) Connect the Wire Harness to the Receiver.
Do not force connector.
3) Connect the Servo to the Wire Harness.
Match up yellow, red and black wires.
4) Install batteries into the Receiver Battery Pack.
Note: Do not connect the Receiver Battery Pack at this time.
1.3.2 Wake System
Hold
the [On/Off] Key for at least three seconds until the Display
shows “on”.
Transmitter will turn on and search for any Bound receivers. When
the Display shows that the System is Ready, the System is awake
and ready to use.
Note: If the Display turns off, press any key to turn the Display on.*
1.3.3 Binding Receiver to Transmitter
1)
Hold
the [MODE] Key for one second. Display will show “SEL”,
then press and release the [6] Key. Display will show “bnd”.
Note: The next sequence must be completed within 10 seconds. **
2) Plug Battery Pack into the Wire Harness and press the [On/Off] Key.
Note: Write down the address shown in the Transmitter Display.
This address will be needed for future communication with
this Receiver.
Transmitter and Receiver are now Bound & ready to use.
Press the [*] Key to operate the servo.
Note: The Receiver will stay addressed until another receiver
is selected. To Bind another Receiver complete Binding
steps. (Sec. 1.3.3)
* The Display will turn off after 5 minutes of no activity. Press any
key to turn the Display on.
** If the [On/Off] Key is not pressed within 10 seconds from
applying power to the Receiver, the Bind process will fail. Remove
power from Receiver and return to Binding Sec. 1.3.3.
Summary of Contents for RC
Page 1: ...Transmitter User Guide...


