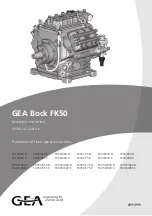
background image


Operating Manual 

Screw Compressor  

ASK  


901824 12 E

Manufacturer:

KAESER KOMPRESSOREN SE

96410 Coburg • PO Box 2143 • GERMANY • Tel. +49-(0)9561-6400 • Fax +49-(0)9561-640130
http://www.kaeser.com

Summary of Contents for ASK 28

Page 1: ...Operating Manual Screw Compressor ASK 901824 12 E Manufacturer KAESER KOMPRESSOREN SE 96410 Coburg PO Box 2143 GERMANY Tel 49 0 9561 6400 Fax 49 0 9561 640130 http www kaeser com...

Page 2: ...Original instructions KKW SASK 2 22 en SBA SCHRAUBEN SC2IO KKW SSC 2 08 20170919 084918...

Page 3: ...12 2 14 2 Mains frequency 60 Hz 13 2 15 Heat recovery 14 3 Safety and Responsibility 3 1 Basic instructions 18 3 2 Specified use 18 3 3 Improper use 18 3 4 User s responsibilities 18 3 4 1 Observe sta...

Page 4: ...cting the heat recovery system 44 7 Initial Start up 7 1 Ensuring safety 46 7 2 Instructions to be observed before commissioning 47 7 3 Checking installation and operating conditions 47 7 4 Setting th...

Page 5: ...d trial run 73 10 16 Changing the cooling oil 74 10 17 Changing the oil filter 79 10 18 Changing the oil separator cartridge 80 10 19 Documenting maintenance and service work 83 11 Spares Operating Ma...

Page 6: ...Contents iv Operating Manual Screw Compressor ASK 901824 12 E...

Page 7: ...for the air and oil cooler 63 Fig 21 Switching cabinet ventilation 64 Fig 22 Filter mat for the air and oil cooler 65 Fig 23 Air filter maintenance 66 Fig 24 Drive belt maintenance 67 Fig 25 Check th...

Page 8: ...List of Illustrations vi Operating Manual Screw Compressor ASK 901824 12 E...

Page 9: ...00V 3 50Hz 12 Tab 27 Supply details 230V 3 50Hz 13 Tab 28 Supply details 400V 3 50Hz 13 Tab 29 Network conditions at 400V 3 50Hz 13 Tab 30 Supply details 230V 3 60Hz 13 Tab 31 Supply details 380V 3 60...

Page 10: ...achine is being serviced 59 Tab 57 Regular maintenance tasks 61 Tab 58 Cooling oil Change intervals 62 Tab 59 Regular service tasks 62 Tab 60 Logged maintenance tasks 83 Tab 61 Consumable parts 84 Lis...

Page 11: ...Make sure you provide the data from the nameplate when ordering documents 1 3 Copyright This operating manual is protected by copyright Any queries regarding the use or duplication of this documentati...

Page 12: ...om danger are shown here 2 Always read and comply with warning instructions 1 4 2 Potential damage warnings Contrary to the warnings shown above damage warnings do not indicate a potential personal in...

Page 13: ...Information relating to one option only are marked with an option code e g H1 indicates that this section applies only to machines with screw in machine feet Option codes used in this operating manua...

Page 14: ...Tab 3 Nameplate 2 2 Options The table contains a list of possible options The options for this machine are shown near the nameplate Enter options here as a reference Option Option code Provided MODULA...

Page 15: ...5 100 Maximum airend dis charge temperature au tomatic safety shut down C 110 110 110 Tab 6 Temperature 2 5 Ambient conditions ASK 28 ASK 34 ASK 40 Maximum elevation amsl m 1000 1000 1000 Permissible...

Page 16: ...0 6 Forced ventilation with exhaust fan Flow rate m3 h at 100 Pa 6000 7500 9000 Tab 8 Overview Ventilation 50Hz Mains frequency 60 Hz ASK 28 ASK 34 ASK 40 Inlet aperture Z see fig ure 10 m2 0 5 0 5 0...

Page 17: ...w rate constant delivery volume relative to intake conditions Flow rate m3 min at 50 Hz mains frequency Max working pres sure bar ASK 28 ASK 34 ASK 40 8 0 2 85 3 50 4 05 11 0 2 38 2 98 3 50 15 0 1 90...

Page 18: ...y cycle Approval Viscosity at 40 C 44 mm2 s DIN 51562 1 45 mm2 s D 445 ASTM test 52 8 mm2 s D 445 ASTM test Viscosity at 100 C 6 8 mm2 s DIN 51562 1 7 2 mm2 s D 445 ASTM test 8 0 mm2 s D 445 ASTM test...

Page 19: ...on with snow cannons SIGMA FLUID PANOLIN HLP SYNTH 46 Description Saturated synthetic ester with additives mineral oil free Easily biologically degradable as per OECD criteria Application Specifically...

Page 20: ...and power 2 11 1 Compressor drive motor ASK 28 ASK 34 ASK 40 Rated power kW 15 0 18 5 22 0 Enclosure protection IP 55 IP 55 IP 55 Tab 20 Compressor drive motor Rated speed min 1 Mains frequency 50 Hz...

Page 21: ...sion dB A Mains frequency ASK 28 ASK 34 ASK 40 50 Hz 65 67 69 60 Hz 67 69 71 Noise pressure level in operation at maximum working gauge pressure as per ISO 2151 and the basic standard ISO 9614 2 uncer...

Page 22: ...4 2013 06 if the following conditions are met multi core copper conductors at an operating temperature up to 70 C Cable length 50 m For an ambient temperature of 30 C Wiring type C without cable conta...

Page 23: ...isted in the table are intended for operation with a public power supply with a net work impedance at the transfer point house connection of maximum Zmax Ohm The operator must ensure that the machines...

Page 24: ...60V 3 60Hz ASK 28 ASK 34 ASK 40 Backup fuse A 40 40 50 Supply cable mm2 4x10 4x10 4x10 Current drawn A 29 35 40 Tab 33 Supply details 460V 3 60Hz 2 15 Option W2 W3 Heat recovery There are typical layo...

Page 25: ...to ___ bar work ing pressure Flow rate m3 h Pressure drop bar Tab 34 Heat recovery Individual design data Component sprecification Feature Value Material 1 4401 Braze Copper Cu Max working pres sure b...

Page 26: ...olony forming units Tab 36 Quality of the heat receiving medium Heat capacity Maximum heat capacity available ASK 28 ASK 34 ASK 40 kW 13 6 16 9 19 8 MJ h 49 61 71 kcal h 11700 14500 17000 Tab 37 Heat...

Page 27: ...ASK 28 ASK 34 ASK 40 Pressure drop bar 0 10 0 10 0 10 Tab 39 Flow rate pressure drop option W3 2 Technical Specifications 2 15 Heat recovery 901824 12 E Operating Manual Screw Compressor ASK 17...

Page 28: ...e machine only within its performance limits and under the permitted ambient condi tions Do not use compressed air for breathing purposes unless it is specifically treated Do not use compressed air fo...

Page 29: ...to recognise the possible dangers of electrical and compressed air devices and take appropriate measures to safeguard persons and property have received adequate training in and authorization for the...

Page 30: ...age carrying components can result in electric shocks burns or death Allow only qualified and authorised electricians or trained personnel under the supervision of a qualified and authorised electrici...

Page 31: ...ling or the belt drive while the machine is switched on can result in serious injury Do not open the enclosure while the machine is activated Switch off and lock out the power supply disconnecting dev...

Page 32: ...written approval by the manufacturer prior to any technical modification or expansion of the machine the controller or the control programs Extending or modifying the compressor station If dimensione...

Page 33: ...faults Install the machine in a suitable compressor room Ensure sufficient and suitable lighting such that the display can be read and work carried out comfortably and safely Ensure accessibility so...

Page 34: ...STOP command device of any components requiring monitoring Pay particular attention to cleanliness during all maintenance and repair work Cover compo nents and openings with clean cloths paper or tape...

Page 35: ...d in chapter 4 section 4 2 1 3 7 Service life of safety functions Pursuant to ISO 13849 1 2008 Category and Performance Level PL of the machine s safety functions have been analysed and assessed Safet...

Page 36: ...as polyester and protective gloves 3 Risk of serious injuries to the hands in particular or even severing of extremities from rotating components Operate the machine only with closed safety guards acc...

Page 37: ...rm Shut off supply lines if possible Mains disconnecting device all poles Cooling water if present Heat recovery if present Warn and move endangered personnel to safety Help incapacitated persons Clos...

Page 38: ...o deter mine its suitability for his specific application Furthermore we do not assume any warranty obligation for damages caused by the use of unsuitable parts or operating materials arbitary modific...

Page 39: ...ponents Cooling air flow The enclosure is not suitable for the following uses Walking on standing on or sitting on the machine Loads of any kind should not be placed or stored on the machine Safe and...

Page 40: ...ck to the point of injection Pressure with in the machine keeps the oil circulating A separate pump is not necessary A thermostatic valve maintains optimum cooling oil temperature Compressed air freed...

Page 41: ...on on location loading capacity and type of message or signal is found in the electrical diagram If the floating relay contacts are connected to an external voltage source voltage may be present even...

Page 42: ...RESET 11 LOAD IDLE Toggles between the LOAD and IDLE operating modes 12 Remote control Switches the remote control on and off 13 Time control Switches the time control on and off Tab 44 Keys LEDs Fig...

Page 43: ...LEDs RFID reader RFID is the abbreviation for Radio Frequency Indentification and enables the identification of per sons or objects Placing a suitable transponder in front of the RFID reader of the co...

Page 44: ...tes the oil separator tank from the air system The venting valve is open A small volume of air circulates through the bypass bore in the inlet valve through the compressor block and back to the inlet...

Page 45: ...hes to READY QUADRO In contrast to DUAL mode the machine will switch in QUADRO after short periods between LOAD to READY after being in IDLE Following extended times in the various operating modes the...

Page 46: ...ecovery The cooling oil circuit includes 2 valves regulating the cooling oil temperature Thermostatic valve machine Thermostatic valve heat recovery The thermostatic valves ensure that the cooling oil...

Page 47: ...h working elements that ensure trouble free func tioning of the cooling and heat recovery systems Fig 9 Function of the heat recovery 1 Plate type heat exchanger 4 Design and Function 4 5 Options 9018...

Page 48: ...suitable lighting such that the display can be read and work carried out comfortably and safely Keep suitable fire extinguishing agents ready for use Ensure that required ambient conditions are maint...

Page 49: ...rom frost direct sunlight dust and rain 5 2 2 Ensuring the machine room ventilation Adequate ventilation of the machine room has several tasks It prevents subatmospheric pressure in the machine room I...

Page 50: ...ducts can be found in chapter 13 3 5 3 Operating the machine in a compressed air network If the machine is supplying an air network the network working pressure may not exceed 16 bar China 15 9 bar Wh...

Page 51: ...energy Uncontrolled release of this energy can cause serious injury or death The following safety concerns relate to any work on components that could be under pressure Close shut off valves or otherw...

Page 52: ...anced by bracing 1 WARNING Serious injury or death can result from loosening or opening components under pressure Vent all pressurized components and chambers completely 2 A shut off valve must be ins...

Page 53: ...power supply must only be connected by authorised installation personnel or an author ised electrician 2 Carry out safety measures as stipulated in relevant regulations IEC 364 or DIN VDE 0100 for exa...

Page 54: ...ntactKAESER for suitable insulation measures WARNING Cooling oil in the heat receiving medium Oil may contaminate the medium if a leak occurs Do not use the heat receiving medium as drinking water Fig...

Page 55: ...heat exchanger with the heat transfer medium 5 Bleed the lines Further information The dimensional drawing in chapter 13 3 gives the flow direction size and position of the connec tion ports 6 Instal...

Page 56: ...contained energy Uncontrolled release of this energy can cause serious injury or death The following safety concerns relate to any work on components that could be under pressure Close shut off valve...

Page 57: ...e checked See chapter Confirmed Are the operators fully conversant with safety regulations Have all the positioning conditions been fulfilled 5 Is a user supplied lockable power supply disconnection d...

Page 58: ...witch Electrical diagram in chapter 13 4 gives the setting values for the motor overload protection switch In direct on line starting the current for the fan motor is fed via the motor overload protec...

Page 59: ...ibute the oil 5 Replace the belt guard and tighten the screw plugs 7 7 Option C1 Activating and deactivating the MODULATING control Use a shut off valve to activate and deactivate the MODULATING contr...

Page 60: ...oltage LED is lit continuously 3 If required Change the display language as described in chapter 7 10 4 Press the ON key The compressor motor runs up and after a short time the machine switches to LOA...

Page 61: ...languages You can set the language for texts on the display This setting will be retained even when the ma chine is switched off 1 In operating mode switch to the main menu with the Return key 2 Pres...

Page 62: ...ller LED lights green 2 Press the ON key The ON LED lights green If a power failure occurs the machine is not prevented from re starting automatically when power is resumed It can re start automatical...

Page 63: ...g off Press the EMERGENCY STOP control device Result The EMERGENCY STOP control device remains latched after actuation The compressor s pressure system is vented and the machine is prevented from auto...

Page 64: ...tification 2 Label the starting device in the remote control centre as follows Remote control Risk of injury caused by unexpected starting Before starting make sure that no one is working on the machi...

Page 65: ...messages The controller will automatically display operation messages informing you about the current opera tional state of the machine Operating messages are identified with the letter O Further inf...

Page 66: ...g the alarm message Further information Please refer to the SIGMA CONTROL 2 operating manual for a list of possible fault messages dur ing operation Warning message If maintenance work is to be carrie...

Page 67: ...not closing Call KAESER SERVICE Leaks in the pressure system Check pipework and connec tions for leaks and tighten any loose connections Compressed air demand ex ceeds the volumetric flow rate from th...

Page 68: ...ts Replace seals Cooling oil consumption too high Unsuitable oil is being used Change to SIGMA FLUID cool ing oil Oil separator cartridge split Changing the oil separator car tridge Oil level in the o...

Page 69: ...components Touching voltage carrying components can result in electric shocks burns or death Work on electrical equipment may only be carried out by authorized electricians Switch off and lock out th...

Page 70: ...are e g high temperatures much dust high number of load changes low load Adjust the maintenance intervals with regard to local installation and operating condi tions Document all maintenance and serv...

Page 71: ...ange the oil separator cartridge 10 18 Variable see table 58 Change the cooling oil 10 16 up to 12000 h Replace the drive belt 10 9 Annually Check the pressure relief valve 10 10 Check the function Sa...

Page 72: ...ible without an oil analysis Tab 58 Cooling oil Change intervals 10 2 5 Regular service tasks The table below lists necessary service tasks Have an authorised KAESER SERVICE technician carry out servi...

Page 73: ...nge the filter mat if cleaning is not possible or if the change interval has expired 4 Carefully insert the filter mat in the retaining frame 10 4 Control cabinet Clean or renew the filter mat A filte...

Page 74: ...he compressed air The frequency is mainly dependent on local operating conditions A leaking cooler results in loss of cooling oil and compressed air Clogged coolers are indicative of unfavourable ambi...

Page 75: ...ing oil escape Is a cooler leaking Have the defective cooler repaired immediately by a KAESER SERVICE technician 10 6 Option W2 W3 Maintain the heat recovery system Deposits in the heat exchanger can...

Page 76: ...device is locked in the off position a check has been made that no voltage is present The machine has cooled down Fig 23 Air filter maintenance 1 Snap fastener 2 Air filter element 3 Air filter housi...

Page 77: ...uard Checking belt tension and adjustment The tensioning device uses spring force to apply correct tension to the belt Adjust the tension when the marker pin reaches the top end of the elongated hole...

Page 78: ...on of this procedure in theSIGMA CONTROL 2 operating manual Never operate the machine without a correctly functioning pressure relief valve Have a defect pressure relief valve replaced immediately WAR...

Page 79: ...he compressor motor stops the pressure system is vented and the machine is prevented from automatically re starting The compressor motor does not stop The safety function of the EMERGENCY STOP device...

Page 80: ...vent the air cooler The machine must be isolated from the compressed air network and completely vented be fore undertaking any work on the pressure system Material The hose coupling shut off valve an...

Page 81: ...that the complete air system is ven ted With the shut off valve closed insert the plug in nozzle 6 into the hose coupling 3 Slowly open the shut off valve 7 to release pressure Disconnect the male ho...

Page 82: ...e coupling oil separator tank venting 4 Oil filler port with plug 5 Cooling oil level indicator 6 Plug in nozzle 7 Shut off valve A Shut off valve open B Shut off valve closed 8 Maintenance hose 1 Ven...

Page 83: ...ing the oil separator tank the machine is still un der pressure from the air system or the section from the shut off valve to the minimum pres sure check valve 1 With the shut off valve closed insert...

Page 84: ...e oil Compressed air helps to expel the oil This compressed air can be taken either from the compres sor itself or from an external source An external source of compressed air is necessary in the foll...

Page 85: ...g device and verify the absence of voltage Cut off the electrical power supply via the power supply isolating device ensure that the device is locked off verify the absence of any voltage The machine...

Page 86: ...te to drain completely 6 Close the shut off valve 11 and unplug the male hose fitting Dispose of used oil in accordance with environment protection regulations Draining the oil from the cooler Fig 31...

Page 87: ...Place the other end of the maintenance hose in the oil receptacle and secure it in place 4 Open the shut off valves 3 and 7 5 Loosen the screw plugs 4 and lift the belt guard 5 6 Rotate the pulley 9...

Page 88: ...the male hose fitting Dispose of used oil in accordance with environment protection regulations Filling with cooling oil Fig 34 Changing the cooling oil Filling with cooling oil 2 Pressure gauge 4 Oil...

Page 89: ...Switch off the machine and check for leaks 10 17 Changing the oil filter The machine must be isolated from the compressed air network and completely vented be fore undertaking any work on the pressure...

Page 90: ...reset the maintenance interval counter 4 After approx 10 minutes of operation Check the cooling oil level and top up if necessary 5 Switch off the machine and check visually for leaks 10 18 Changing t...

Page 91: ...o one side 4 Remove the cover fixing screws 17 and carefully remove the cover 14 5 Take out the old oil separator cartridge 23 together with the gaskets 21 and dispose of ac cording to environmental p...

Page 92: ...f valve between the machine and the air distribution network 3 Switch on the power supply and reset the maintenance interval counter 4 After approx 10 minutes of operation Switch off the machine and c...

Page 93: ...ter maintenance and service work carried out in the list Date Maintenance task carried out Operating hours Signature Tab 60 Logged maintenance tasks 10 Maintenance 10 19 Documenting maintenance and se...

Page 94: ...machine resulting from the use of unsuita ble spares or operating fluids materials Use only original parts and operating fluids materials Have an authorized KAESER SERVICE technician carry out regula...

Page 95: ...are parts list to plan your material requirement according to operating conditions and to order the required spare parts Make sure that any service or repair tasks not described in this manual are car...

Page 96: ...11 Spares Operating Materials Service 11 4 Replacement parts for service and repair 86 Operating Manual Screw Compressor ASK 901824 12 E...

Page 97: ...11 Spares Operating Materials Service 11 4 Replacement parts for service and repair 901824 12 E Operating Manual Screw Compressor ASK 87...

Page 98: ...tion The machine is switched off 1 Drain condensate from the condensate drain and dispose of according to applicable environ mental protection regulations 2 Remove the user supplied condensate lines 1...

Page 99: ...apply to machines not yet commissioned Please consult with KAESER if you have questions to the appropriate storage and commis sioning 1 NOTICE Moisture and frost can damage the machine Prevent ingress...

Page 100: ...mage The machine is not equipped with fastening points Examples of unsuitable fastening points Pipe sockets Flanges Attached components such as centrifugal separators condensate drains or filters Rain...

Page 101: ...s of 15 to 45 for attachment devices with multiple strands Slope angles between 45 and 60 may be unsuitable Slope angles larger than 60 are prohibited Ensure the maximum incline of 6 of the machine to...

Page 102: ...For this reason batteries must not be disposed of with unsorted residential waste They must be delivered to the national battery collection system This procedure facilitates the handling and recyclin...

Page 103: ...13 Annex 13 1 Pipeline and instrument flow diagram P I diagram 13 Annex 13 1 Pipeline and instrument flow diagram P I diagram 901824 12 E Operating Manual Screw Compressor ASK 93...

Page 104: ...13 Annex 13 1 Pipeline and instrument flow diagram P I diagram 94 Operating Manual Screw Compressor ASK 901824 12 E...

Page 105: ...13 Annex 13 1 Pipeline and instrument flow diagram P I diagram 901824 12 E Operating Manual Screw Compressor ASK 95...

Page 106: ...13 Annex 13 1 Pipeline and instrument flow diagram P I diagram 96 Operating Manual Screw Compressor ASK 901824 12 E...

Page 107: ...13 Annex 13 1 Pipeline and instrument flow diagram P I diagram 901824 12 E Operating Manual Screw Compressor ASK 97...

Page 108: ...13 Annex 13 1 Pipeline and instrument flow diagram P I diagram 98 Operating Manual Screw Compressor ASK 901824 12 E...

Page 109: ...on C1 Pipeline and instrument flow diagram P I diagram MODULATING control 13 Annex 13 2 Pipeline and instrument flow diagram P I diagram MODULATING control 901824 12 E Operating Manual Screw Compresso...

Page 110: ...13 Annex 13 2 Pipeline and instrument flow diagram P I diagram MODULATING control 100 Operating Manual Screw Compressor ASK 901824 12 E...

Page 111: ...13 Annex 13 2 Pipeline and instrument flow diagram P I diagram MODULATING control 901824 12 E Operating Manual Screw Compressor ASK 101...

Page 112: ...13 Annex 13 2 Pipeline and instrument flow diagram P I diagram MODULATING control 102 Operating Manual Screw Compressor ASK 901824 12 E...

Page 113: ...13 Annex 13 2 Pipeline and instrument flow diagram P I diagram MODULATING control 901824 12 E Operating Manual Screw Compressor ASK 103...

Page 114: ...13 Annex 13 2 Pipeline and instrument flow diagram P I diagram MODULATING control 104 Operating Manual Screw Compressor ASK 901824 12 E...

Page 115: ...13 3 Dimensional drawing 13 Annex 13 3 Dimensional drawing 901824 12 E Operating Manual Screw Compressor ASK 105...

Page 116: ...ay be given to or made available to third parties Subject to development related changes Drawing may be altered only via CAD W3 int heat recovery T 55K W2 int heat recovery T 25K H1 Machine mountings...

Page 117: ...s not allowed for any other than the agreed upon purpose Neither originals nor reproductions may be given to or made available to third parties Subject to development related changes Drawing may be al...

Page 118: ...13 4 Electrical Diagram 13 Annex 13 4 Electrical Diagram 108 Operating Manual Screw Compressor ASK 901824 12 E...

Page 119: ...formation on power supply voltages and frequencies for all machines The voltage and frequency and local conditions under which any particular machine may be used are given on the nameplate of the mach...

Page 120: ...03070 00 2 10 Circuit diagram Control voltage tapping SASK 03070 00 3 11 Circuit diagram Power supply unit SASK 03070 00 4 12 Circuit diagram IO module Configuration SASK 03070 00 5 13 Circuit diagram...

Page 121: ...ts earth conductor black red 1mm H05V K 18AWG UL Style 1015 CSA TEW white 1mm H05V K 18AWG UL Style 1015 CSA TEW blue 1mm H05V K 18AWG UL Style 1015 CSA TEW white blue 1mm H05V K 18AWG UL Style 1015 C...

Page 122: ...upply unit digital inputs digital inputs digital outputs analog inputs 4 20mA Pt100 Relay outputs Terminal strip Power supply Terminal strip Control B1 B2 B40 K1 Pressure transducer Air main pressure...

Page 123: ...0 7 8741 00070 7 8741 00090 Siemens Siemens 3RT2936 1CD00 3RT2926 1CD00 3RT2926 1CD00 3RT2926 1CD00 3RT2936 1CD00 Interference suppressor 7 8740 05120 7 8740 05110 7 8740 05110 7 8740 05110 7 8740 051...

Page 124: ...7 8741 00090 7 8741 00090 7 8741 00100 Siemens Siemens 3RT2936 1CD00 3RT2926 1CD00 3RT2926 1CD00 3RT2926 1CD00 3RT2936 1CD00 Interference suppressor 7 8740 05120 7 8740 05110 7 8740 05110 7 8740 0511...

Page 125: ...7 8741 00090 7 8741 00090 7 8741 00100 Siemens Siemens 3RT2936 1CD00 3RT2926 1CD00 3RT2926 1CD00 3RT2926 1CD00 3RT2936 1CD00 Interference suppressor 7 8740 05120 7 8740 05110 7 8740 05110 7 8740 05110...

Page 126: ...6 97 98 95 96 2 4 W13 U1 V1 W1 W2 U2 V2 PE U1 V1 W1 W4 U4 V4 PE PE2 Compressor motor Power switching 2 5 1 3 5 2 4 6 W19 2 U1 U3 U4 V1 V3 V4 W1 W3 W4 U2 V2 W2 W14 2 4 1 3 5 2 4 6 NSGAF u 2 5mm black...

Page 127: ...Overload relay Compressor motor 5 2 X7 10 Star contactor 5 2 X10 10 5 21 22 A1 A2 1 5 1 5 1 5 3 1 3 5 13 2 4 6 14 5 21 22 Star delta changeover performance related components see Equipment parts list...

Page 128: ...ck model specific electrical diagram see page 9 230V 1 50 60Hz Control voltage tapping 1 2 4 3 6 5 I I I s b c supplied by customer 1 connection s b c 10VA 01 Consumer external PE2 3 EMERGENCY STOP 11...

Page 129: ...x4mm green yellow 500V 70 C PE1 1x1 5mm green yellow 500V 70 C 1x2 5mm green yellow 500V 70 C RS485 FC Ethernet X3 X1 X6 SD card X5 P24 M24 X7 5 2 MCS Ersatz f r Ersatz durch a b c nderung Datum Datum...

Page 130: ...0 DOT 1 00 DOT 1 01 M M M AII_PA AII_PA AII 1 00 AII 1 01 FE FE FE FE GND AIR 1 00 AIR 1 00 AIR 1 01 AIR 1 01 DOR COM DOR COM DOR COM DOR COM DOR 1 04 DOR 1 03 DOR 1 02 DOR 1 01 DOR 1 00 3 7 IOM Ersat...

Page 131: ...E AIR_B 8 9 10 X9 W117 2x0 34mm 250V 80 C Direction of rotation 5 2 DI_PA DI 1 2 X8 1 2 P 1 0 bar W104 2x0 5mm 500V 70 C 1 2 1 2 Control valve 5 2 DOT M 7 8 X8 W113 2x0 5mm 500V 70 C 5 2 DOT M 5 6 X8...

Page 132: ...gnated conductors 1 5mm orange 500V 70 C 15 2 3 31 32 16 max 250V AC 24V DC 3A Compressor motor running Volt free contacts 2 3 43 44 17 Ersatz f r Ersatz durch a b c nderung Datum Datum Bearbeiter Gep...

Page 133: ...N OFF DI_PA DI 3 4 X8 Digital output User s connection 24V DC 0 3A max cable length 30m DOT M 9 10 X8 4 20mA L L GND AII AII_PA 4 5 6 FE 7 4 20mA Ri 200 4 wire connection Possible connections for AII...

Page 134: ...500V 550V 220V L1 L02 L02 L02 F11 5 L2 F11 5 F11 5 primary 420V 400V 380V primary 460V 440V 230V primary 200V Power connection 1 2 L1 0 0 0 L1 20V Power connection Jumper between 32 36 32 37 1 36 2 32...

Page 135: ...1 2 3 4 5 6 7 8 page Bl Circuit diagram Handling Terminals Feed line connection SC2 MCSIO Ersatz f r Ersatz durch a b c nderung Datum Datum Bearbeiter Gepr ft Norm Name Ursprung 10 10 20 10 2016 D Si...

Page 136: ...ion total 2 Terminals supply 1 2 Mounting plate PE1 1 4 PE M1 PE2 total 16 Terminals 3 4 6 F11 1 3 4 A2 Q1 01 4 2 L1 T21 2 Volt free contacts User s connection 1 N M7 2 2 N T21 02 Compressor motor run...

Page 137: ...s are performance related and not shown to scale B25 X11 1 F4 Q3 Q2 Q1 PE X0 230V 24V 230V F11 230V 24V X11 T21 T11 230V 24V Ersatz f r Ersatz durch a b c nderung Datum Datum Bearbeiter Gepr ft Norm N...

Page 138: ...13 Annex 13 4 Electrical Diagram 128 Operating Manual Screw Compressor ASK 901824 12 E...

Reviews: