background image

Technical Specification

1 --- 4

CRF §178.3570 and is USDA H---1 approved. FG---460 is approved for canning, food
packing, meat and poultry processing and other applications where incidental food
contact may occur.

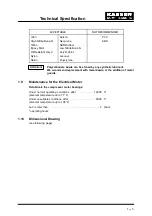
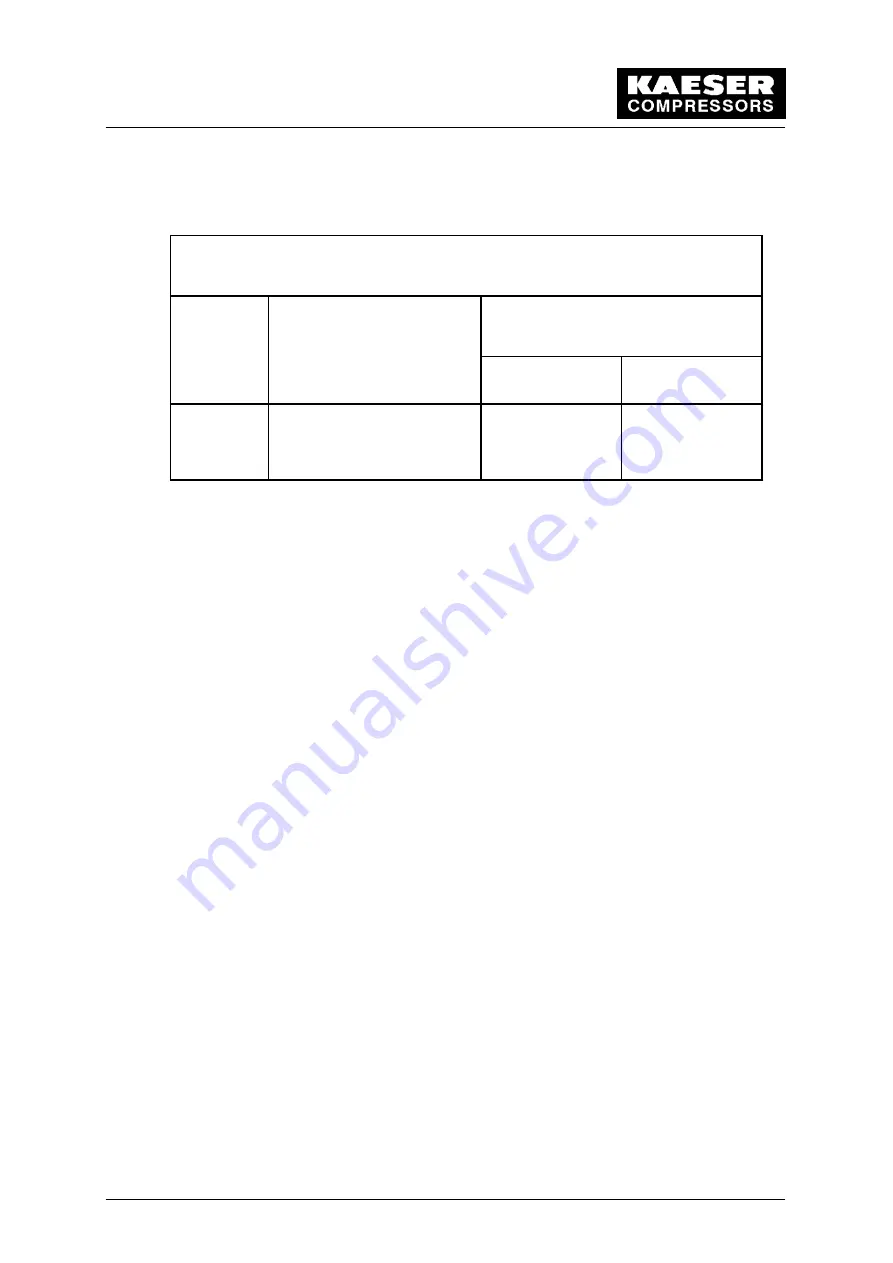
SPECIALTY KAESER LUBRICANTS

(Refer to product information to determine suitability.)

SIGMA

LUBRICANT

DESCRIPTION

MAXIMUM RECOMMENDED

CHANGE INTERVAL*

First Oil Change

Subsequent Oil

Change

S---680

FG---460

ISO 68 Synthetic Lubricant

ISO 46 Food Grade Synthetic

Lubricant

6,000 Hours

3,000 Hours

8,000 Hours

4,000 Hours

*

Oil changes may need to be more frequent depending on ambient conditions.
When high ambient temperatures or dirty conditions are present, oil changes may be
necessary every 1,000 hours (4,000 hours for synthetic) or even shorter intervals. Oil
change intervals required should be determined through periodic oil analysis.

General Information

KAESER synthetic lubricants should be stored in a protected location to prevent contami-
nation. Do not re---use drums; flush and send to reconditioner.

Although the KAESER synthetic is not highly flammable, it will burn. While KAESER syn-
thetic compressor oil is less flammable than equal viscosity mineral oils, it cannot be classi-
fied as a fire---resistant fluid. It has a flash point above 460

•

F. Since the user has total con-

trol over the conditions of the compressor lubricant, he assumes total responsibility for its
safe usage.

Material Safety Data Sheets are available for each lubricant from your KAESER authorized
distributors.

Regardless of the lubricant selected, the KAESER Sigma lubricants will separate readily
from water. If condensate occurs it can easily be removed. Let the compressor sit so that
any water can drain back to the separator tank and separate to the bottom. See chap-
ter 9.14 proper draining procedure.

Compatibility of KAESER Sigma Lubricants

All the above listed KAESER Sigma lubricants are similar to mineral oil in its compatibility
with paints, seals, gaskets and hoses. The typical precautions are required when changing
over from mineral oil to KAESER synthetic hydrocarbon based lubricant.
Never mix lubricants of different types or brands.

When switching from mineral oil to a synthetic oil, the plant’s system materials must be
re---evaluated. Certain plastics are not compatible with synthetic oils. The following is a par-
tial list of acceptable and not recommended materials:

Summary of Contents for SM 8

Page 1: ...Wye Delta Start L 115 V receptacle L D O L Start L Outdoor modification L psig L Rainhoods L L Switchable Modulation L L Synthetic lubricant L Wiring Diagram L Food Grade lubricant Serial No KAESER C...

Page 2: ...4 Copyright 3 10 4 Transport 4 11 4 1 Transport Instructions 4 11 4 2 Packaging 4 11 5 Construction and Operation 5 12 5 1 Principle of Compression 5 12 5 2 Brief Description 5 12 5 3 Pipe and Instru...

Page 3: ...filter cartridge 9 38 9 12 Oil Top Off 9 39 9 13 Cleaning the Oil Cooler and Aftercooler 9 41 9 13 1 Removing and cleaning the oil cooler air aftercooler 9 41 9 14 Oil Change Oil Separator Tank and O...

Page 4: ...rt Electrical diagram SSM8 U1005 00 1 2 Noise Level Noise level to CAGI Pneurop 68 dB A at 1 m distance free sound field measurement 1 3 Motor Compressor motor Rated power 7 5 hp Rated speed 3600 rpm...

Page 5: ...vating pressure 230 psig 1 6 Installation Requirements Max height above sea level of the place of installation 3000 ft for all heights above please contact authorized KAESER distributor Min ambient te...

Page 6: ...Hours 4 000 Hours 8 000 Hours Oil changes may need to be more frequent depending on ambient conditions When high ambient temperatures or dirty conditions are present oil changes may be necessary ever...

Page 7: ...ESER syn thetic compressor oil is less flammable than equal viscosity mineral oils it cannot be classi fied as a fire resistant fluid It has a flash point above 460 F Since the user has total con trol...

Page 8: ...n be etched by any synthetic lubricant We recommend replacement with metal bowls or the addition of metal guards 1 9 Maintenance for the Electrical Motor Relubricate the compressor motor bearings Unde...

Page 9: ...Technical Specification 1 6...

Page 10: ...nt is prevented This symbol identifies environmental protection measures This symbol indicates operations to be carried out by the operator or service technician This bullet identifies listings 2 2 Ge...

Page 11: ...tant observation for a short period Check the oil level again and top off with oil to replace the oil taken up by the piping and the cooling system Operation of compressor package is not recommended i...

Page 12: ...ns Maintenance materials wear items replacement parts Ensure that all wear items maintenance and replacement parts accu mulating during operation of the compressor package are disposed of according to...

Page 13: ...ludes adherence to the installation removal applica tion operational and maintenance instructions laid down by the manufacturer 3 2 Improper use Never direct compressed air toward persons Compressed a...

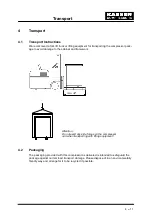
Page 14: ...inet and framework min 32 Do not exert any side forces on the compressor unit when transporting with lifting equipment Attention 4 2 Packaging The packaging provided with this compressor as delivered...

Page 15: ...tion bearings The compressed air and oil mixture leaves the airend via the discharge port 1 2 3 4 6 5 1 Drive shaft 4 Male rotor 2 Oil injection 5 Female rotor 3 Discharge port 6 Air inlet port 5 2 B...

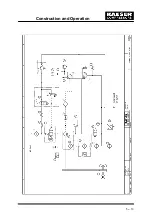
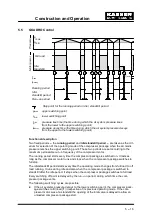
Page 16: ...Construction and Operation 5 13...

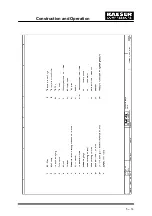
Page 17: ...Construction and Operation 5 14...

Page 18: ...d and idle If the compressor package runs in idle for longer than the preset period 1 to 2 for example t1 6 min the drive motor is stopped completely 2 When the lower switching point pmin 3 is reached...

Page 19: ...point These two periods are set according to the maximum permissible cut in frequency of the compressor motor The running period starts every time the compressor package is switched on It lasts as lo...

Page 20: ...sor is switched to standstill after the run on period has ex pired 3 If the pressure decay time tpdecay was shorter than the period set for the idle stand still period the idle mode is selected 4 that...

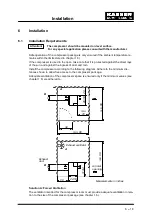
Page 21: ...nst the ingress of dust and rain Install the compressor according to the following diagram Adhere to the minimum dis tances shown to allow free access to the compressor package Adequate ventilation of...

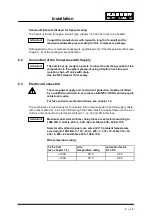
Page 22: ...ain power supply and overcurrent protection must be installed by a qualified electrician in accordance with NEC OSHA and any appli cable local codes For fuse and wire recommendations see chapter 1 4 T...

Page 23: ...2 Points to be Observed before Starting the Compressor Unit ANY NON OBSERVANCE OF THIS OR OTHER REFERENCES WARN ING ATTENTION DANGER CAN LEAD TO ACCIDENTS CAUSING IN JURY TO PERSONS OR DAMAGE TO EQUI...

Page 24: ...see chapter 5 3 must be open Lock the main disconnect in the off position in accordance with ap plicable lock out tag out procedures example OSHA CFR 29 1910 147 to ensure the compressor does not rest...

Page 25: ...sertion key 3 with the interlock switch 1 Tighten the bolts 4 again 1 4 4 3 2 2 6 5 1 Door interlock switch 4 Bolt 2 Clamping nut 5 Frame 3 Insertion key 6 Maintenance door Functional check of the int...

Page 26: ...ance with ap plicable lock out tag out procedures example OSHA CFR 29 1910 147 to ensure the compressor does not restart See chap ter 2 3 for the main disconnect switch The relay is set to the standar...

Page 27: ...is oil must be of the same type as the oil used to operate the com pressor see label near the oil filler plug on the oil separator tank If no additional oil is available remove required amount of oil...

Page 28: ...nditions yes no Is a shut off valve fitted by the user yes no Is a flexible connecting hose or axial compensator fitted between the compressor package and the compressed air system yes no Have all scr...

Page 29: ...in the con troller and can differ from the standard settings described because of requirements spe cific to a customer Note the list of parameters supplied Further details on individual function keys...

Page 30: ...Remote ON key 9 Return key 5 Load idle key 10 Info event key 11 Acknowledge reset key 8 2 2 Light emitting diodes and plain text display 12 13 19 14 15 16 17 18 20 21 12 Four line plain text display 1...

Page 31: ...Press the OFF key 2 LED 19 extinguishes Lock the main disconnect in the off position in accordance with applicable lock out tag out procedures example OSHA CFR 29 1910 147 to ensure the compressor do...

Page 32: ...enance due is shown in the display 12 A list of service messages that may occur during operation is included in the SIGMA CONTROL service manual Carry out the maintenance work Acknowledge service mess...

Page 33: ...t switch Ensure that no maintenance personnel is working on the compressor unit that all panels are latched back on again and all maintenance doors are closed before restarting the compressor unit To...

Page 34: ...ion 9 13 Clean or replace the filter mats 9 6 1000 to 2000 h Replace the oil filter 9 11 Proper interval varies See chapter 1 8 Change the oil 9 14 2000 to 3000 h Change the oil separator cartridge 9...

Page 35: ...direction of the arrow and latch onto the frame Lift the panel 2 and remove To close Turn the locking lever 3 to its initial position Attach the panel 2 making sure that it latches Close the access do...

Page 36: ...reafter every 500 hours of operation 3 1 2 1 Hexagonal nut 2 Hexagonal nut 3 Indicator pin The belt drive tension is automatically adjusted within a limited range by the pressure spring of the belt te...

Page 37: ...drive tension after 2 hours of operation and then again after 24 hours of operation as experience shows that the belts stretch mostly during this period 9 6 Cleaning or Replacing the Filter Mat Clean...

Page 38: ...Unscrew the wing nut 3 and remove the air filter cap 2 and the filter cartridge 4 Clean the air filter cap and sealing surfaces Cleaning the air filter cartridge 4 by tapping Tap the air filter cartri...

Page 39: ...SIGMA CONTROL See chapter 1 5 for the safety relief valve activating pressure Have the safety relief valve tested by an authorized KAESER distribu tor in accordance with the maintenance schedule see...

Page 40: ...ure in the oil separator tank escapes Remove the nozzle 6 from the hose coupling 3 Venting the air aftercooler When the compressor package is vented pressure is still present in the air aftercooler an...

Page 41: ...rdance with ap plicable lock out tag out procedures example OSHA CFR 29 1910 147 to ensure the compressor does not restart Before opening or removing pressurized components pipes hoses tanks etc it is...

Page 42: ...il Top Off Check the oil level weekly with the oil level sight gauge when the compressor unit is shut down If necessary top off the oil to the maximum level To do this it is imperative that the compre...

Page 43: ...off valve between the compressor and the compressed air system After an oil change or oil cooler cleaning with removal of the oil cooler run the compressor package up to operating temperature to ensu...

Page 44: ...t tag out procedures to ensure the compressor does not restart Before opening or removing pressurized components pipes hoses tanks etc it is imperative that the compressor package is completely depres...

Page 45: ...leaning areas with oil separators suited for such purpose Clean the cooler laminations with compressed air water or steam jet Seat the O rings correctly in the compressed air inlet of the oil air af t...

Page 46: ...eratures close to the maximum ambi ent temperature see chapter 1 6 change the oil more often e g 1 2 or 1 4 of recom mended interval Drain the oil out of the oil separator tank cooler and the oil pipe...

Page 47: ...clean container to catch escaping oil The container must be large enough to hold the total oil content of the compressor unit see chapter 1 7 Hang the oil drain hose 10 into the container and secure S...

Page 48: ...isolation shut off valve in accordance with applicable lock out tag out proce dures The compressor unit oil circulation system vents automatically The pressure gauge on the oil separator tank must in...

Page 49: ...rdance with applicable lock out tag out procedures example OSHA CFR 29 1910 147 to ensure the compressor does not restart Afterwards carry out a visual check for leaks 9 15 Changing the Oil Separator...

Page 50: ...e O ring 6 and O ring 9 and dis pose of according to environmental regulations Clean the sealing surfaces of the oil separator tank The oil separating cartridge is disposable and cannot be cleaned Ins...

Page 51: ...mpressed air system Perform a test run When the operating temperature is reached see chapter 1 1 shut down the compressor package see chapter 8 3 and lock the main disconnect in the off position in ac...

Page 52: ...Maintenance 9 49 9 16 Maintenance Schedule Model No Serial No Date Description of work Operating hours Signature...

Page 53: ...90 0 Hose pipe from the air oil cooler to the compressor air end 1 8 1181 0 See chapter 1 3 for details of the V belt set Important for spare parts orders Enter the data on the compressor name plate i...

Page 54: ...Appendix 11 51 11 Appendix 11 1 Wiring Diagram...

Page 55: ......

Page 56: ......

Page 57: ......

Page 58: ......

Page 59: ......

Page 60: ......

Page 61: ......

Page 62: ......

Page 63: ......

Page 64: ......

Page 65: ......

Page 66: ......

Page 67: ......

Page 68: ......

Page 69: ......

Page 70: ...ercooler are clogged Clean with compressed air water or steam injector See chapter 9 13 On water cooled units the heat ex changer elements may be clogged Inspect heat exchanger elements Clean or repla...

Page 71: ...ing but produces no pressure Possible cause Remedy Airend rotates in wrong direction Reverse motor polarity Inlet valve does not open or opens only partially Check the inlet valve control valve and li...

Page 72: ...lators 11 2 6 Safety relief valve blows off Possible cause Remedy System does not discharge at idle Make sure ball valve in vent line is open Check the control lines inlet valve and combined control v...

Page 73: ...il types not listed Oil separator cartridge has ruptured Check pressure differential and re place oil separator cartridge if neces sary Oil separator cartridge mountings are loose Tighten mounting bol...

Page 74: ...SM 8 SM 11 A 08 B 07 C 14 D 11...

Page 75: ...rtaining to the number description and needed for each assembly are dealt with in the following pages 3 TO ORDER PARTS When ordering parts furnish the following information to prevent any error Model...

Page 76: ......

Page 77: ...et profile 14 1 7 2470 0 Door interlock switch 15 2 6 3121 0 Fillister head screw B 4 8 x 19 16 4 6 3118 00010 Terminal clamp 17 2 6 3122 0 Fillister head screw B 4 8 x 32 18 1 9 1393 00010 Fastener 3...

Page 78: ......

Page 79: ...eve dia 20 x 1 8 x 12 5 14 4 6 1328 0 Base of the machine 15 1 6 3013 0 Hex nut M 16 16 1 5 1663 0 Compression spring 17 2 4 9600 0 Disk 18 1 5 0427 0 Disk 21 1 6 0604 0 Clamping sleeve dia 4 x 20 22...

Page 80: ......

Page 81: ...8 21 1 9 0818 1 Hose coupling G 1 4 22 1 2 7553 0 Extension 24 1 8 0411 1 Strainer 25 2 6 0256 0 Angle fitting R 3 8 26 2 5 1519 0 O ring dia 16 x 2 27 1 6 2693 0 Locking screw G 1 2 28 1 5 1584 0 O...

Page 82: ......
Page 83: ...672 1 Tube 14 1 8 1190 1 Hose line 15 1 6 1113 0 Angle G 3 4 16 1 2 8783 0 Control tube 17 1 2 8842 0 Control tube 18 1 2 9374 0 Control tube 19 1 4 4597 0 Angle fitting R 1 4 20 1 6 0249 0 Angle fitt...

Reviews: